Feeds:
Posts
Comments

Posts Tagged ‘snack’

DSC_0904

Happy Friday, everyone! I’m made you something with fun sprinkles to help you celebrate the end of your week. I hope you have some awesome plans for this weekend. I think I have not 1, but 2 fun things in the works that I am looking forward to sharing with you on my next Travel Tuesday-Staycation post.

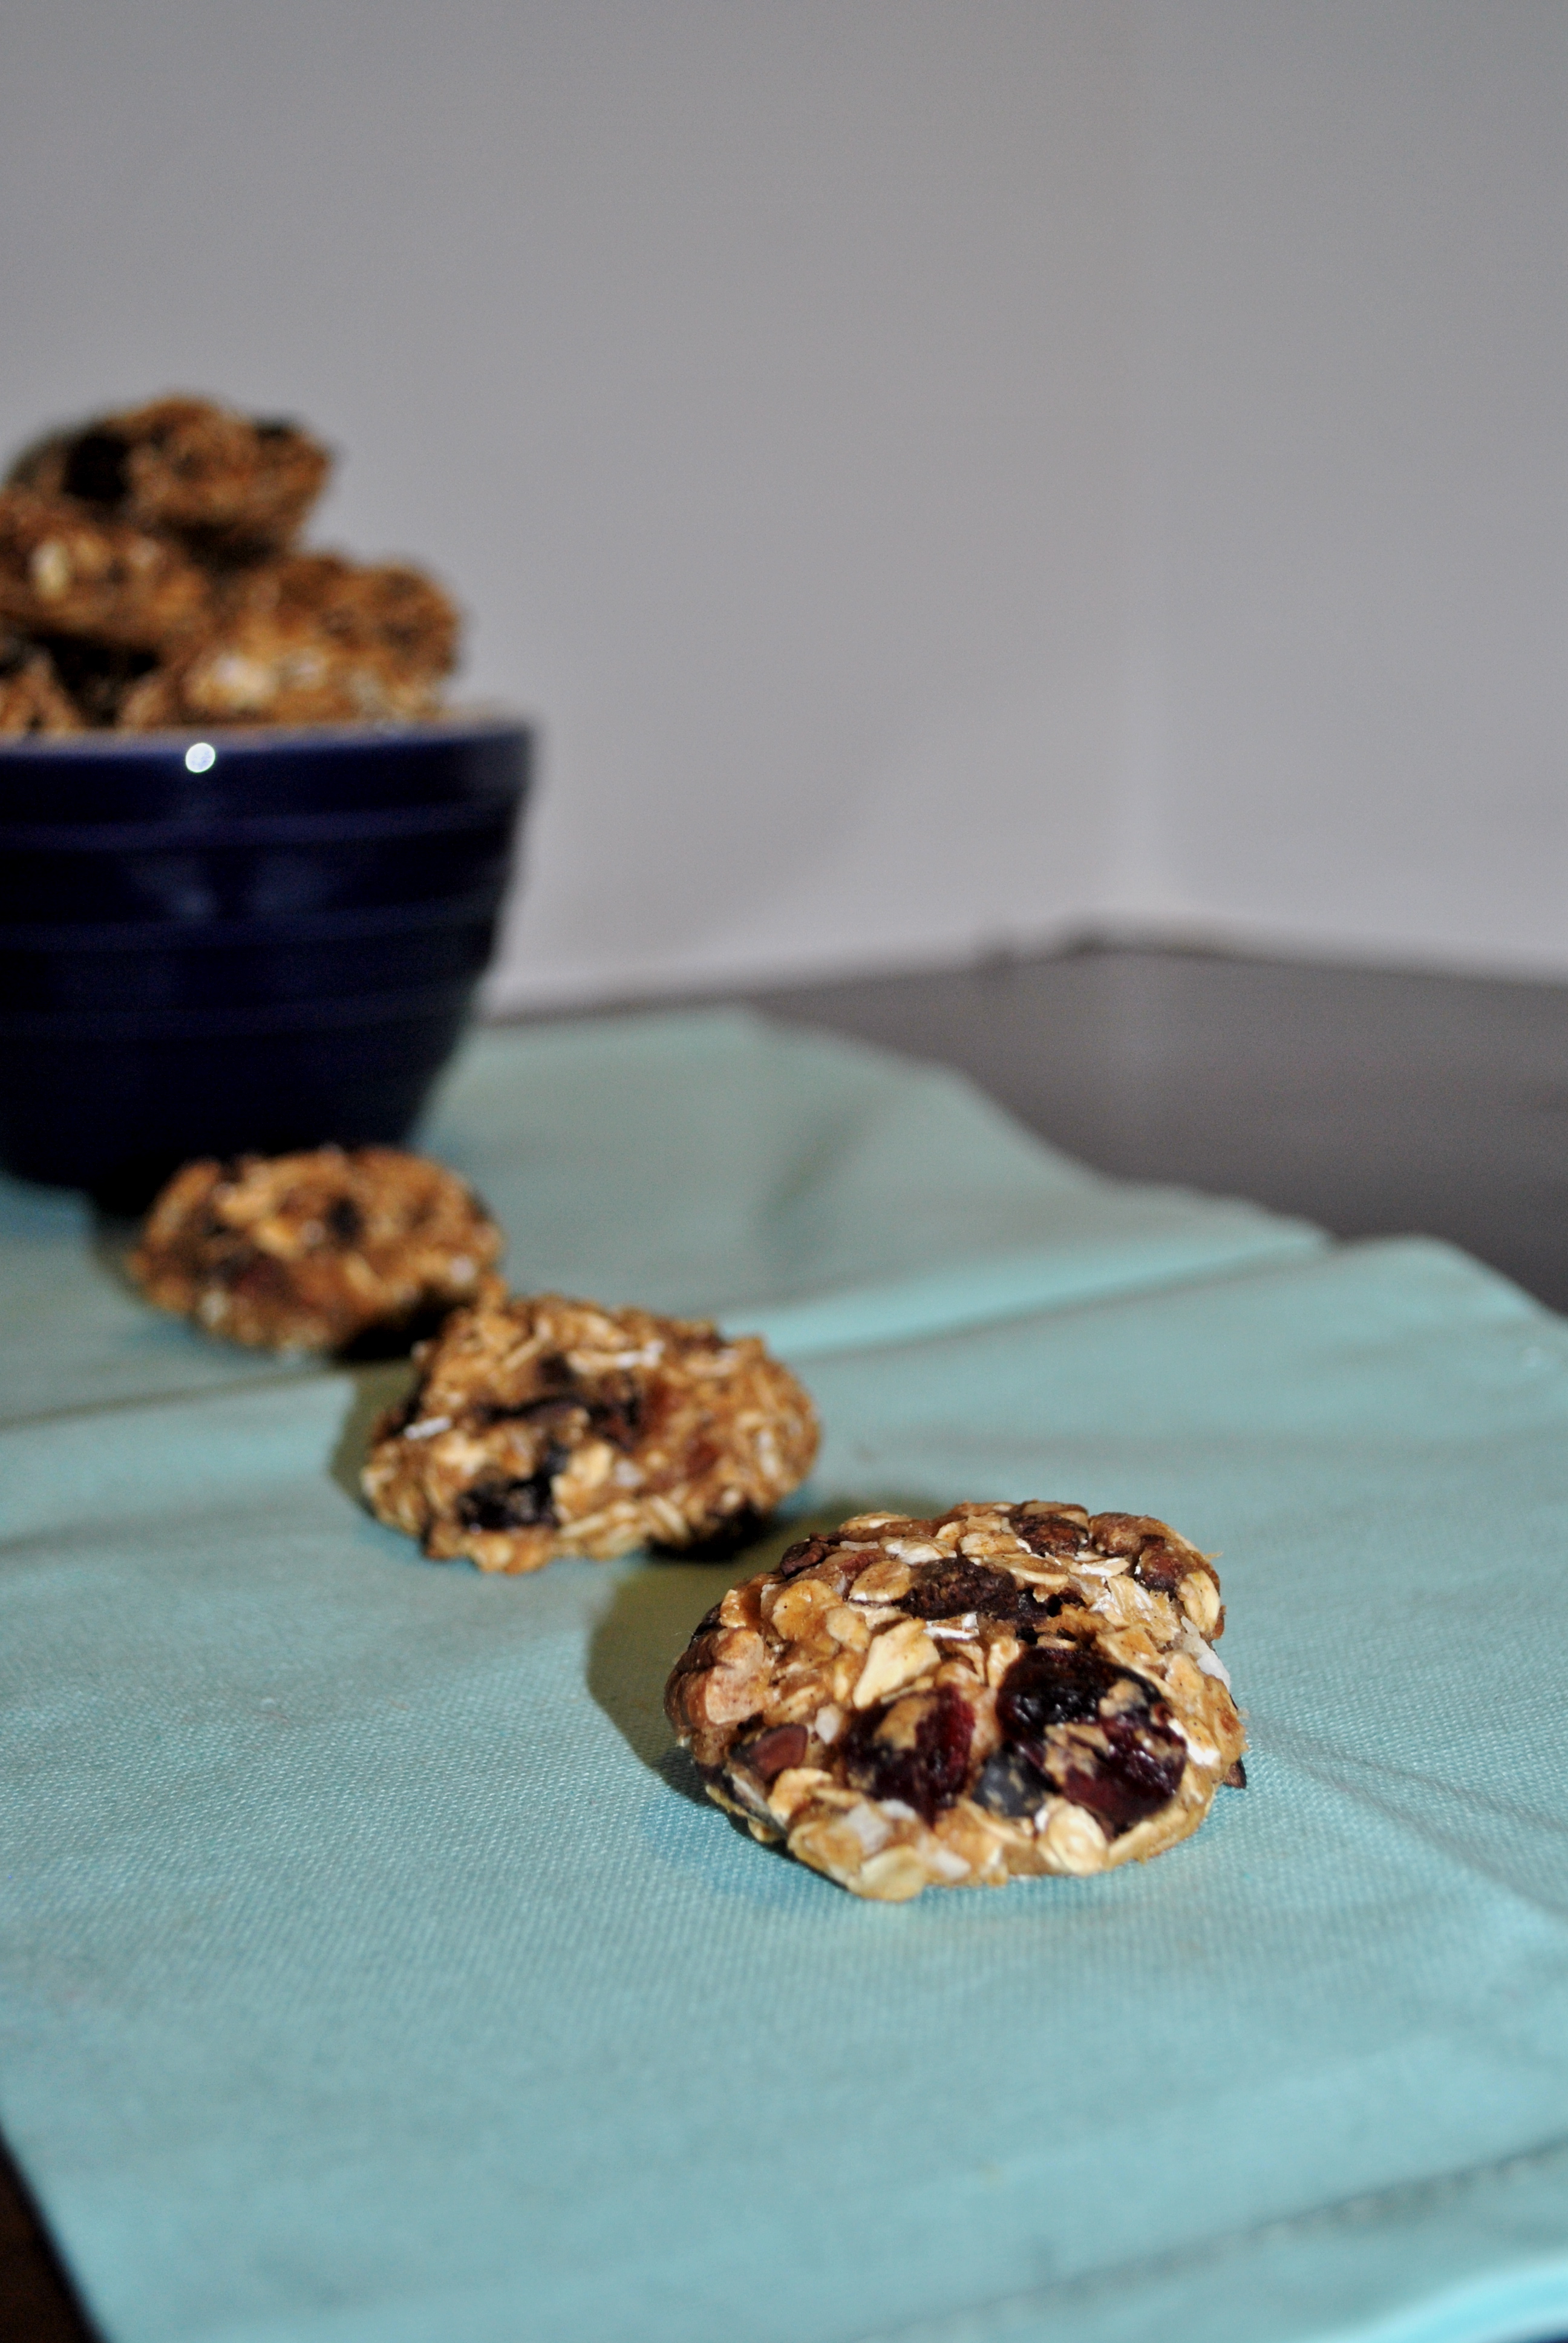
Ok, now let’s get down to business. The family I nanny for often has chocolate chip cookies in the house. They are good. Real good. Like, I’m pretty sure in one day, the Dad and I can make a fairly large dent before the kids even know I restocked. They aren’t vegan and they aren’t healthy. Thus, they are my worst enemy. They whisper to be from the very top of the cabinet saying “psst, Erin. You worked out this morning. You can totally have 1. Or 3. I’m yummy and chock full of chocolate chips…”

DSC_0883

It’s the worst.

peanut butter + maple syrup

peanut butter + maple syrup

So I’ve been trying to make some cleaner, healthier-sorta-kinda, desserts that I can keep around the house that I don’t have to worry about sharing. This way, when I’m being taunted by store bought chocolate chip cookies, I have a better option.

peanut butter/maple syrup + coconut flour

peanut butter/maple syrup + coconut flour

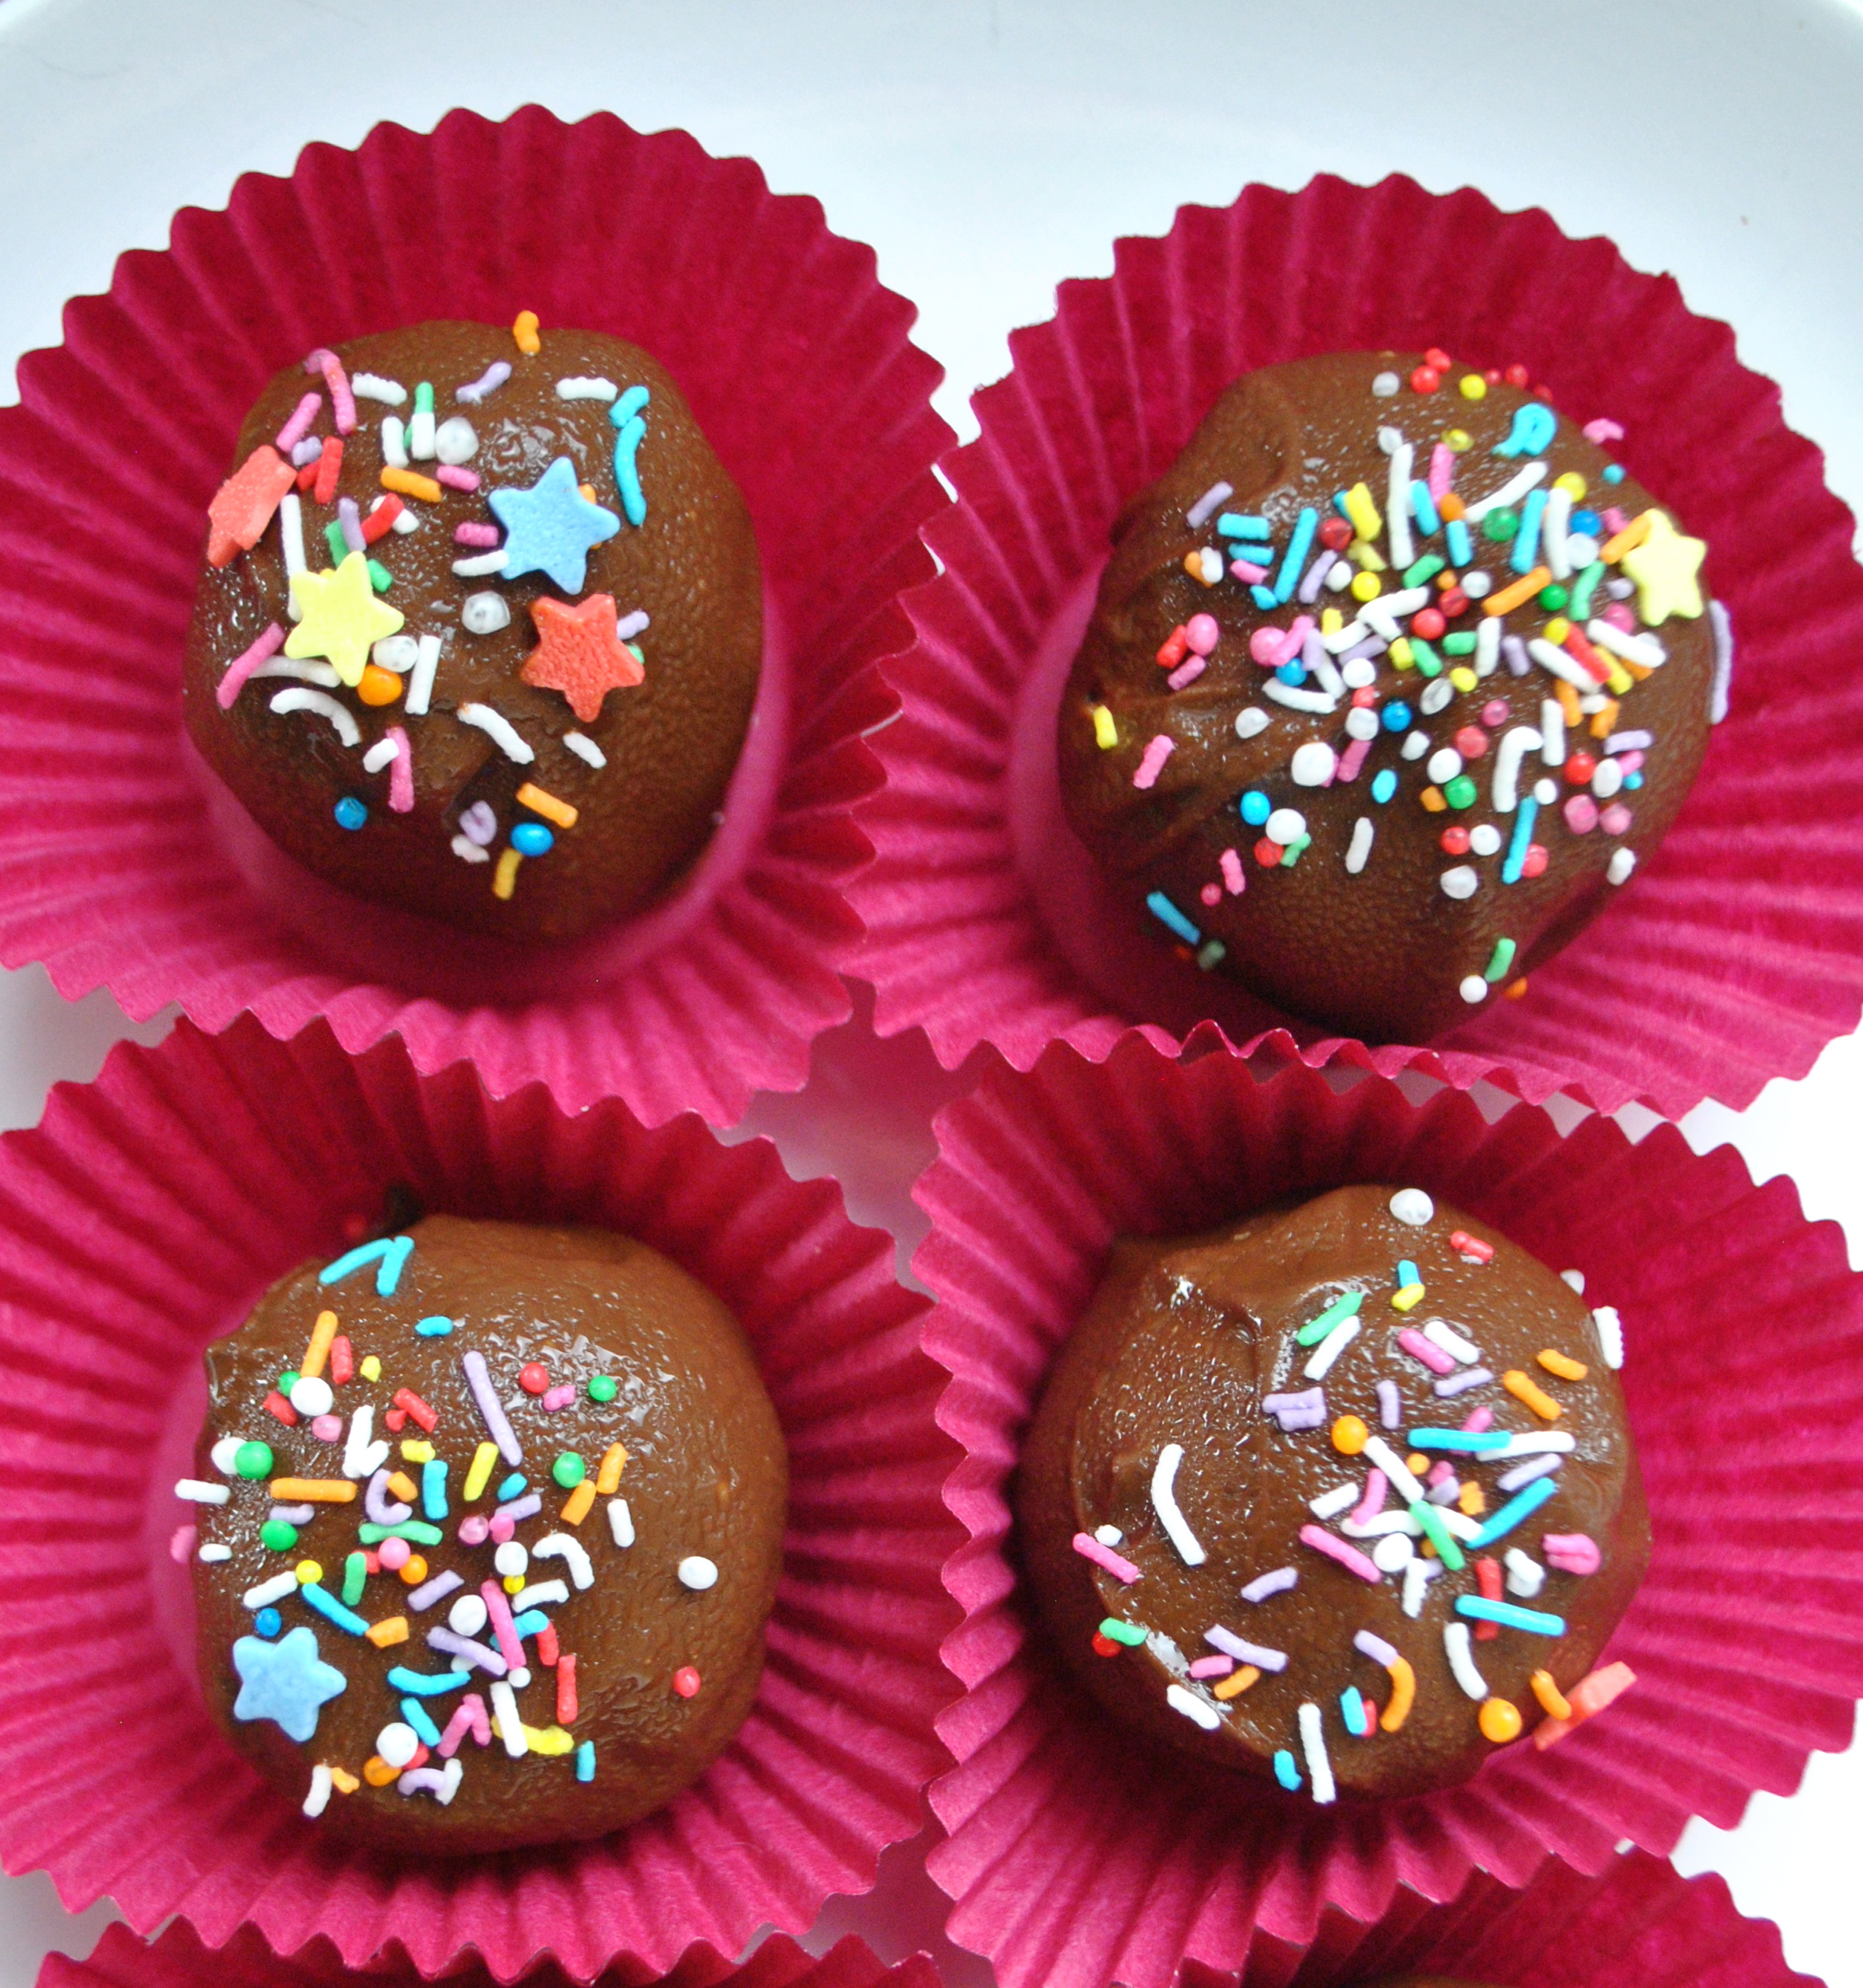
Healthy-ish Peanut Butter Balls
from Oh She Glows
serving 20-25

Ingredients:

  • 1 cup 100% natural peanut butter (smooth or crunchy, I used Teddy’s. You want it to be the all natural kind that is kind of drippy.)
  • 3.5-4 tablespoons pure maple syrup, to taste (I only tried maple syrup so I can’t vouch for other liquid sweeteners like honey and Agave Nectar)
  • 2-3 tablespoons coconut flour (I used 2.5)
  • fine grain sea salt, to taste (I used 1/8 teaspoon because by PB was already salted)
  • 6 tablespoons rice crisp cereal
  • 3/4 cup dark chocolate chips
  • 1/2 tablespoon coconut oil

Instructions:

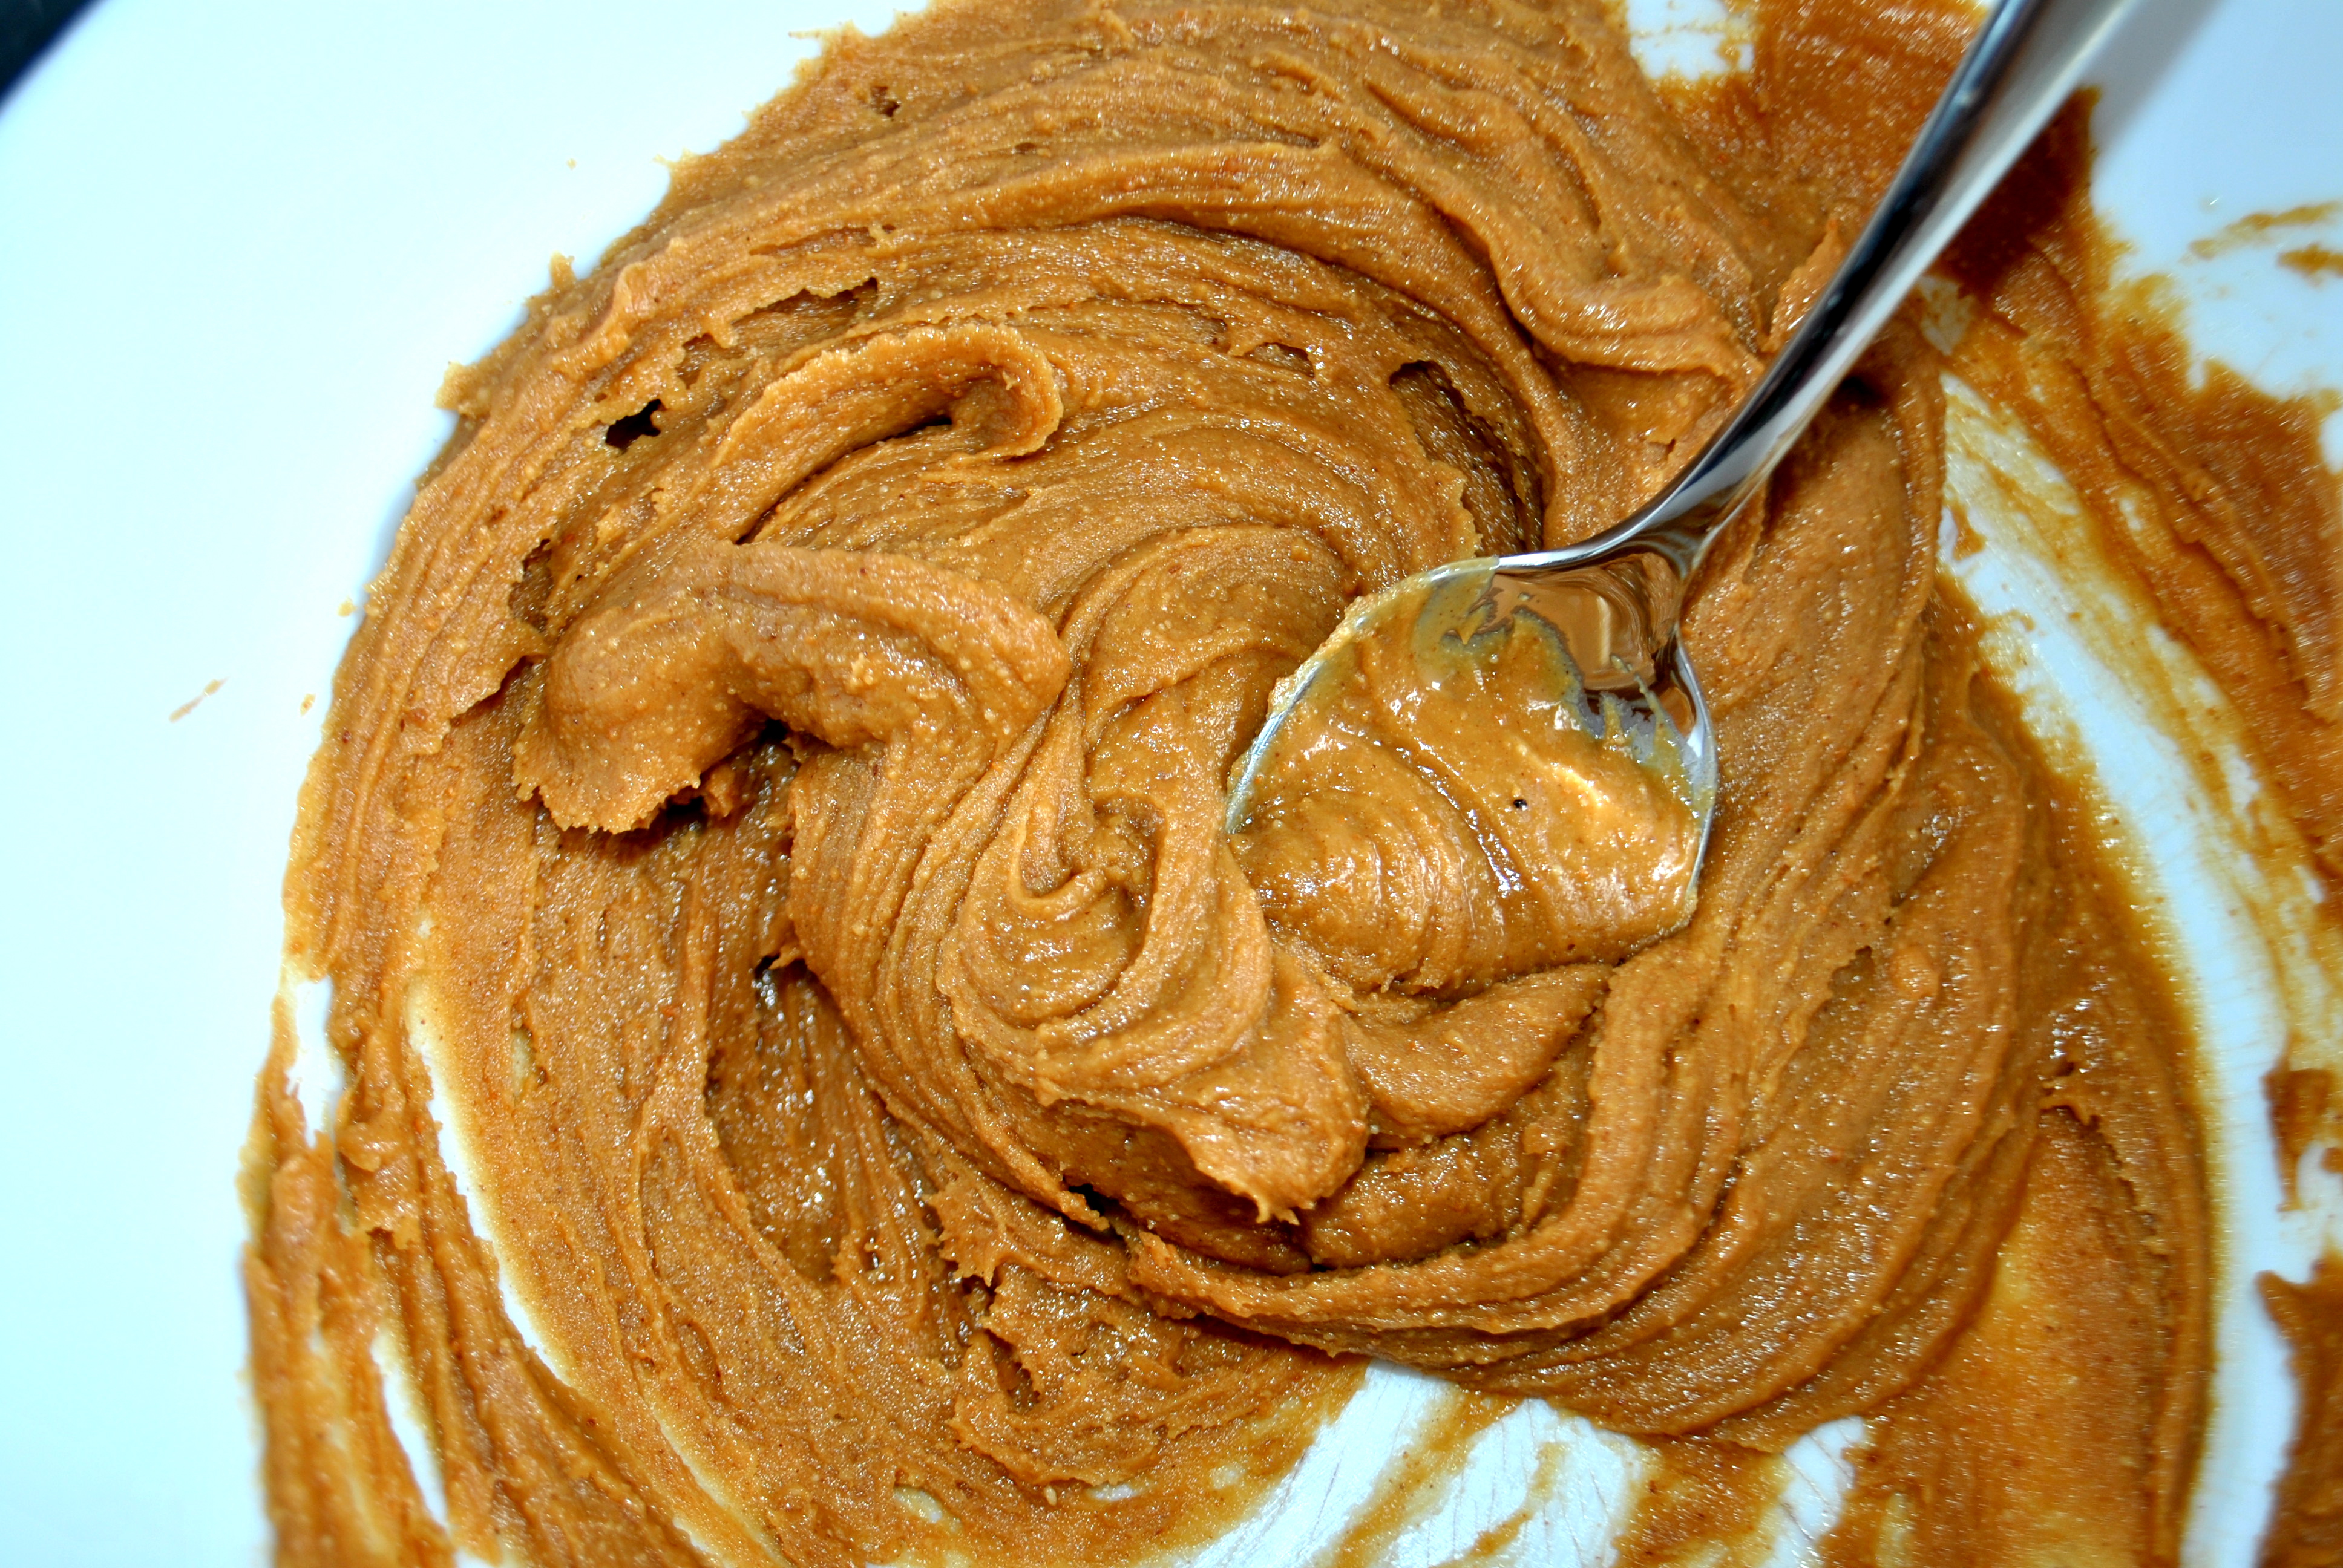
  1. Combine natural peanut butter and the maple syrup in a medium bowl and stir vigorously for about a minute until the mixture has thickened.
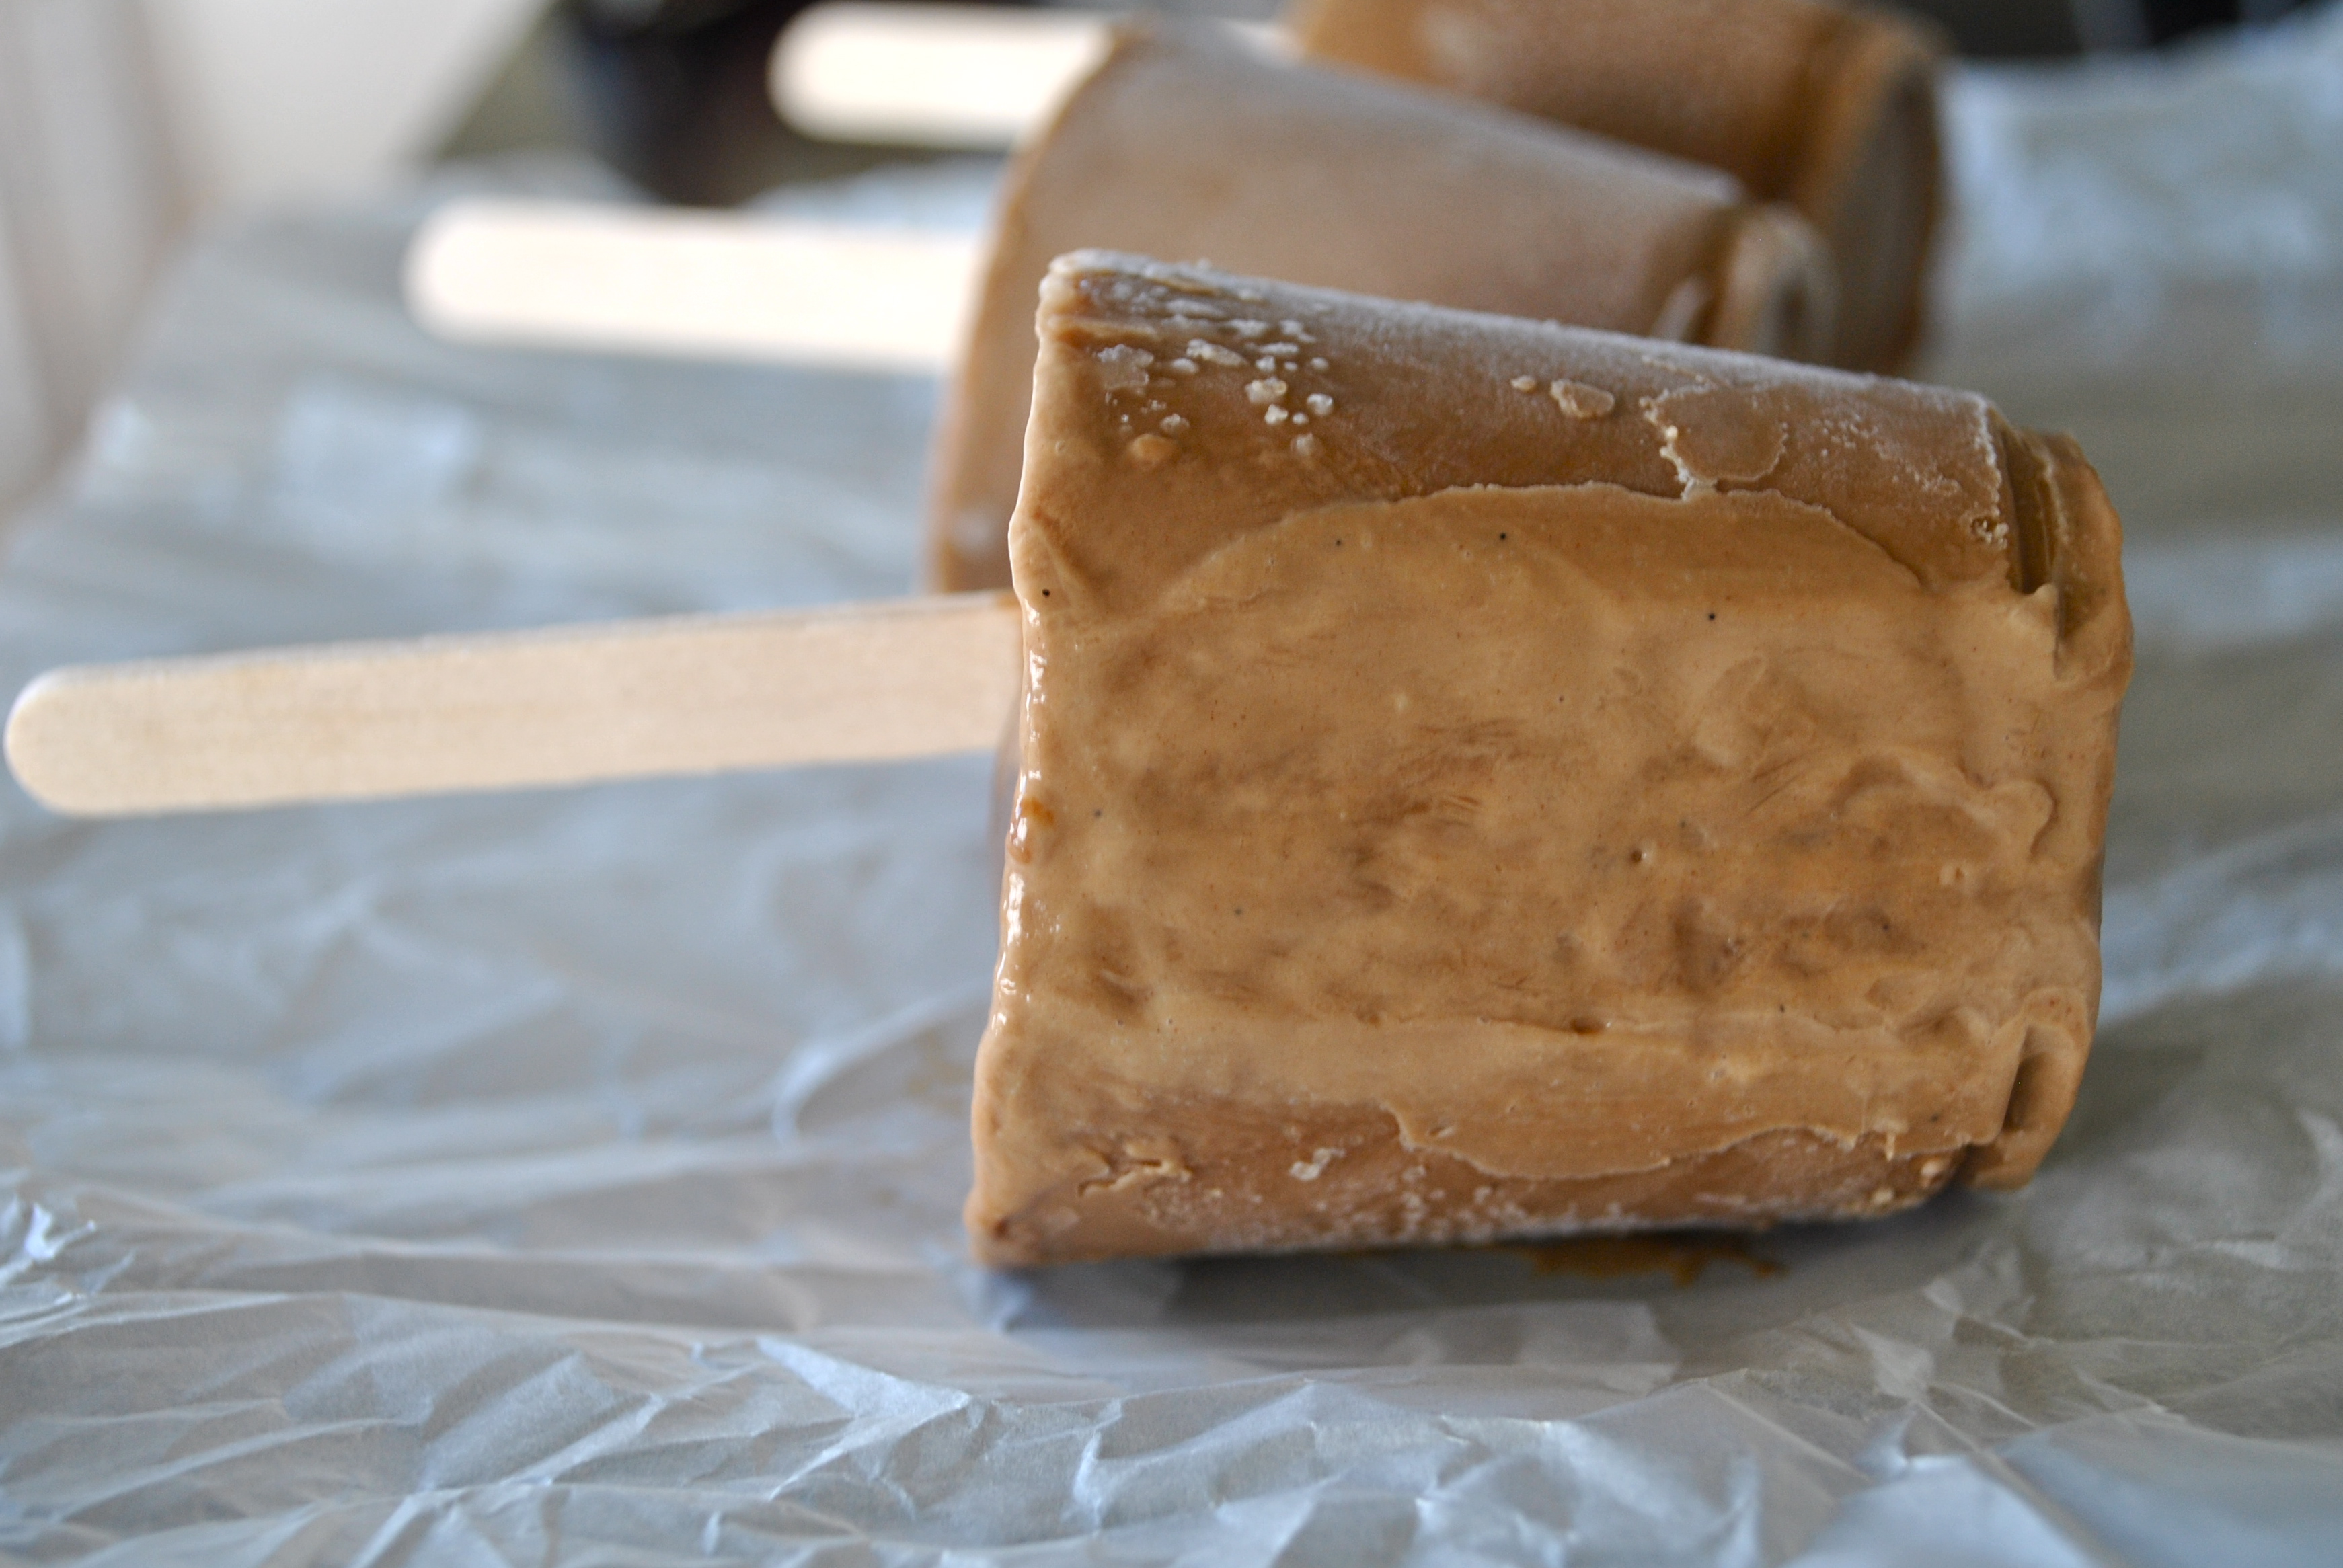
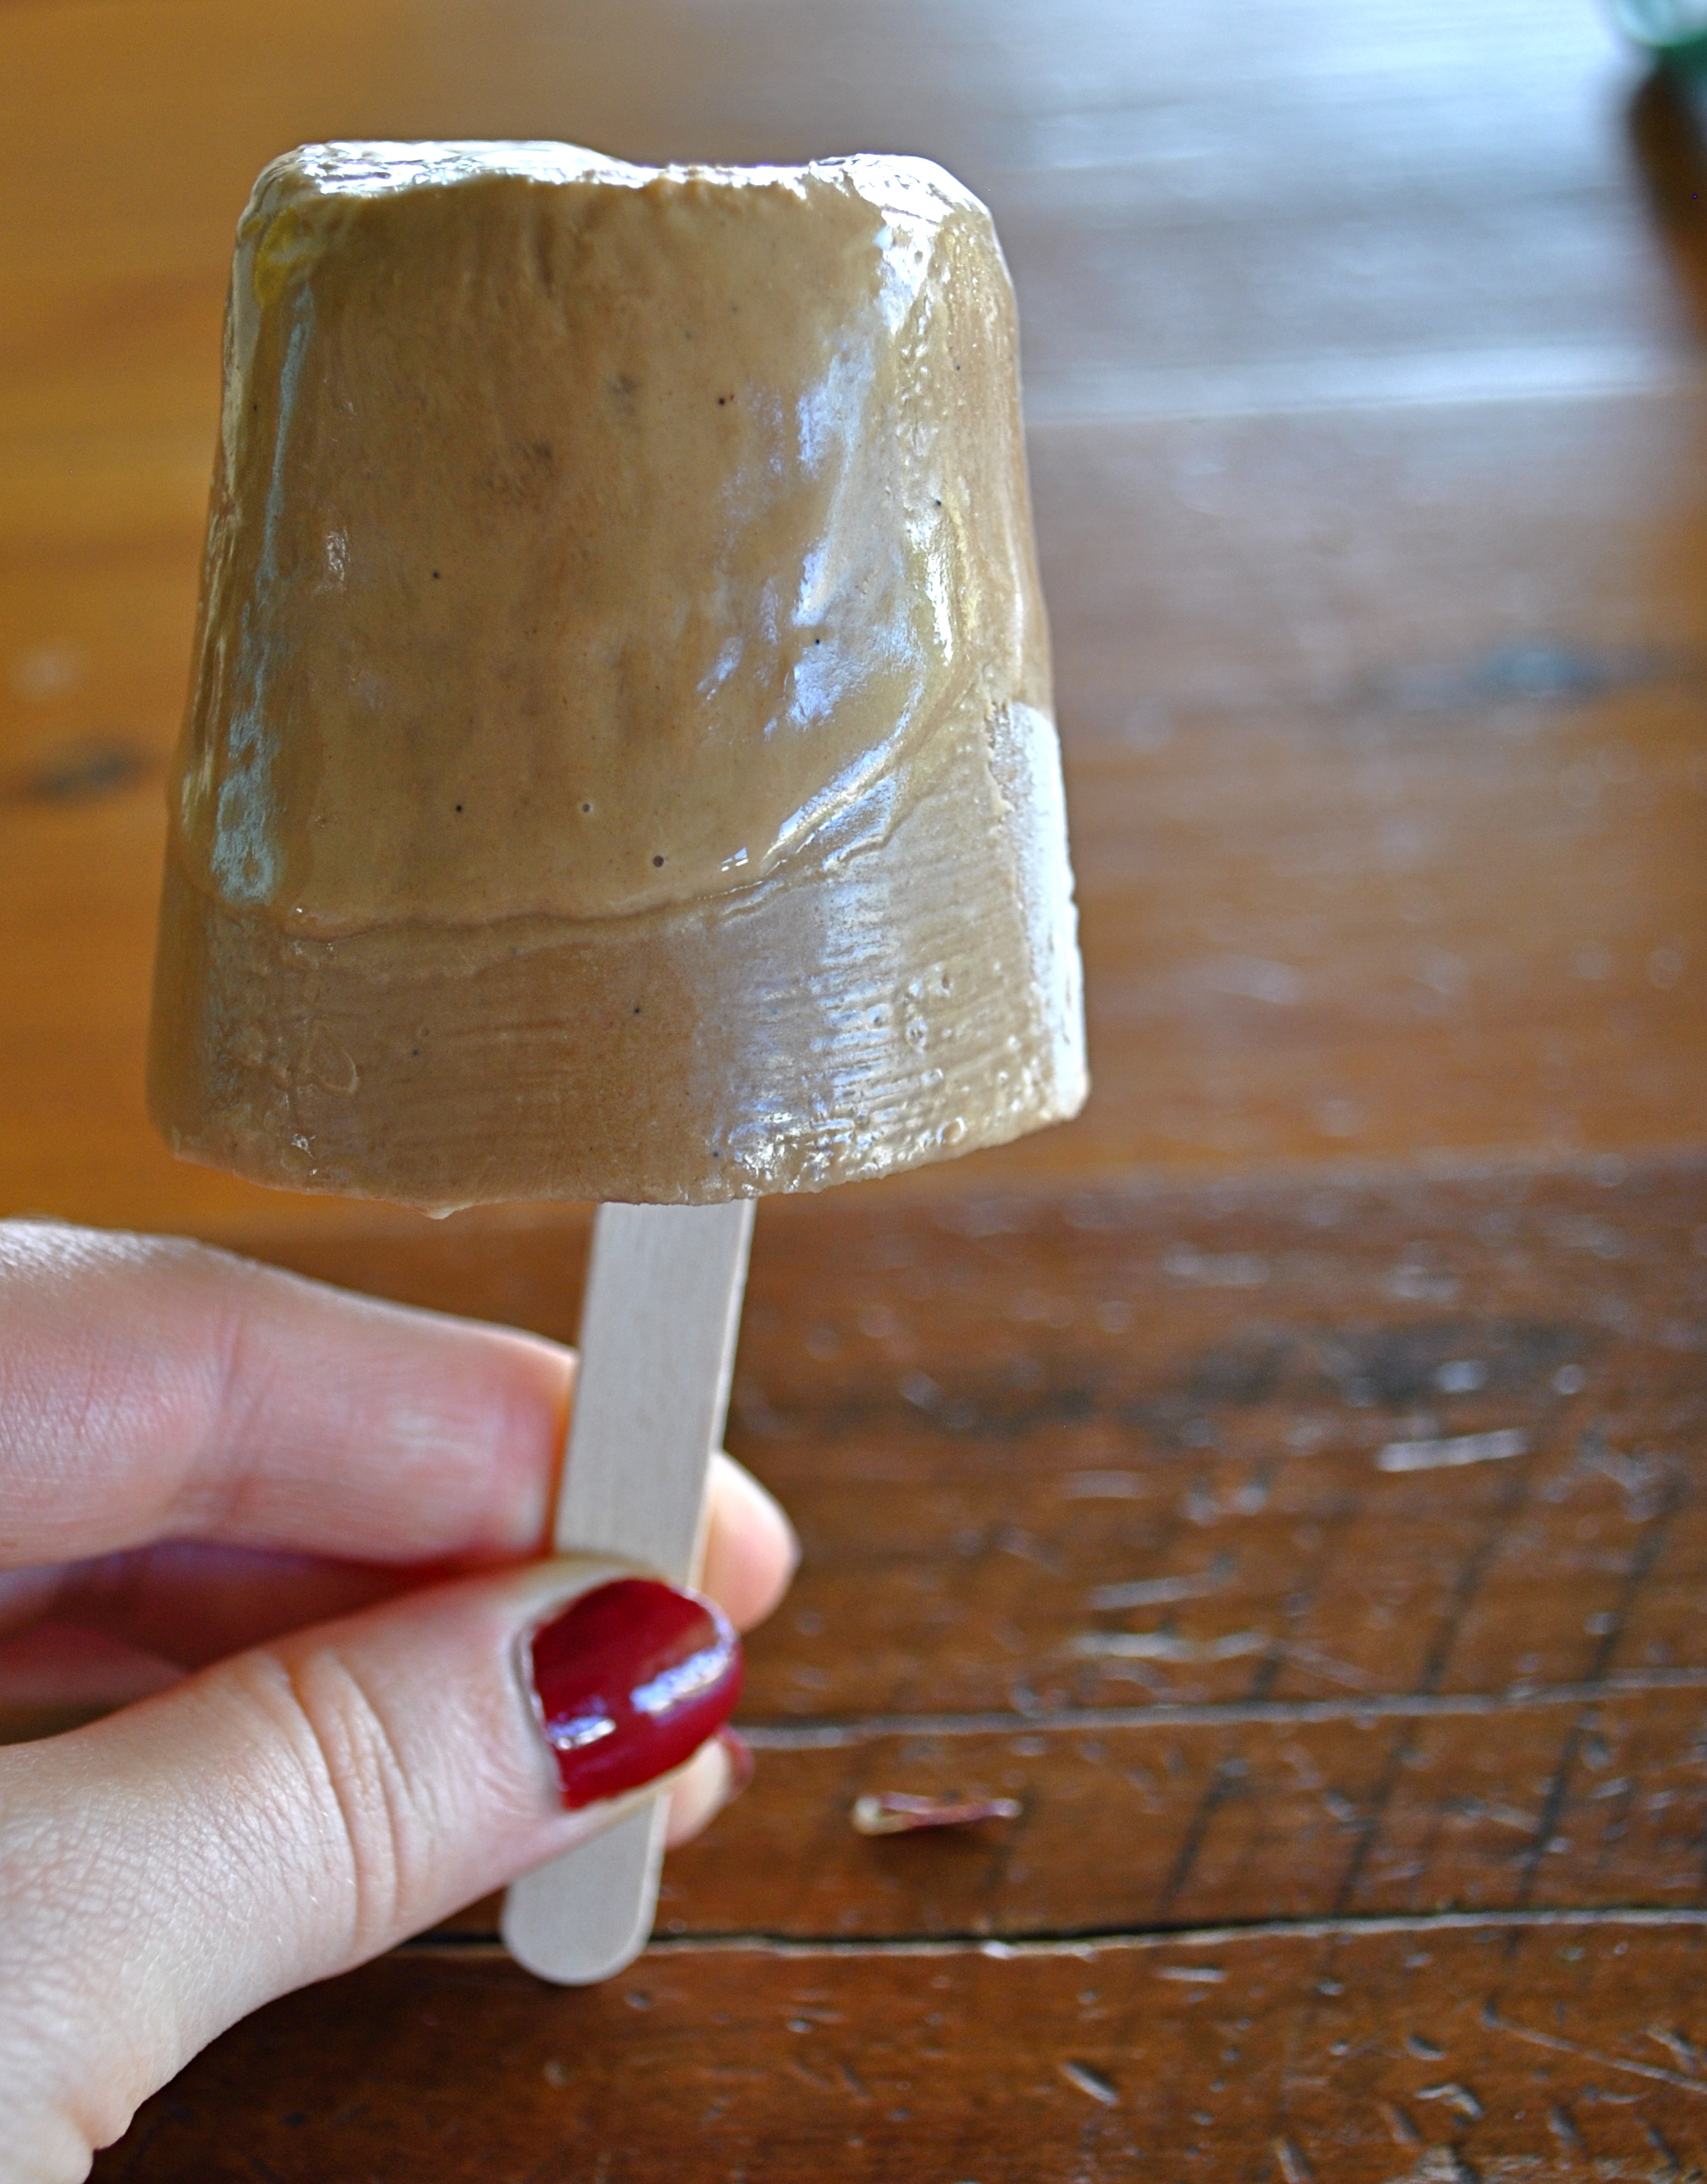
  2. Add the coconut and stir until well combined. The amount of the coconut flour will depend on the consistency of your peanut butter. Start with 2 TBSP, combine and let sit for a minute or two. The coconut flour will continue to absorbed the moisture in the mixture and will continue to thicken. Add a bit more if the peanut butter remains sticky. You want to be able to roll the peanut butter into a ball without it sticking to your hands (add more flour if this is the case) and without cracking or crumbling (add more maple syrup). See my picture below for a reference on what your dough should look like.
  3. Add salt and combine.
  4. Add cereal and gently combine.
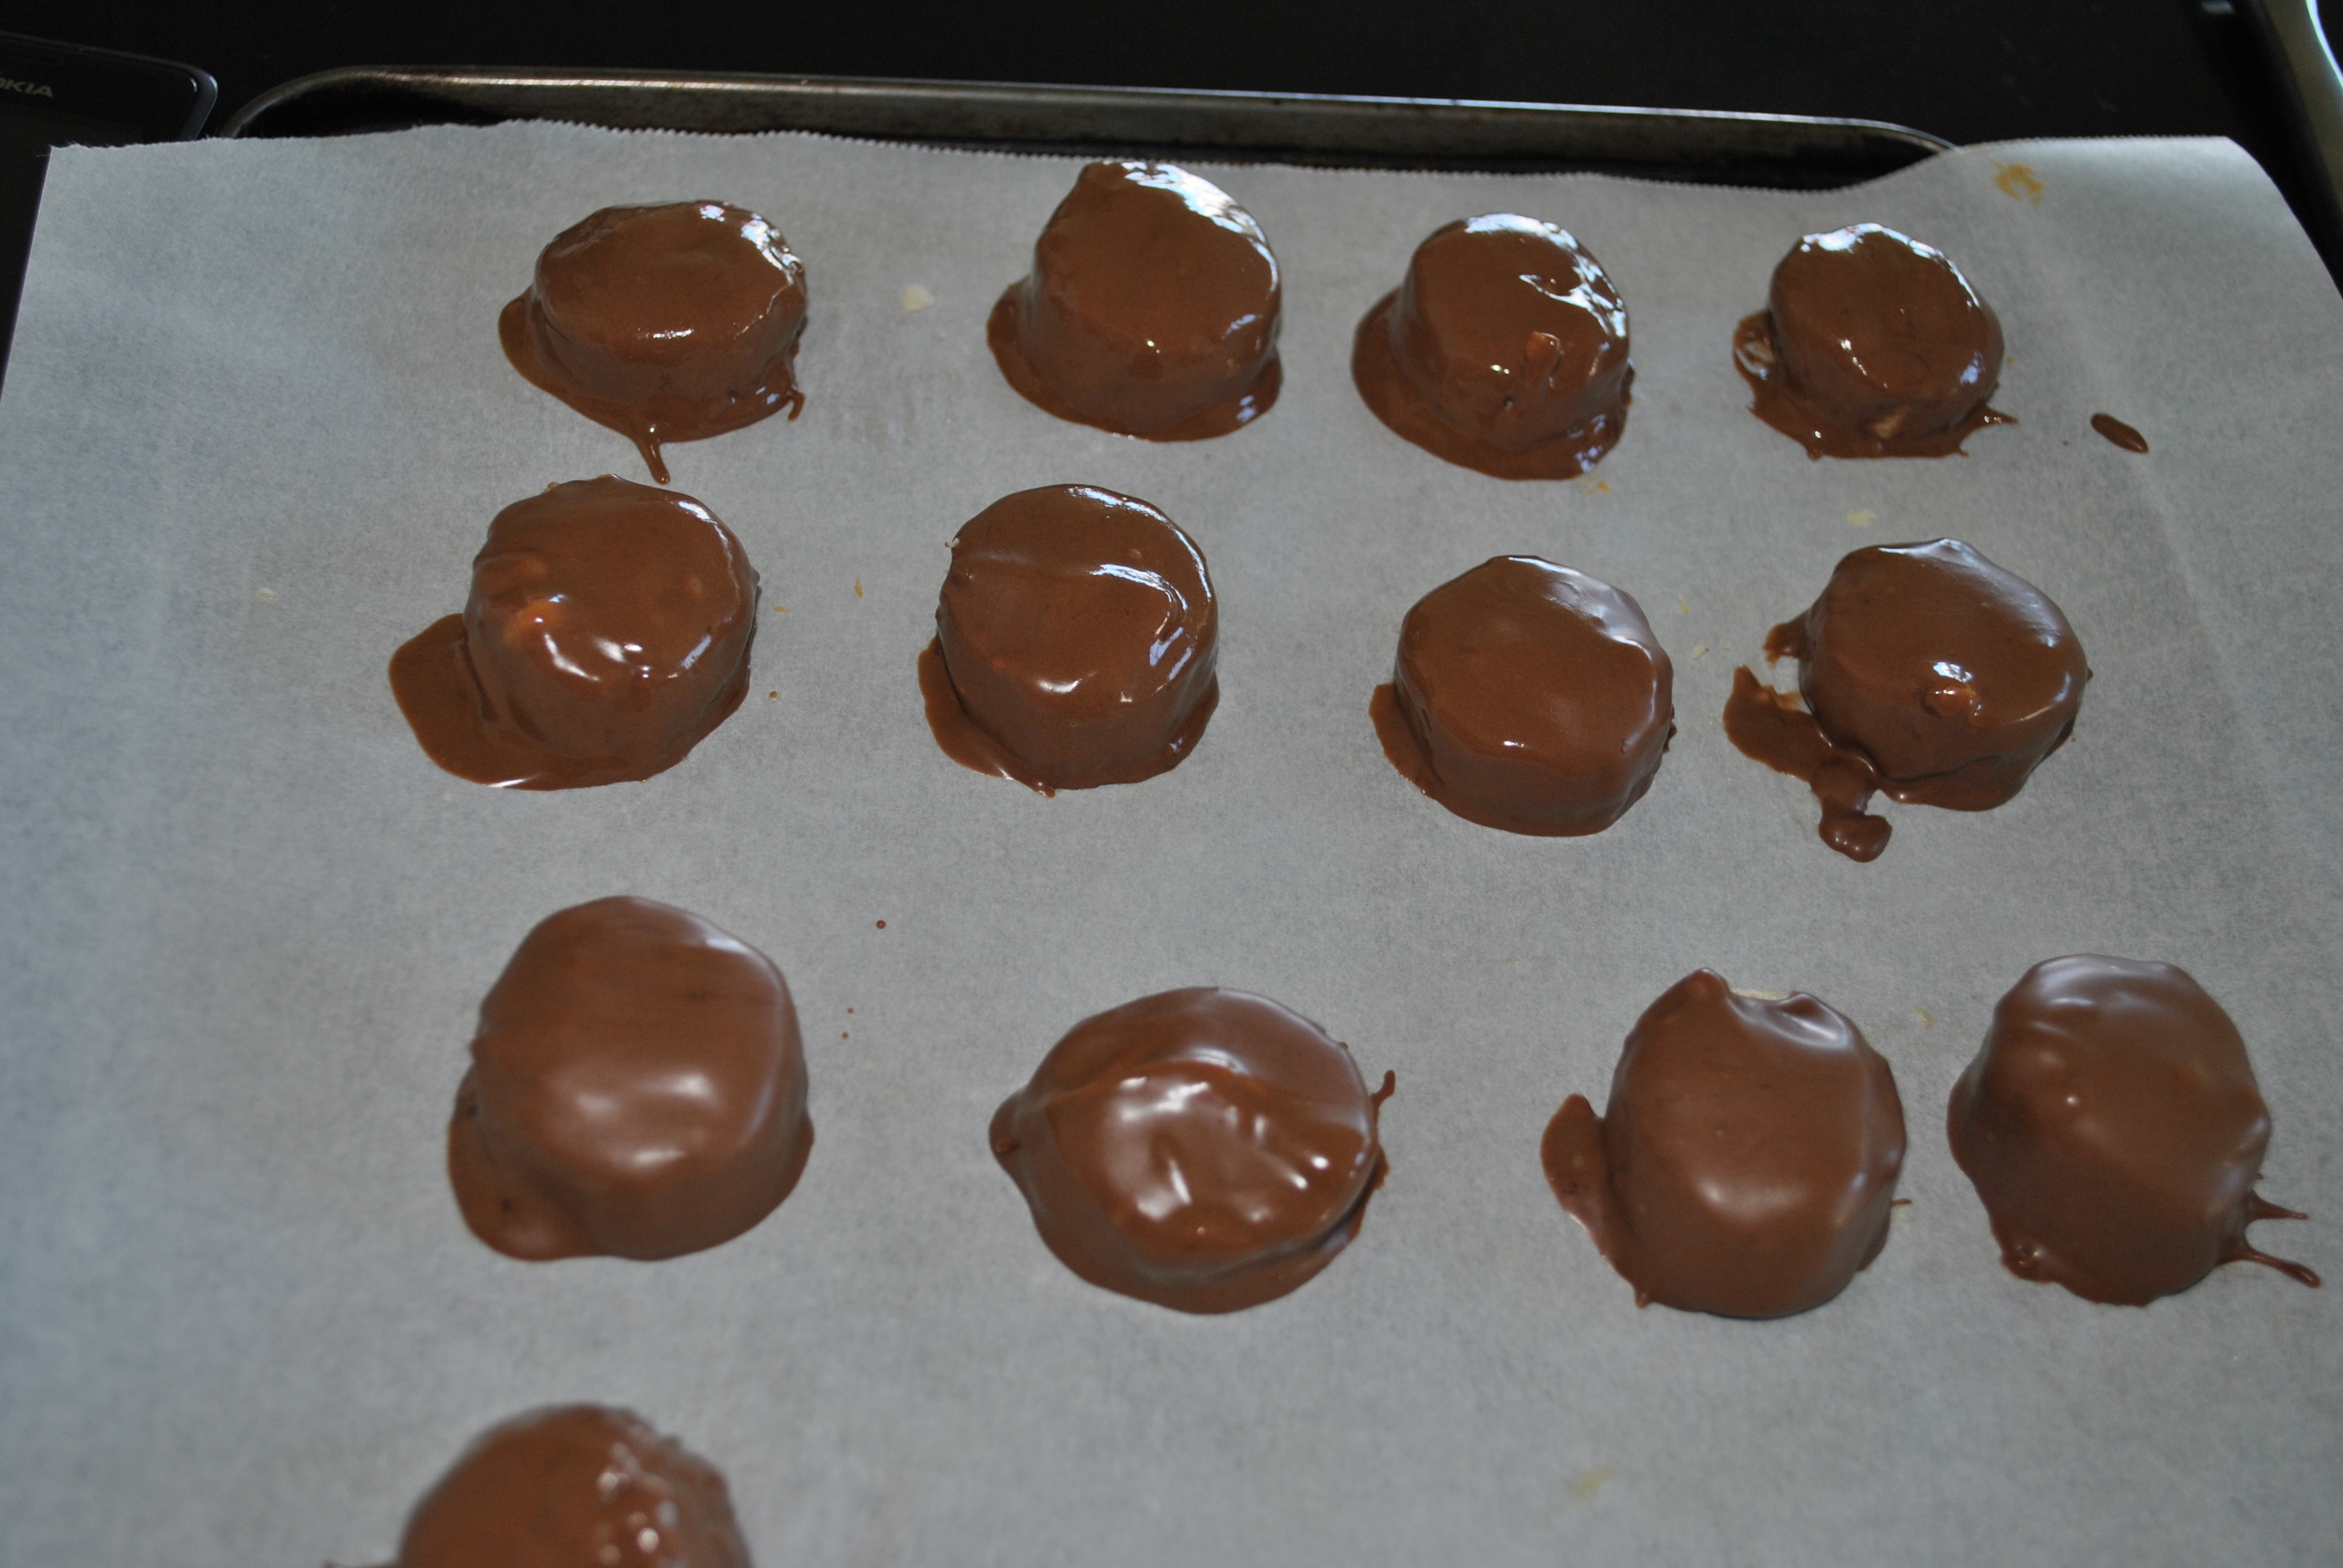
  5. Shape into balls and place on a baking sheet lined with parchment paper (I was able to make 20 but I would suggest going smaller for a better Peanut butter/ chocolate ratio). Place in freezer while you prepare the chocolate.
  6. On medium heat,melt the chocolate and coconut oil in a double boiler. Once the chocolate had begun to melt, stir the chocolate around until it becomes smooth then remove from heat.
  7. Remove the peanut butter balls from the freezer. One at a time, drop them into the melted chocolate, roll around until it is covered, then roll it gently up the side to help remove excess chocolate.
  8. Place in the fridge or freezer for another 10 minutes or so for the chocolate to harden. Keep chilled.

DSC_0880

I had been eyeing this recipe since I received two large jars of Teddy’s peanut butter from home for Christmas. I sort of forgot about it with the craziness of the holidays but the other day, I realized I was down to my last 1/2 of a jar and knew I had to make this before it was too late.

DSC_0888

The filling is straight up peanut butter goodness! The rice cereal adds a nice texture but the best part is, because it’s so peanut buttery, I’m good with one. It’s the perfect little afternoon snack!

DSC_0906

AND peanut butter is a very American thing and most of the family doesn’t particularly like them so they are all for me! Yesssss!

PS. did you notice in the first picture the condensation on the Peanut Butter Balls because it was SO hot here when I was photographing them? It reminded me of this skit. LOL! Happy Friday.

Read Full Post »

DSC_0468

I am SO happy it is Friday! It’s week two of the new school year and waking up early again is hitting me hard. I’ve been in grumpy zombie mode all week. I’ve wanted nothing but a serious nap. I went to bed one night at 9:30 and I still can’t shake it! This weekend I will be lounging in bed late every morning and soaking up the laziness! I think I may also work on some Valentine’s Recipes and check out Wolf of Wall Street. Has anyone seen it? Thoughts?

ok, Friday Favorites:

New Music: New Taking Back Sunday (duh!):

Favorite new exfoliant: Lush‘s Let the Good Times Roll. This was one of my Sydney Lush purchases and I can’t get enough of it. It smells amazing, like caramel popcorn, and leaves my skin so soft. The lady at Lush told me to use it every other day or every three days. It nearly kills me not to use it every night. Ob-sessed!  I think it’s seasonal, though :/

Picture from Lush.com

Picture from Lush.com

Favorite New Make-up: Garnier’s BB cream. I’m not going to get into a big make-up rant because I sound like a commercial. I will say getting up early, working with kids and living in a sunny, hot climate has resulted in me almost never wearing makeup during the day. When I do, I wanted something much lighter and gentler on my skin. This meets all those requirements. Plus, my skin actually looks better after I wear it. True story. Downside- it’s not all natural. Leave a comment below if you have a good all natural foundation you use.

DSC_0851

Favorite Beverage: Boost’s King William Smoothy. It’s just cold, liquid chocolate. Perfect thing to kick my chocolate cravings. To make vegan, I switched the milk for soy milk and the yogurt for sorbet. In this case, I’m pretending all chocolate is vegan. I’m the worst vegan ever.

DSC_0851

Favorite Treat: Popsicles. When I can’t afford the above smoothie, I reach for these. It’s been hot here and I’ve been on a cold treat kick. I made these fudgesicles a few weeks ago and had to force myself to keep them to a snack. A hot meal for lunch and dinner? Nah, bring on the frozen chocolate!

DSC_0475

Mocha Fudgesicles
slightly altered from Take A Mega Bite

Ingredients:

  • 1 (14 oz) can full fat coconut milk
  • 3/4 cup vegan chocolate chips or vegan chocolate
  • 1 T instant espresso or 2 T instant coffee
  • pinch salt
  • 1/2 t vanilla
  • 1/2 T- 1 T sugar, depending on the chocolate used (my chocolate chips were sweet enough so I used 1/2T)

Place the coconut milk, chocolate, and espresso in a saucepan and heat until chocolate is mostly melted. Set aside for 5 minutes for the coffee to steep. Stir in salt, vanilla, and sugar. Taste and add more sugar to taste. Pour into popsicle mold and freeze for a few hours or over night.

If you do not have popsicle molds (like myself), pour into small paper or plastic cups, cover with tin foil and poke your popsicle stick through the tin foil. Freeze for a few hours or over night.

When ready to eat, run the mold under warm water. If you pull a stick out sans pop just run it under water and place back in the popsicle to freeze.

DSC_0478

These were so creamy and delicious. I definitely hoarded them from the children because I didn’t want to share. I mean… because they don’t need the caffeine. yeah…we’ll go with that.

Now, what are your weekend plans?

Read Full Post »

BBQ Polenta Bites

DSC_0859

Last year for the Super Bowl, my friend Amelia (who created this hummus and helped with my Aussie header above), strolled into my super bowl party with Buffalo Polenta Bites. At that point, I had had polenta exactly zero times. It’s just not something we ever had around the house. After trying them though, I couldn’t get them out of my head. They were SO good.

DSC_0844

Since then, I have thought of those buffalo bites at least once a  month and always tell myself that I need to try and make them. As polenta is not something I normally have and frying the heck out of pseudo-cornmeal screams ‘special occasion’, I just never really got around to trying this recipe out.

Plus, it sort of scared me because I seriously always think placenta in my head. True story. Even as I’m typing this, I keep triple checking myself. Cause really, those are just not two things that you should get mixed up. Ever.

DSC_0856

Anyway, as I’m currently kicking it in Australia, I’m not sure if I will be able to watch the Super Bowl but I couldn’t resist a chance to recreate Amelia’s recipe. Of course, I couldn’t find Buffalo Sauce here which sort of breaks my heart, so I had to go the BBQ route. Feel free to sub your favorite kind of sauce for BBQ sauce. I imagine it would taste great with Buffalo, teryaki or hoisin sauce. Whatever floats your boat!

DSC_0863

BBQ Polenta Bites
inspired by Amelia and based off of Taste.com.au

  • 3 C. of water
  • 3/4 C. instant polenta
  • 1 TBSP of vegan butter (I used nuttelex lite)
  • 1/8 C. nutritional yeast
  • 1/4 c. flour
  • salt and pepper to taste
  • 1 tsp smoked paprika (or more to taste)
  • vegetable oil
  • 1/4-1/2 C. BBQ sauce

Grease a small cookie sheet and set aside.

Bring water to a simmer in a saucepan over medium heat. Gradually add polenta in a thin stream, stirring constantly. Reduce heat to low and cook for 3-5 minutes, continuing to stir constantly, until the polenta is thick and soft. Stir in the butter, nutritional yeast and salt and pepper to taste.

Pour the polenta into the prepared pan and smooth the surface. Set aside to cool. Once cool, cover and place in fridge to set. I checked mine after an hour and it was all set.

Cut the polenta into bite size pieces, mine came to about 20. Mix the flour, smoked paprika, salt and pepper together. Add the polenta and toss to coat.

Heat vegetable oil in a non-stick pan over medium heat. You want enough vegetable oil so that when you lay your polenta in the pan, it hits your pieces at the mid-way mark. So the amount of oil will depend on the sizes of your polenta bites and your pan.

Add the polenta bites to your pan a few at a time. You do not want to crowd your pan so make sure you have plenty of room for your bites to cook. I fit 7 pieces into my frying pan at one time. Cook for 4 minutes on each side or until golden. Transfer to a plate lined with a paper towel.

Once all your polenta bites have been fried and are cool, place them in a large mixing bowl. Add about 1/4 C of BBQ sauce and toss gently with a large spoon until covered. Add more BBQ sauce if needed. The amount will depend on the type of BBQ sauce used and the number of bites you have.

DSC_0868

So now for the all important question- Who are you voting for in the super bowl? I’m routing for the Broncos and Welker. If you follow my blog at all, you know Welker holds a dear place in my Dad’s heart. It was a sad, sad day in our house when he was traded from the Patriots.  So this is our chance to root for the guy once again and what kind of daughter would I be if I didn’t take this chance to cheer on my Dad’s man crush? I mean, Come on!  So, let me know if you will be joining my Dad and me as we cheer on Welker or if you are throwing in your lot with the Seahawks. Look, I even included a poll so you can vote. I’m getting fancy up in here! After you vote, leave a comment and tell me what you’re making. I’m living vicariously through you guys. Help a girl out!

Read Full Post »

This recipe is a huge cop out. Like, I don’t even know if it’s considered a recipe. But here we go.

DSC_0442

As I mentioned last week, I’ve been in a HUGE food funk. These overnight oats are what I have for breakfast, followed by some sort of toast with hummus for lunch and leftovers for dinner. I’m just not feeling food. It’s too hot here! Add to that the fact that the kids are now on summer break so I no longer have all afternoon to myself and there goes my cooking time! I did try to make some M&M cookies last week with the kids. The M&Ms weren’t vegan but I had leftovers from when I was making cookies for the kids’ teachers. The results were these colorful, flat-as-crepes cookies. Yeah…one of the kids put 1 1/2 c. of flour in instead of 2 1/2 c. of flour. Whoops.

DSC_0447

So basically, my cooking time slot has been narrowed down to the 30 minute reading time I force upon the kids each day. Well, it’s supposed to be 30 minutes but after taking out the 10 minutes I spend telling them to “focus” and “stop talking” and “stop making faces at each other” and “stop kicking each other!” and “Oh my gosh if I have to tell you one more time to read your book…!”, it’s usually only about 20 minutes. That’s why this recipe is perfect. It takes about 10 minutes to prepare, you pop them in the freezer and the result is a little bite sized cold, chocolately/salty treat that you can grab in between activities. It’s hot here so they are perfect as an alternative to bites of ice cream. As for those in colder weather, they may be a healthier alternative to munching on holiday cookies?

DSC_0435

Either way, I thought these were a great little treat for myself but silly me, I made them in full view of all three kids. Which means I had to share. And they loved them. Which means they didn’t last nearly as long as I thought they would.  I don’t know if that is a good thing because they were clearly tasty or a bad because now I have to use my precious 30 20 minutes of free time to make a much larger batch tomorrow.

Chocolate Peanut Butter Banana Bites
from Nom! Nom! Nom! Blog
serves 1-2, but can easily be doubled

1 banana

1/8 c. of peanut butter, approximately

1/2 cup of vegan chocolate chips

Line a baking sheet with wax or parchment paper and set aside.

Cut your banana so you have round discs that are about 1/2″ thick. Top the discs with peanut butter.

Melt your vegan chocolate in the microwave or on the stove with a double burner. I prefer the double burner method but whatever you find easiest. If your chocolate isn’t melting smoothly, add a little bit of shortening. Once your chocolate is melted, remove from heat. Dunk your banana into the chocolate. I found the easiest way to be with a fork. Pierce the side of the banana with the fork, then dunk it into chocolate. Use another fork to slide the chocolate-covered banana off the first fork and onto the wax paper.

Freeze until the chocolate hardens. Remove from wax paper and place in a baggy or container and return to the freezer.

DSC_0437

I feel like the directions for this are really wordy. It could also read “Cut banana. Put PB on top. Dunk in Chocolate. Freeze.” 3 ingredients, 10 word instructions, and we’re done!

DSC_0443

Now if you’ll excuse me, I need to go secretly make another batch of these and hide them where the kids can’t find them. Why can’t they just be satisfied with messed up, flat M&M cookies? Sheesh!

Read Full Post »

Three Pepper Hummus

DSC_2610

IT FEELS LIKE FALL!!!

I’m so excited 🙂 This past weekend, I had planned a last-hooray-to-summer trip to the Cape since I hadn’t been all summer. I was thinking when I planned it that we may still be able to get some beach time in, or at least some pool time, but we ended up gravitating more toward the heated hot tub, hoodies and looking for an apple orchard (Note: the Cape’s 1 apple orchard not only doesn’t have cider donuts but is super, duper tiny and oddly enough, tucked behind a subdivision. We ended up turning around and going to Sundae School for pumpkin ice cream instead!). We did hit up Pirates Cove, where I may have, by just a little bit, sort-of-kind-of, beat Matt in mini golf. I’m pretty sure it was my lucky cowboy boots though!

cape cod collage

(starting at top left: the Sundae School truck; Pirates Cove souvenirs; Matt and me; Pirates Cove!; a sand sculpture of a shark. It’s a small detail from this huge boat sculpture, which was awesome;Sunset at Gray’s Beach.)

I feel like the trip was my final goodbye to summer and now I can dive head first into my very short celebration of fall! I have the windows open as I write this, letting the crisp fall air in as I sip Pumpkin Spice Tea. My to-do list has very few To-Dos on it and then I’m pulling out those two cans of pumpkin I have and baking something. I don’t care what but they will be used! And I can’t wait!

But for now, here is a recipe for Three Pepper Hummus. My fridge was pretty bare when I came back from the Cape. Oddly enough, I had one cucumber. Just one. And some bread. So I whipped up this hummus in an attempt to have a more nutritious lunch then I had at the Cape (fried food and ice cream and bagels…oh my!).

DSC_2604

Three Pepper Hummus
modified from Smoky Chipotle Hummus

  • 1 (15.5 ounce) can garbanzo beans,drained
  • 1/4 cup water
  • 2 tablespoons tahini (sesame-seed paste)
  • 2 tablespoons fresh lemon juice
  • 1 tablespoon olive oil
  • 1/2- 1 1/2 canned chipotle pepper in adobo sauce *
  • 1 clove garlic
  • 3/4 teaspoon cumin
  • 1/2 (7 ounce) jar roasted red bell peppers, drained
  • 5 pepperdew peppers, drained
  • 1/4 teaspoon salt
  • ground black pepper to taste
*start with 1/2 of a chipotle pepper and add more to taste. I love the taste of chipotle peppers and don’t mind the heat so I ended up using 1 1/2.
DIRECTIONS:
Place the garbanzo beans, water, tahini, lemon juice, olive oil, chipotle pepper, garlic, and cumin in the bowl of a food processor; blend until smooth. Add the red peppers, pepperdew peppers, cilantro, salt, and pepper. Pulse the mixture until the ingredients are smooth and well combined.  Transfer to a serving bowl, cover, and chill until ready to serve.
DSC_2607
I should be doing something productive for my trip to Australia but I’m sure it can wait on some pumpkin bread/cookies/burgers!

Read Full Post »

Yoga Cookies

DSC_2236

Happy Friday, everyone! I’m pretty sure this week was extra long. I don’t care that the calendar says it had 5 days like every other work week. It. Was. Long.

With that said I feel like it’s too easy to focus on the negative and complain about my week so let’s do Friday Favorites as top 5 positive things from this week, shall we? That’s way more fun…

1. Saturday I partied it up with my friend, Rachel, and her very cool friends. It was a birthday/cinco de mayo party. I didn’t drink a drop of margaritas. I know! Who am I?? I did have two very large glasses of the world’s best sangria though. Seriously. I tried to get the recipe and Eric was not having it. It was also the first time I’ve had people who I haven’t met before say “Oh! You write Wicked Vegan? I read your blog all the time!” Or something along that line. It was a very cool moment. Hey, Deanna!

1. she punched the Pinata open. Bats are for woosies and 2. it was filled with little bottles of liquor!

1. Rachel punched the Pinata open. Bats are for woosies and 2. it was filled with little bottles of liquor!

2. SOWA is finally open! I walked around Sunday in the sunshine with my friend, Lisa. She bought the world’s cutest teal dress that looked like it was straight out of New Girl. I bought an umbrella necklace and a cactus. It was a good day.

IMG_20130505_203713

3. I received the following rant from my friend Melissa, via email, this week that made me laugh out loud in my cube. This comes AFTER she sent me a dress from modcloth to consider for Lisa’s wedding this summer:

“Also, Modcloth is sort of evil because I imagine they must be  bunch of tiny little Zooey Deschenel clones in colored tights and vintage cardigans. Manic Pixie Dreamgirls at their worst, not even realizing their power to destroy another girl’s self-esteem because they can’t imagine a dress size that accommodates for hips.
Evil hags.”

LOL! Well, ok then!

4. but that email couldn’t top my Dad’s discovery of emoticons. After he sent me some clapping hands (he’s partial to the animated ones), I firmly told him he was WAY too old for emoticons and he needed to stop. Immediately. This did not work. Instead, I got messages like this:

dad and emoticons

Note: The little dude in red dances..and the beer glasses clink…and the smiley face bounces… and the whale spurts water…yeap.

BUT, the cherry on top was when I found out that he sent Mom a “hive with bees buzzing”:

hive or poop?

He’s firmly sticking to his bee hive story but clearly, I’m not buying it! He definitely sent my mom an animated emoticon of poop! My parents are hilarious.

and last but not least, 5. I made these cookies as a sugar-free snack for post-yoga. Rachel and I are still going strong with the hot yoga, even though the Team Lean Challenge has concluded. Well, I should say Rachel is going strong. I seem to be getting progressively worse. But silverlining- I get to chill in child’s pose and watch the very hot guy in yoga attempt Warrior 1. “mmhmm…it is really hot in here… I’m sure taking off your shirt would be a total improvement… Thank you, yoga gods!”

DSC_2225

Yoga Cookies
Adapted from recipe found in Chole’s Kitchen by Chloe Coscarelli; and online at Love and Flour

Serves: 24ish

Ingredients

  • 1 cup + 2 TBSP whole wheat pastry flour (or all purpose flour)
  • 2 scoops of your favorite vanilla or non-flavored vegan protein powder (2 scoops should be roughly 1/2 c, minus 2 TBSP. I used a pre-packaged serving size of Vega Sports Protein Powder in Vanilla)*
  • 1 teaspoon ground cinnamon
  • ½ teaspoon salt
  • ¾ cup + 2TBSP of unsweetened apple sauce
  • ½ cup maple syrup (or agave)
  • 1 tablespoon pure vanilla extract
  • 1 1/4 cups rolled oats
  • ½ cup shredded coconut, unsweetened (I also tried flaked coconut and much prefer the texture of shredded. The cookie holds together better)
  • ½ cup unsweetened craisins
  • ½ cup cacao nibs or vegan chocolate chips (I used Taza Cacao nibs, which I purchased on a whim because I LOVE their Chocolate discs)
  • ½ cup chopped walnuts

*You want your flour and your protein powder to equal 1 1/2 cups combined. Like I said, I used a pre-packaged Vega Protein pack and when I measured it out, it was just shy of the 1/2 c. mark. Hence, the weird flour measurements

Instructions:

  1. Whisk together the flour, protein powder, cinnamon and salt in a large bowl and set aside.
  2. In a separate bowl, stir together the apple sauce, syrup, and vanilla.
  3. Add the wet ingredients to the dry ingredients and stir until combined.
  4. Fold in the oats, coconut, craisins, walnuts, and cacao nibs.
  5. Scoop 1½ tablespoons of dough, roll into a ball, then gently flatten the dough with the palm of your hand. Place on a baking pan lined with parchment paper.
  6. Bake at 350 degrees for 12-14 minutes until firm and bottoms are golden brown

DSC_2245

DSC_2246

One of the hardest things I have found when attempting to eat healthy over the past year or so is that sugar and snacks are SO hard to cut out of your diet. I wanted to make these “cookies” as hearty and as healthy as possible while still fooling my brain into thinking it’s snacking. So I did my best to eliminate the extra sugar from this recipe by using unsweetened apple sauce, coconuts and craisin. I also tossed the chocolate chips and used roasted cacao nibs. I will be honest- these definitely aren’t going to replace chocolate for me, they definitely don’t taste like a chocolate chips and they aren’t that great plain. BUT, I found they gave enough of a chocolate hint when cooked into the cookies to fool my brain without over powering the other ingredients. Cooking them into the cookies took away a lot of the bitterness. I want to try the semi-sweet chocolate baking squares next time.

DSC_2234

Alright, everyone. I hope you have a fantastic weekend! It’s rainy and gross here in Boston but try and stay positive this weekend. Get out and do something spring-y, meet some awesome new people or, you know, tell someone you love them with an animated poop icon. Whatever puts a smile on your face 🙂

Read Full Post »

So, let me introduce you to no-bake Chocolate Peppermint Bars. I’ve made these twice now: once, they came out, well, not so great. I may have, possibly, dumped an entire canister of salt into the food processor instead of 1/2 tsp. Then, because I had used the last of my cocoa powder for these bars and had no other desserts lined up for a snack for the week, I may have spent 30 minutes oh-so-carefully scooping out as much of the salt as I possibly could in an attempt to salvage these bars.

Not surprisingly, that didn’t really work and the end result was a very, VERY salty dessert bar that I attempted to eat so I wouldn’t waste it. And even less surprising, I had to throw them out half way through because I just couldn’t torture myself anymore.

BUT, as fate would have it, Angela at Oh She Glows ended up posting a sugar-free version a week or so later, which I was even more excited to try! See, everything in life happens for a reason.

Chocolate Peppermint Bars
from Oh She Glows

  • 1 cup packed, pitted Medjool dates (approx 12)
  • 1 cup rolled oats
  • 2 tbsp cocoa powder
  • 1/4 tsp fine grain sea salt, or to taste
  • 2 tbsp almond milk
  • 1/2 tsp peppermint extract, or to taste
  • 1/2 cup walnuts
  • 1/4 cup almonds
  • 4 tbsp mini dark chocolate chips (I use Enjoy Life) or chopped chocolate
  • 1-2 tbsp large flake unsweetened coconut, for garnish, or, I used unsweetened flaked coconut

Line a loaf pan with two pieces of parchment paper, one going each way. Set aside. In a food processor, process the pitted dates until chopped and sticky.

Add in the rolled oats, cocoa powder, salt, peppermint extract, and almond milk. Process until combined, scraping down the side of the bowl as needed.

Add in the nuts and chocolate chips and pulse until combined and sticky. It should be sticky enough to easily make a ball.

Crumble mixture all over prepared loaf pan. Sprinkle a handful of coconut on top and press mixture into pan with slightly wet fingers. Cover with a piece of parchment paper and roll out smooth with a pastry roller.

Freeze for about 15 minutes or until set. Slice into 6 rows and then slice rows in half to make 12 small bars.

These little bars would be great to munch on while your picking apples, having a picnic on a nice fall day or on a road trip to check out the foliage! And you know, for lunch boxes and stuff.

Read Full Post »

Buffalo Hummus

I’m back! Singularly employed, once again, and looking forward to 1. having my weekends back! Two whole days off?? CRAZY! and 2. spending a little more time on content for WV. yeah! Now, back to the food…

There is a scene in Ten Things I Hate About You where Biana and her friend are chatting and their conversation goes:

Biana: I know you can be overwhelmed and you can be underwhelmed but can you just be whelmed?
Her Friend: I think you can in Europe…

Well, consider this Europe because “just whelmed” is exactly how I usually feel about hummus! I don’t love it, I don’t hate it, it is just something that’s…ok. I’ll eat it every now and again randomly but I never end up finishing a container and it usually ends up going bad.

But this recipe is definitely the exception. My friend, Amelia, made it a few months back when we had our pretentious drive-in experience. She brought this along with pita chips and veggies. In fact, it was the pita chips that almost caused me to have to pull the car over because there was a squabble regarding how soon movie snacks can be opened before the movie. The answer: definitely not on the way to the movie!

Anyway, Amelia sent me this recipe a few weeks ago and I’ve been dying to make it…and then eat it immediately. Like, all of it.

Buffalo Hummus
courtesy of Amelia

  • 1 can of chickpeas (or the equivalent if you are using dried)
  • 1 TBSP tahini
  • 4 TBSP Frank’s Red Hot Buffalo Sauce (you can use regular Frank’s Red Hot if that’s what you have or you don’t feel comfortable with the “butter flavoring” ingredient. This was just what I had in my fridge)
  • 5 Peppadew peppers (these are located in a jar, generally in the deli section. They have mild and hot. I used mild cause I’m a whimp but hot would be great, too)
  • 1 clove of garlic
  • 1 TBSP of olive oil
  • salt to taste
  • red chili flakes (optional)

Put the chickpeas, tahini, Frank’s Red Hot, peppadew peppers, garlic olive oil and salt into a food processor and process until smooth. Taste. Add more heat if need be. Drizzle more Frank’s Red Hot on top and sprinkle with red chili flakes for garnish.

I seriously love this hummus recipe. I was scraping every last bit out of the food processor with the cucumbers. I may have even pulled out a bag of old potato chip when I ran out of cucumber slices. Those didn’t really work but I did try them! I was able to restrain myself a bit and actually make a rather delicious meal with this. You will have to tune in later in the week for that recipe. Two words, though: caramalized. pineapple. Oh yeah!

Read Full Post »

Spiced Popcorn

True story: I have an addiction to smuggling things into movie theaters.

It started as a small problem- My mom would bring us to CVS before seeing a movie and we would smuggle candy into the theater. Note, I said my Mom. My Dad tried it once and all the sneaking around nearly caused him to have a heartattack in the theater. We weren’t allowed to eat our smuggled items until all the lights went out and the movie started to cover the noise. I’m pretty sure even at 10 I was looking at him like he was nuts.

But, the smuggling back then was ok because we usually bought popcorn when we got there. It evens out, right?

Then, when I reached my teen years, I would smuggle in one of those ginormous bags that gets you free refills. I would go into the theater and about 10 minutes into the movie, I would pull out the popcorn bag and go to the snack bar and tell them I spilled it in the theater and needed a refill.

Brilliant, I know.

But my smuggling really hit it’s peak a few years ago when me and a date smuggled in full sandwiches, chips and drinks into an after-work showing of Social Network. You know a dudes legit when he goes along with sandwich smuggling.

I wish I could say I was a reformed smuggler but since going vegan, I now have to smuggle my popcorn in, too. I mean, I love me some movie theater popcorn but that liquid butter they drown the popcorn in is either 1. a dairy product or 2. chemicals that mimick a dairy product and that isn’t much better! Rumor has it the popcorn is first popped in coconut oil so if you ask for no butter, you are in the clear. But, whenever I ask anyone at the theaters (who never seems to be older than 17), they all seem a bit stoned and give me vague answers like ‘coconut oil? uh…sure’. Riiight…I think I’ll stick to my smuggling habits

Melinda’s Popcorn aka Spiced Popcorn

*all the measurements in the recipe are approximates. Adjust according to your taste*

  • coconut oil
  • 1/3-1/2 c. corn kernels
  • olive oil
  • 1 tsp salt
  • 1 tsp paprika
  • 1 tsp onion powder
  • 1 tsp garlic powder
  • pinch of cayenne pepper

Pop kernels using your preferred popping method (air popping, brown bag in the microwave, or on the stove top.  I usually prefer in the microwave but my microwave burst into flames last week so I will be showing you the stove top method.)

Pour a few TBSP of coconut oil on the bottom of a big pan with a cover (I used a big soup pot), add a few kernels, cover and set over medium high heat. Once one or two of the kernels have popped, add the rest of your corn kernels and cover. Shake and move the pot around continuously to prevent the popcorn from burning. Continue until the kernels stop popping

Pour the popcorn in a bowl. Drizzle olive oil on the popcorn and about 1/2 tsp each of the salt, paprika, onion powder and garlic powder and a bit of the cayenne pepper. Toss. Drizzle a little more olive oil and toss. Drizzle more olive oil and the rest of the spices. Toss and taste. Add a little more of whatever else you think you need (which almost always is more salt for me).

This is hands down my favorite popcorn I’ve made from scratch. The spices give it such a good flavor that you don’t even miss the liquid butter…or the 800 knapkins you need to wipe the butter grease off your fingers. Much thanks to Melinda for introducing this to me at the drive-in.

I hope everyone has a great weekend! Should I leave you with a Friday song to rock out too?? Oh ok, here you go. My new favorite song:

Read Full Post »

Two weekends ago, Melinda and Amelia came over for a dessert baking party. Wine was opened, chocolate was melted and these bars were inhaled. I’m not exaggerating. Melinda wouldn’t even wait for them to set! The pan of Trail Mix Seven layer bars was passed around between all of us on the couch (including two of my roommates) and we ate them directly from the pan.

With our hands.

I wish I was kidding.

I wish we could say we were stoned to at least excuse our behavior but nope! They were just delicious and that’s the only excuse we had!

I woke up the next morning to find a tiny little corner piece was all that remained. The five of us ate almost the whole pan! Clearly, a photograph was not taken and even if it was, I don’t think any of us want us unceremoniously shoving trail mix bars into our faces with our hands to be available on the internet!

Either way, I was forced to make them again for you so I could actually get a picture.

Trail Mix Seven Layer Bars
inspired by Vegan Baking

Crust:

  • 9 cinnamon graham crackers (one packet in Honey Graham Set)*
  • 5 TBSP of coconut oil, melted
  • 1 TBSP + 1tsp water
  • 1/8 tsp salt
  • 1/2 cup apple juice infused dried cherries (or regular dried cherries)
  • 1/2 cup craisins
  • 1/2 cup chopped almonds
  • 1/2 cup chopped pecans
  • 1/2 cup vegan chocolate chips
  • 1 cup condensed milk (recipe here. I used Unsweetened Vanilla Almond milk this time)

Prepare the condensed milk ahead of time.

Preheat the oven to 325F. Line an 8×8 baking dish with parchment paper and set aside.

Put the graham crackers in a large ziploc baggy and crush until the graham cracker are roughly the texture of sand. (You can use a food processor but honestly, why lug it out and then have to wash the whole darn thing when crushing them works just as easily??).  Add coconut oil, water and salt to  your crushed graham crackers, seal up the bag and mush it all around until everything is well incorporated.

Dump the graham cracker crumbs into your 8×8 pan. Spread evenly. Use the bottom of a drinking glass to press down on the crumbs until they are tightly packed together.

Cover the graham crackers with the toppings. Pour the condensed milk over the toppings.

Bake for 35 minutes.  Once removed from the oven, allow to cool completely before cutting into it. I would recommend putting it in the fridge overnight. If you don’t let it cool, it will just be a crumbly mess of ingredients. I mean, it will still be delicious! But it won’t hold together in bar form. Trust me…the crumbly mess is what we ate the first go around because we were impatient.

*I know graham crackers often have honey in them. I could not find honey-less graham crackers when I was at Whole Foods but I don’t have an issue with honey so I went ahead and used them. Also, the Honey Graham brand and Whole Food’s 365 brand had mostly the same ingredients. If you are looking for a honey-less, more all-natural version, I would recommend trying to make these and swap out the honey for agave syrup or maple syrup. These have been on my ‘to-make’ list forever but this recipe wasn’t the time to try it.

The idea for these came about because my cafetaria at work always has seven layer bars and they are sooo good. and sooo not vegan. This was my vegan version. It’s a little heartier with all the fruit and nuts. The great thing about these is, like trail mix, you can customize it to your liking. You could swap out the cherries for raisin (eww, please don’t) or dried blueberries. You could swap out the almonds and pecans for different types of nuts. And you could use any time of non-dairy milk for the condensed milk.

Now seriously, go make these. And maybe have a fork ready so you don’t end up eating them with your hands. Though…I hear all the cool kids are doing that…just sayin’.

Read Full Post »

Older Posts »