Feeds:
Posts
Comments

Posts Tagged ‘dinner’

Wicked Vegan- Stuffed Accorn Squash1

ahh, Thanksgiving. Probably one of the hardest holidays for those with dietary restrictions. Raise your hand if you have been taunted with greasy turkey legs, been asked a million questions about your diet (“But where do you get your protein? Don’t you miss meat? What would happen if you had one bite? Wouldn’t it be funny if I hid meat in your vegetables?!”) and generally felt left out over this holiday. There was definitely one Thanksgiving when I was a vegetarian when my options were mashed potato, rolls and a garden salad. All good things but not super festive, you know? So I feel ya’. I’ve compiled some yummy tidbits from the blog that I think you could bring to your Thanksgiving dinner and not get crap over (“Is this some sort of healthy, vegan food??”). All the below recipes have been tested on meat eaters and received thumbs up.

Actually, that’s a lie…I never tested the Vegan Green Bean Casserole out on my family because I hoarded it all to myself. True story.

bbqpolentabites

BBQ Polenta Bites

Three Pepper Hummus

Buffalo Hummus

Blueberry Salsa

Black Bean Salsa

Hot Pretzel Challah Bread

pumpkinburger

Southwestern Pumpkin Burger

Butternut Squash Apple Soup

Black Bean Quinoa Soup

Green Bean Casserole

Garlicky Brussel Sprouts

Wicked Vegan PB Krispie Treats

Peanut Butter Krispie Treats (these would be so cute with little turkey cookie cutters and sprinkles)

Chai Spiced Cookies

Now, you can probably see there aren’t a lot of main dishes up there. The past few years I’ve eaten Tofurkey but I just wasn’t feeling it this year. Those Tofurkey loaves are a lot for one person! I end up having leftovers for ever. So this year I am trying a stuffed acorn squash. I was SO impressed and happy with the way it came out. I made this recipe while at my parents this weekend and my mom, a meat eater, got to sample everything and was equally impressed.

IMG_1300

Apple, Quinoa and Kale Stuffed Acorn Squash with Tahini Maple Dressing
from Edible Perspective, with mild adaptations
yields 4 main dish servings

for the dressing:

  • 1 garlic clove, peeled + smashed
  • 1/4 cup lemon juice
  • 1 tablespoon olive oil
  • 3 tablespoons tahini
  • 2-3 teaspoons pure maple syrup
  • salt + pepper to taste

for the squash and apples:

  • 3 tablespoons unrefined coconut oil
  • 1 1/2 tablespoons pure maple syrup
  • 1/8-1/4 teaspoon cayenne pepper
  • 2 medium acorn squash
  • 2 crispy apples (I used honeycrisps)
  • salt + pepper

for the kale and quinoa:

  • 3-4 teaspoons unrefined coconut oil
  • 1 cup uncooked quinoa, rinsed and drained
  • 2 cups water
  • 5-6 cups chopped kale (lacinato/dino was recommended but seriously, I can never find it. Curly green kales works just fine)
  • 1 1/2 teaspoons minced garlic
  • salt + pepper to taste
  • 1 tablespoon lemon juice
  • 4 – 5 TBSP dried cranberries
  • pecans for garnish

for the dressing: Combine the smashed garlic, lemon juice, and oil in a jar.  Seal and shake vigorously.  Let sit for 10 minutes.  Shake once more then remove the garlic.  Add tahini, maple syrup, lemon zest, and a big pinch of salt and pepper.  Seal and shake until smooth.  Taste and adjust salt/pepper/maple syrup if needed.  Set aside.  Store leftovers in the fridge for up to 1 week.

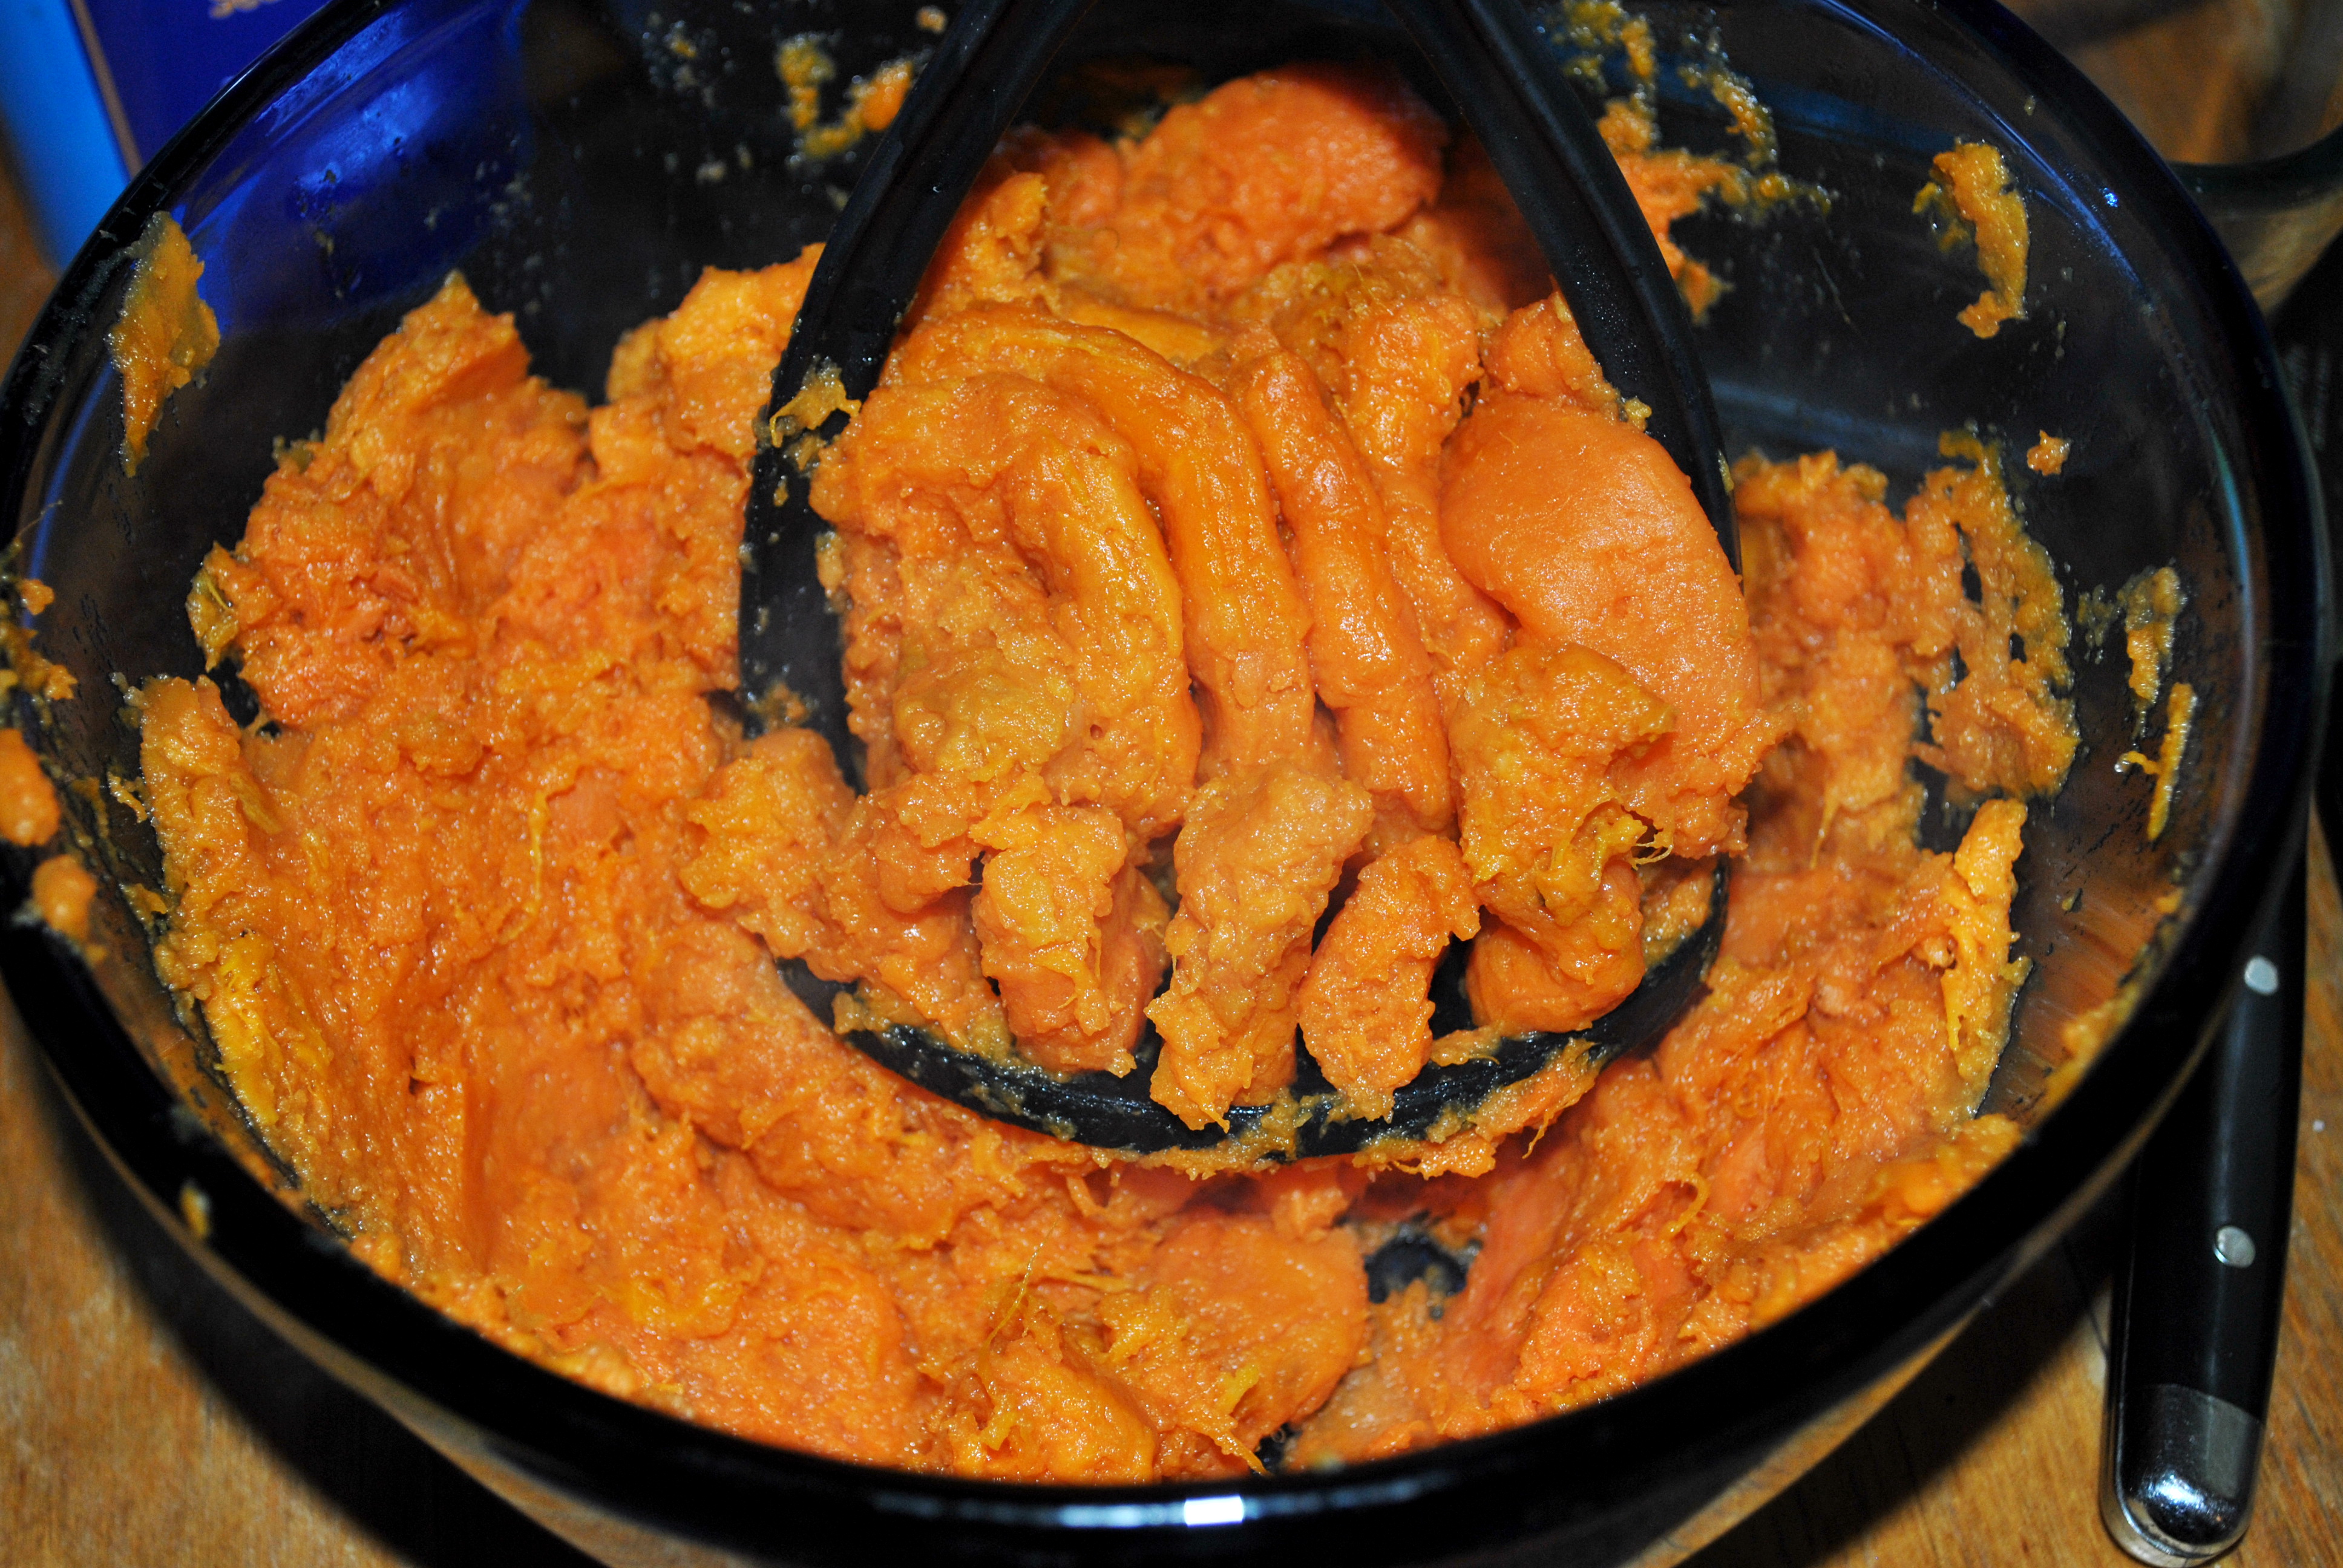
for the squash and apples: Preheat your oven to 400* F.  In a small pan combine the coconut oil, maple syrup, and cayenne over medium-low heat and stir until melted.  Take off the heat.  Slice 2 acorn squashes in half, remove and toss the seedy middle and coat the flesh with the oil/maple mixture.  Place squash halves cut side down on a baking sheet and roast for about 35-40 minutes until tender.  A few minutes later slice the apples into 1/4-inch thick slices, removing any seeds/core.  Place on a baking sheet and toss to coat with remaining oil/maple mixture.  Place in the oven during the last 7-10 minutes of squash roasting.  Roast for 7 minutes to maintain a nice crunch.

for the kale and quinoa: As soon as the squash is in the oven heat a pot over medium with 2 teaspoons of coconut oil.  Once hot add the quinoa and stir for 2-3 minutes.  Add the water then raise heat to medium-high.  Bring to a boil, stir, then reduce heat to simmer and cover for 15 minutes.  Remove from the heat and keep covered.  After placing your apples in the oven to roast place a large pan over medium heat and melt 1-2 teaspoons of coconut oil.  Once hot, add the garlic and stir for about 30 seconds, then add the kale and stir frequently for about 3-5 minutes until wilted.  Fluff the quinoa with a fork and combine in the pan with the kale.  Sprinkle with a good amount of salt and pepper and add the lemon juice and craisins.  Stir to combine. Once the the squash and apples are complete, dice the apples and combine with the quinoa and kale.

to assemble: Place the roasted squash half on a plate and fill with the quinoa mix. Drizzle with the tahini dressing and sprinkle with pecans.

*NOTE* If you are making this for Thanksgiving, you can make the dressing and quinoa/kale mixture ahead of time (including the apples) and save the acorn squash for the day of. You can microwave the filling after  you pull out the squash. It will save some time and dishes when there is a ton going on in the kitchen. You can also cook and stuff the acorn squash the night before (do not put dressing on) and reheat the next day on 350 for about 40 minutes uncovered (covering may speed the cooking time). Just a few things to keep in mind when prepping for Thanksgiving.

—– other serving option —–

for a salad- style dish: visit Edible Perspectives page and check out how she presents this as a salad dish. This option would be great if you want to make this dish for a large group of people or want to serve it as a side-dish.

Wicked Vegan- Stuffed Acorn Squash3

This recipe is so yummy! I love love love the dressing and will most likely be using this as my go to dressing going forward. Also, I am a huge fan of the roasted apples and craisins mixed in. It gives it such a nice sweetness. Plus, it just looks so pretty when plated up!

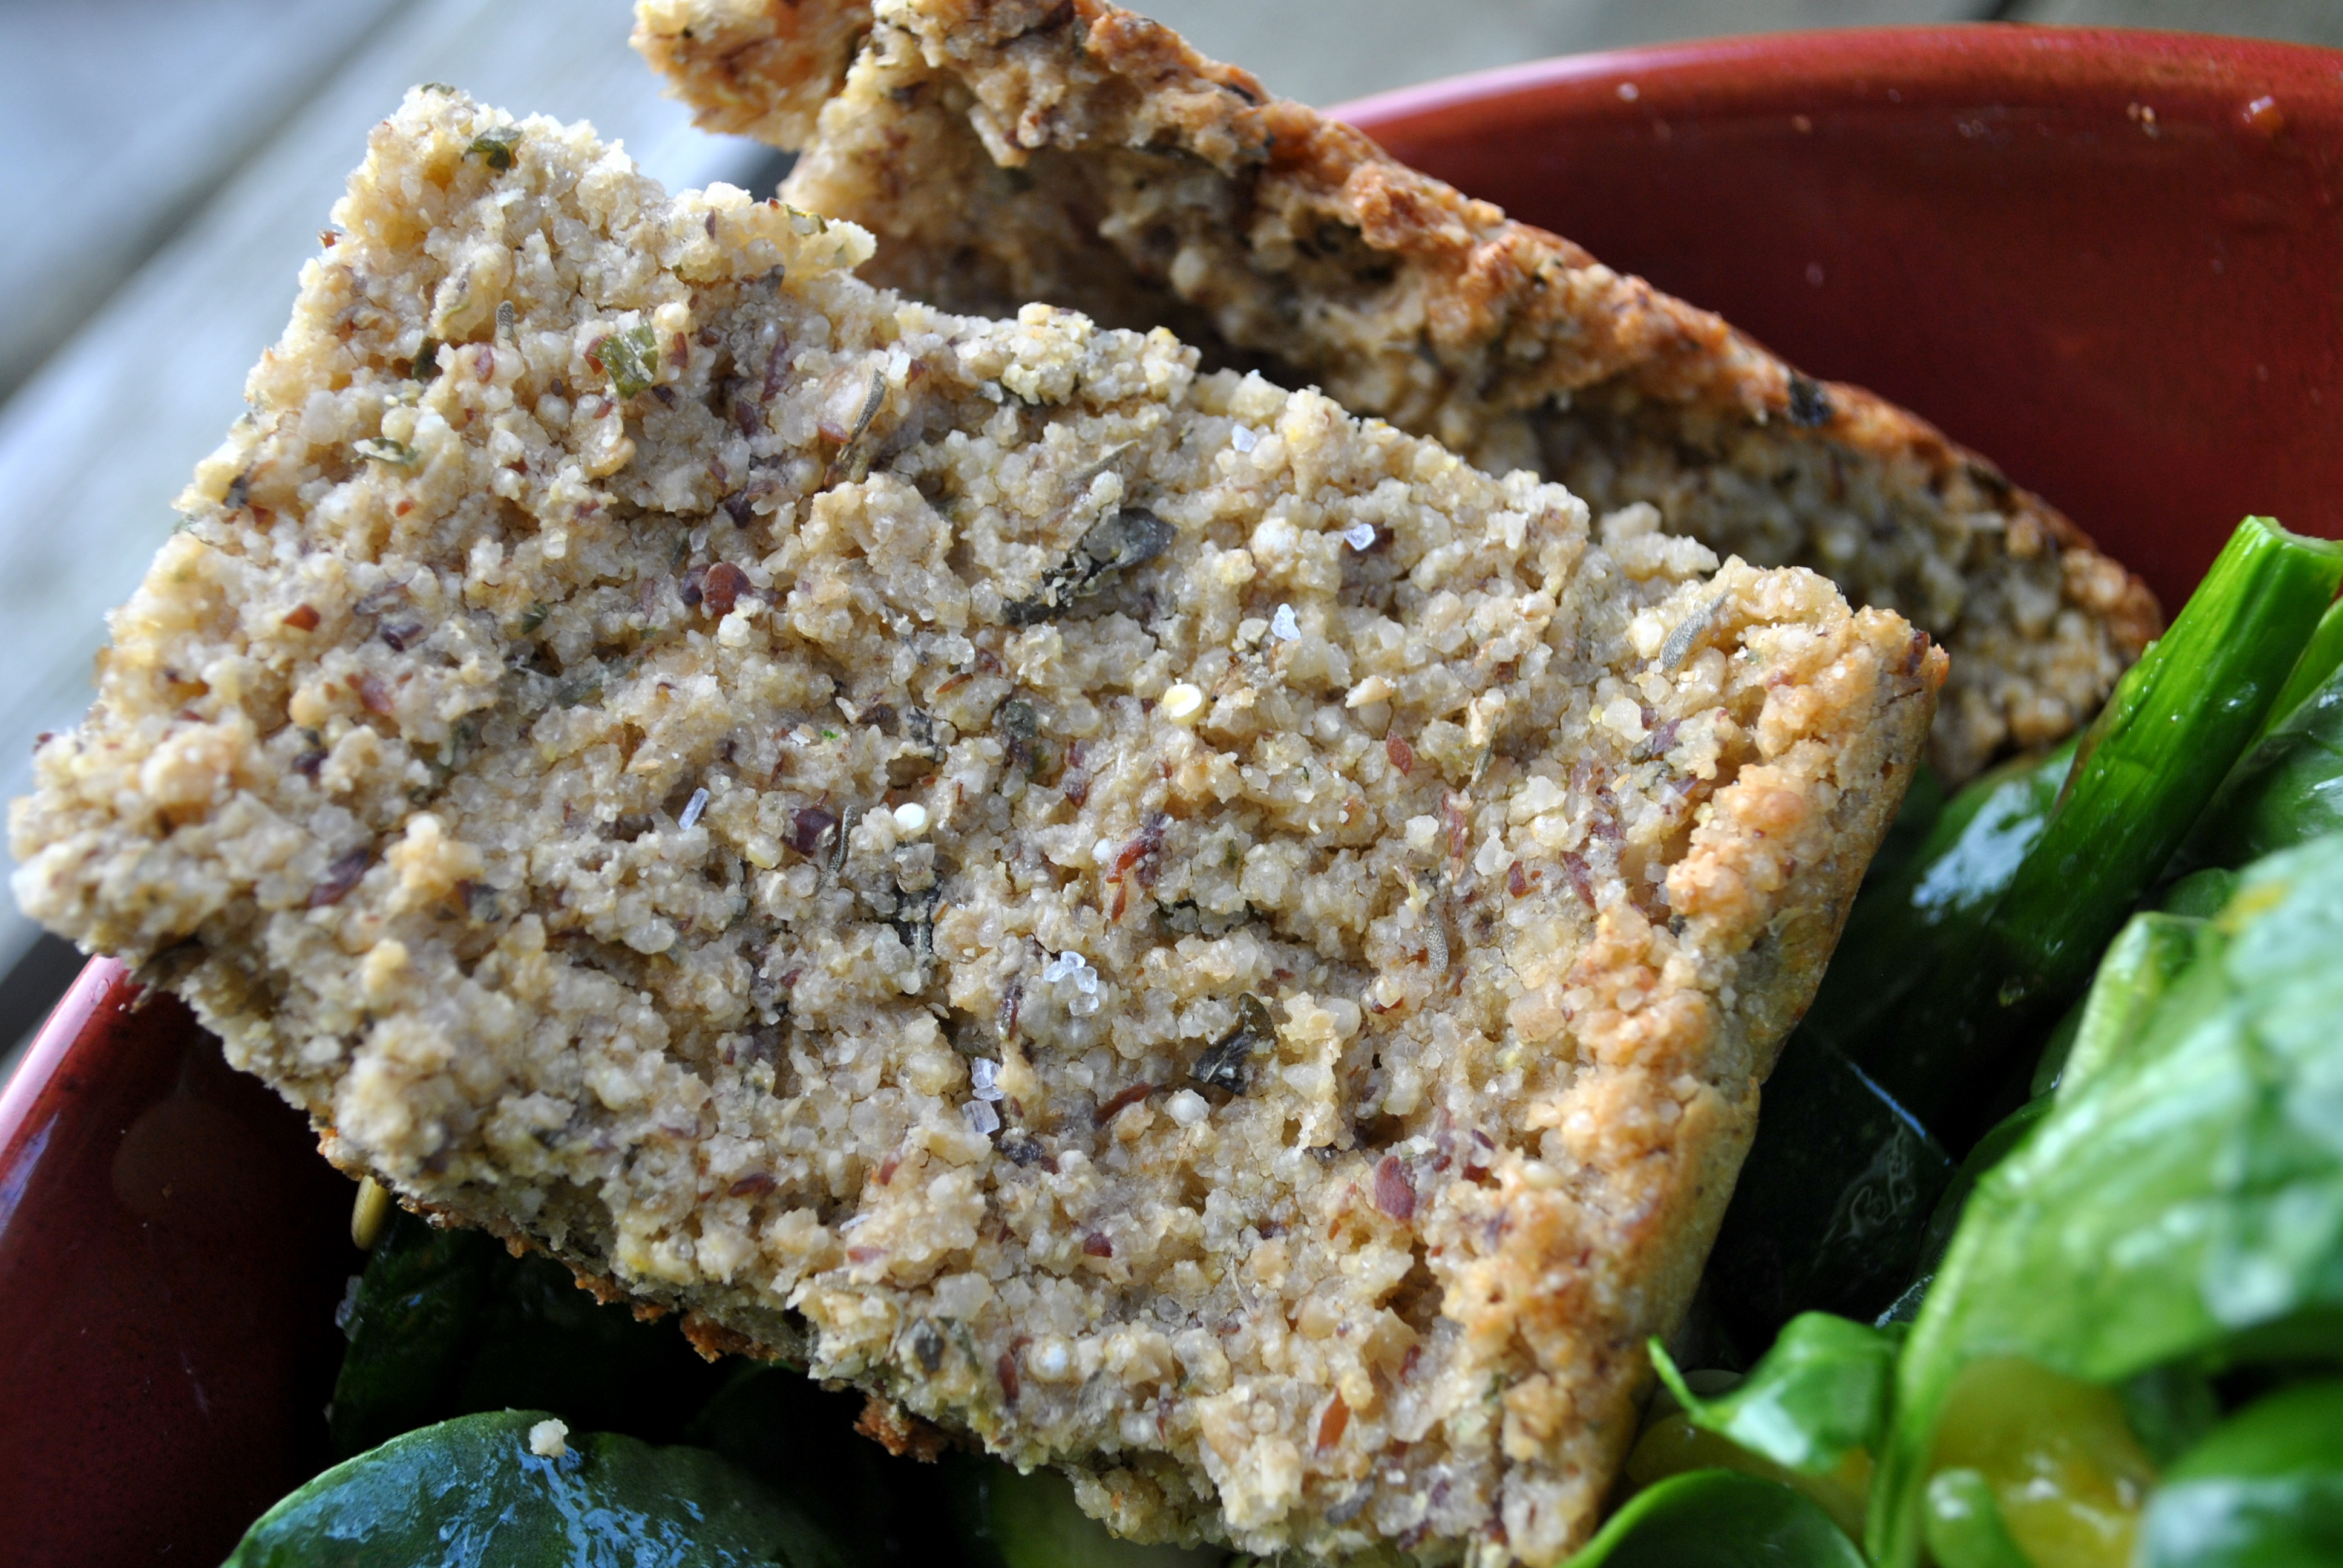
If you are wondering what I served with it in the picture above, that is the stuffing I will be sharing with you tomorrow. Trust me when I say you are going to want to tune it. It has this challah pretzel bread in it!

Read Full Post »

DSC_0882

Remember when I said I was in a food rut? Apparently that is still in place. I just checked my back posts and realized I haven’t posted a recipe for a real meal since Dec. 2. It’s been desserts, snacks and breakfast foods ever since then.

I mean, if I’m being honest with you, those are the only meals that I really care about but I try to at least pretend to be a responsible adult.

To make matters worse, this wasn’t even really my idea! As I’ve mentioned in past posts, I love wraps but can’t successfully wrap a wrap to save my life. I almost always put too much or too little in, never heat them correctly and somehow rip them. It’s a serious problem people! And that’s with normal, run of the mill flour tortillas. The one time I tried rice paper wraps was disastrous!

Instead, this recipe is due 100% to the fact that when I asked the 13 year old what he wanted for lunch one day, he said “summer rolls with noodles”. I laughed at him, told him we didn’t have the ingredients, he found them, proceeded to laugh at me and then I had a mini panic attack because  I can’t handle rice paper wraps!

Fun twist, I can, in fact, handle rice paper wraps. So much so that I’ve made them about a million times for lunch since that fateful day AND made them one time to feed the family while the Dad was away. I got all the ingredients ready, laid them out and the kids made their own. It was a hit! Here’s my favorite variation:

DSC_0879

Tofu Mango Summer Rolls
makes 3 wraps= 1 serving

  • 25g of asian marinated tofu*
  • 1/5  an english cucumber, grated
  • 1/2 a large carrot, grated
  • 1/2 an avocado, cut into strips
  • 1/3 a mango, cut into strips
  • 1 green onion, green and white parts, sliced
  • 1/4 cup basmati rice, cooked (angel hair pasta also tastes really good and is what I used with the kids)

For dipping sauce:

  • 1 TBSP Sweet Chili Sauce
  • 1/2 TBSP Low Sodium Soy Sauce (or more to taste)
  • splash of toasted sesame seed oil (optional)

*weird measurement, yes. But I’ve been using  this tofu, which is pre-marinated and comes in four pre-cut servings. I know, it’s lazy but at least it’s not more dessert!

Instructions (I’m including step-by-step pictures, which I normally hate but sort of felt necessary):

1. Get all your ingredients set up on your chopping board. You have to work quickly when you are making these.

DSC_0885

2. Grab a pot or pan that is large enough to lay your wrapper in without bending it. Fill it  with warm water (I like a frying pan best). Line a plate with a clean, dry towel.

3. Submerge your wrapper in the warm water for approximately 30 seconds until it is soft and pliable.

DSC_0889

4. Lay out the wrapper on the clean towel (this towel is clean, I swear!).

DSC_0903

5. Pile the ingredients on one end leaving room to fold the end over the ingredients, like a burrito.

DSC_0895

6. Fold the end with your filling over the filling.

DSC_0896

7. Fold in the sides.

DSC_0906

8. Slowly roll up the filling in the rice paper.

DSC_0897

9. Mix the Low Sodium Soy Sauce and the Sweet Chili paste together. If you like toasted sesame seed oil, a splash of that adds some great flavor but it isn’t necessary.

10. Dip in your Summer Rolls and chow down!

DSC_0882

I know the dipping sauce is pretty simple and not that innovative. I tried a bunch of different variations and concoctions- garlic, soy sauce, ginger, sweet chili sauce, sesame oil, hoisin sauce, rice vinegar, etc- but honestly, my favorite was just the simple sweet chili sauce and soy sauce combo. It was easy, came together fast and the simplicity matched the rolls. I like these rolls because they are fast and light which is what I’m looking for in this heat. I didn’t want to complicate the meal with a fancy sauce. Feel free to experiment though!

When I made these for the family, I paired them with these green beans and the meal was a huge success!

Ok, tomorrow, we are back to dessert. And if the past few months are any indication, that will be the norm for the next two months. YEAH!

Read Full Post »

DSC_0196

Things have been terribly uninteresting, food-wise, here in Aussie. For the past few weeks, I have been totally and completely uninspired. For breakfast, I have grapefruit and toast. For lunch, I have veggies and store bought hummus. Sometimes I go wild and have peanut butter and celery. Hold me back!

As a result, new and interesting foods have been scarce. I’ve tried one or two new recipes but they have all fallen short. I think I’ve temporarily lost my kitchen mojo!

This could very well have to do with a hacking cough and lingering feeling of ‘blah’ that I haven’t been able to shake for about a week or so. I’ve been downing green tea and honey like it’s going out of style. And I’ve been craving soup except it’s hot out! Maybe I just need to feed my soup craving and all will return to normal.

Despite the boring food phase I’m facing, I do have this recipe that I promised you a bajillion years ago (or 3 weeks) that I just haven’t gotten around to posting. It uses the Cheeze sauce recipe that I made for Halloween. I made another batch and have been using it for Mac and Cheeze, which is at least somewhat of a comfort food. Even if it isn’t the piping hot soup I crave.

DSC_0190

Veggie Loaded Mac and Cheeze
serves 2

-3 TBSP olive oil

– 3 cloves of garlic

-half an onion

-half a bunch of curly leaf kale

-1/2 c. of tomatoes (I used small cherry tomatoes)

-1 1/2 – 2 c. of pasta of your choice (I used gluten-free buckwheat spirals)

-about 1/2 c. of Cheeze sauce, or more to taste

Heat oil over medium -low heat in a medium sized skillet. Add the onions and the garlic and saute for 2-3 minutes. Add the tomatoes, stir and cover, cooking until the tomatoes are soft and mushy. This should be about 5 minutes. My goal here was to create a really flavorful oil base to cook the kale in. Once the tomatoes are soft, add the kale and toss so it’s covered in the oil. Cover for 5 minutes until the kale and bright green and cooked down. Give it another good toss. Reduce the heat to low.

While the kale is covered and cooking, put your pasta on. Cook according to instructions. Once cooked and drained, add it your kale mixture. Toss everything together. Add your Cheeze sauce and stir/toss to coat. Add more if desire. Keep heat to medium low and heat your mixture until the sauce is hot. Serve right away.

Half recipes if you are making for one person. Leftovers to do not heat up well.

DSC_0191

I’ve made this a few times and more often then not, I serve it in a big bowl and eat it curled up on the couch reading. It’s such a good comfort food meal. You will never pass this off as real mac and cheese to your non-vegan friends but it’s a great, veggie packed recipe that hits that craving when you want the blue box.

I do have a Travel Tuesday for you tomorrow and, hopefully, a Friday Favorite that I’ve been sitting on forever! We’ll see how I come along with the recipes. Fingers cross I create something not sucky soon!

Read Full Post »

DSC_0006

This post just didn’t want to happen. I’ve opened WordPress approximately 800 times to write it and approximately 800 times I’ve managed to do just about anything else.

I feel like the kids when I’m trying to get them to do their homework. They want to do just about anything BUT what’s in front of them.

Talk about the day: Check.

Put their head down and whine about how much they hate school: Check.

Sing Lady Gaga: Check.

Dance to Lady Gaga: Check.

Pretend the chairs are the bars from gymnastics: Check.

Fall off fake gymnastic bars because they are, in fact, chairs and have a fake melt down: Check.

DSC_0009

Literally, anything other then doing actual work is an option. They’ll do one problem or read one sentence and they’re off doing something else and I have to refocus them. That’s exactly how I’ve felt writing this blog but no one has been around to refocus me so instead I:

Write post cards: Check.

Sing Taylor Swift: Check.

Dance to Taylor Swift: Check.

Write 2 other blog posts for later in the week: Check.

Look up xmas presents on the most obscure websites ever: Check.

Check every single on line store I have ever shopped at for an update on their products (I’m looking at you Toms and your super cute new star shoes): Check.

Work out: Actually….uh, nah! I think I’ll blog. lol!

Despite my new found A.D.D, this “cheeze” sauce was divine. I originally made it for the Halloween Quesadillas and then began putting it on pasta with kale and tomatoes for a sort of vegan, veggie loaded Mac and Cheeze. I seriously can’t get enough. Here is the recipe for the quesadilla. I will share the pasta with you next week.

Do you like my fancy bowl?

Do you like my fancy bowl?

But first, let’s start with the sauce:

Vegan “Cheeze” Sauce
by Oh She Glows

Ingredients:

  • 1 fresh butternut squash* (peeled and chopped) OR 1 cup canned butternut squash OR canned pumpkin (I only tried it with roasted squash, a combo of butternut and japanese, but pumpkin is next if I can find it canned!)
  • Extra virgin olive oil, S & P
  • 1 tbsp Earth Balance (or other non-dairy butter replacer)
  • 3/4 cup unsweetened & unflavoured almond milk 
  • 1 tbsp arrowroot powder (or cornstarch) (arrowroot is cheaper in Australia, so I used that)
  • 6 tbsp nutritional yeast, or more to taste
  • 2 tsp Dijon mustard
  • 1/4-3/4 tsp garlic powder
  • 1/2 tsp onion powder
  • 1/2-1 tbsp fresh lemon juice
  • 1/2-1 tsp kosher salt (to taste) & ground black pepper, to taste

1. If you are roasting squash, preheat oven to 425F. Line a casserole dish with tin foil. Mix chopped squash with EVOO, S & P. Roast for about 40 minutes, uncovered, or until tender. Remove and set aside to cool.

2. Next, prepare the roux in a pot on the stove top. Add non-dairy butter over low-medium heat. In a bowl, whisk together milk and arrowroot powder (or cornstarch or flour) until clumps are gone. Add into pot with butter and whisk. Stir in remaining ingredients (nutritional yeast, Dijon, garlic, lemon, S & P) and whisk over low heat until thickened (about 5-7 minutes or so).

3. In a blender, blend the roux with 1 cup of roasted squash (or if using canned, simply stir 1 cup into the pot).

Voila! You have a cheeze sauce. Now, what to do with it:

DSC_0012

Veggie Cheeze Quesadillas
makes approximately 4 quesadillas

vegan butter

1 yellow onion, thinly sliced

olive oil

1 garlic clove

1 red pepper

8 oz of mushrooms

salt and pepper

1 batch of vegan Cheeze sauce

option toppings: guacamole, salsa, vegan sour cream

In a small pan, melt a bit of vegan butter over medium low heat. Once melted, add your sliced onions and stir to coat. Let sit, stirring occasionally until caramelized. This should take 15-20 minutes.

While your onions are caramelizing, slice up your red peppers. Heat some olive oil in a different frying pan  over medium heat. Add your garlic and sautee until fragrant. Add your red peppers. Stir occasionally until soft, this should take about 15 minutes. After the peppers have been cooking for about 5 minutes, throw in your mushrooms and continue cooking for the remaining 10 minutes. Season with salt and pepper to taste at the end.

Once your veggies are done, Preheat oven to 350.  Lay out your tortilla shells. Cover 4 of the shells in Cheeze sauce. Top with your cooked veggies. Place the remaining shells on top. At this point, you can cover the quesadillas and place in the fridge if you are making them ahead of time. I would not recommend leaving them in the fridge for longer then 1 day. The edges tend to dry up and get stale.

Once you are ready to cook, place in the preheated over and cook for about 10 minutes until the tortilla shells have started to turn golden. Remove from the oven, slice up, add your toppings of choice and devour!

Another option would be to cut up all your veggies and cook them with a taco or fajita seasoning, either in the oven or on the stove. I really wanted caramelized onions though which is why I opted for the stove top veggies. 

This recipe is customizable so go crazy with it. 

DSC_0036

Pumpkin faces totally optional, but it does make it more fun!


Read Full Post »

DSC_2259

During the whole Team Lean Challenge I did with my friend, Rachel, I cut out a ton of bad food. I realized if it was in my house, I would eat it. I’m looking at you bread, pb and chocolate chips. I may not have cookies in the house but combined, you make an amazing 9pm snack.

At the top of my list was pasta. It’s just so easy! I mean, I could roast a ton of veggies which takes forever… or I could just heat up some noodles and dump some sauce on it/cook up roman noodles/pour boxed mac and cheese into a pot.

DSC_2249

See. Pasta had to go.

But the week of the bombings in Boston, a friend of mine was planning a potluck for Sunday as a way to end what had been a very stressful week on a positive note. It was a great idea! I brought this and all the non-vegans ate it up. I had no leftovers!

Of course, it was so delicious, I was dying to make it again, fitness challenge or not! When I made it for just me, I pumped up the veggies significantly and added some tofu for an extra kick of protein. The result was a super creamy, veggy-packed noodle fest. So delicious!

DSC_2251

Peanutty Noodles and Veggies
adapted from Chloe Coscarelli’s Peanutty Noodles recipe found in Chloe’s Kitchen and on line at KATU.com
s
erves 4 to 6

  • 1 pound brown rice noodles
  • 1 block of tofu, pressed and cubed
  • 1 cup coconut milk
  • ½ cup water
  • ¼ cup maple syrup
  • ¼ cup soy sauce
  • ½ cup peanut butter, chunky or creamy
  • 1 tablespoon chili-garlic sauce
  • 1 teaspoon grated fresh ginger
  • 3 cloves garlic, minced
  • 2 tablespoons lime juice
  • 1 tablespoon toasted sesame oil
  • 2 carrots, peeled and shredded
  • 1 cup of edamame (no shells, thawed if using frozen, which I did)
  • 1 red pepper, diced
  • 3 scallions, trimmed and thinly sliced
  • ½ cup peanuts, roughly chopped, for garnish

Instructions:
Bring a large pot of heavily salted water to a boil. Add brown rice noodles and cook according to package directions. Drain, rinse with cold water, and drain again. Return noodles to pot.

Heat some sesame oil in a skillet. Saute tofu in the pan until golden. (if you prefer your veggies cooked, you can also throw them in with the tofu at this time. I sauteed my edamame with the tofu but left my peppers and carrots raw). Set aside.

Meanwhile, make the sauce by combining coconut milk, water, maple syrup, soy sauce, peanut butter, chili-garlic sauce, ginger, and garlic in a medium saucepan. (this will look so gross when it’s all going into the pan and you will definitely be thinking “eeew! this is going to taste weird.” It won’t. Trust me.) Let cook over medium heat, whisking frequently, until sauce comes together and thickens.

Remove from heat and mix in lime juice and sesame oil.

Toss hot noodles with the sauce, tofu and veggies.

Garnish with peanuts and scallions and serve. Any leftovers can be served warm or cold the next day for a delicious lunch.

DSC_2256_2

I had fro-yo three times last week and may or may not be planning to share some Game of Thrones-themed cupcakes with you later in the week. Yeeeah…clearly, the fitness thing is over. Good thing I haven’t given up on the exercise!

PS. This would be great for a memorial day cook out. It tastes good hot or cold and it doesn’t scream, LOOK AT ME I’M VEGAN! well…maybe leave out the tofu if your hanging with all carnivores…

Read Full Post »

Sloppy Chicks

DSC_2255

I know I’m being annoyingly clique right now but I REALLY wish it wasn’t Monday. I could have used one more day this weekend.

My oh-so-awesome landlord decided that the construction he has been doing the last several week should continue at 7 am on Saturday, my one day to sleep in. I was thrilled to turn over in bed at such an early hour and see a middle aged latino man working outside my window as I slept and he worked on the apartment. Thankfully, my blinds were mostly shut. Mostly.

I was then even more overjoyed to see that our driveway was strewed with wooden boards, discards shingles, tools and machines making it impossible for me to get out until around 4 pm, when they were finish their work and had cleaned up. So much for a fun filled day of errands and shopping

DSC_2248

Yes, I was in an excellent mood on Saturday.

Thankfully, I made good use of my Saturday evening by having a few friends over and watching the first few episodes of Games of Throne. I may be kind of addicted! Can we just talk about how infuriating the Lannisters are?! ARGH! Every time Cersei Lannister and her ugly ass, scheming self are on the screen I just want to punch her!

But I digress, a TV viewing party would be incomplete without some good food. I whipped up these vegan-friendly Sloppy Joes and they got thumbs up all around from my non-vegan friends. My friend, Rachel’s boyfriend, had three of them and he definitely isn’t vegan. I consider that a win!

DSC_2251

Sloppy Chicks
from Keepin’ It Kind

the original recipe says it makes 4; we used average hot dog bugs and we got 7 servings

Ingredients:

  • 1 tsp olive oil
  • ½ onion, diced
  • 2-3 cloves garlic, minced
  • ½ red bell pepper, diced
  • 2 15oz cans of chickpeas, rinsed and drained
  • 1 15oz can of fire roasted tomatoes, diced
  • ¼ cup tomato paste
  • 2 T soy sauce
  • 2 T Sriracha Sauce
  • 1 T Maple Syrup
  • 2 tsp dried oregano
  • 1 ½ tsp cumin
  • 1 tsp dried thyme
  • 1 tsp smoked paprika
  • 1 tsp liquid smoke
  • 1 T nutritional yeast (optional)
  • salt/pepper to taste
  • optional toppings: avocado or vegan cheese
  • 4 vegan hamburger or hotdog buns; could also serve it on a baked potato or with lettuce in a wrap

Instructions:

  • Pour the chickpeas into a bowl.  Use a fork to mash them until they are in small chunks/shreds.  I like to mash about half the chickpeas and keep half whole for texture. Set aside.
  • Preheat the oven to it’s lowest temperature.  Open the buns (if you are using them) and place the halves, cut side up, on the center rack (or on a baking sheet).  Let them heat up for about 10-15 minutes.
  • Heat the olive oil in a large shallow saucepan over medium heat for about one minute.  Add the onion and garlic and sauté until onions are translucent and garlic is fragrant.  Add the bell pepper and the chickpeas and sauté for about two minutes.  Add the rest of the ingredients and let it simmer, stirring occasionally, for about 10-15 minutes, until heated through and slightly thickened.  If it sticks, add a little water to scrape the pan and lower the heat a bit.
  • Once the buns are warmed and the chickpea mixture is hot, scoop the mixture onto the buns.  Serve while hot.

DSC_2256

I did spend Sunday eating brunch, working out and soaking up the sunshine so my landlord was not able to destroy my whole weekend. Can I just say, Sunday was beautiful here in Boston! If I could have  one wish, it may be that everyday is as beautiful as that day was.

So, any Game of Throne fans? Thoughts? I’m only on season 1 so don’t spoil anything but please, tell me I’m not the only one who wants to punch some of these characters in the face.

Read Full Post »

DSC_2209

This week has been rough. On Tuesday, our dog Ace, died really unexpectantly. The vet thinks it was cancer in his chest. He was still pretty young at 8 and it hit us all really hard. He was a super good dog, even though he was mildly neurotic. He didn’t like red rugs. He had a nightly routine which involved giving his blanky a tour of the house before settling down. And overall, he really didn’t like change. But, don’t we all have quirks? I can’t eat m&ms or skittles without sorting them into groups by color. Is that any less weird then avoiding red rugs? Needless to say, he fit into our family pretty well and it’s been hard losing him.

So, I’ve been trying to stay busy all week. Tuesday night, despite the news, I went to ballet class, swollen red poofy eyes and all. Last night, I went on a bit of a shopping spree with my friend, Rachel. Container store, Lush, Barnes and Noble, fro-yo with soy yogurt AND Whole Foods. It was kind of epic. And perfectly fun and distracting.

DSC_2210

Thankfully and completely by coincidence,  I managed to get my act together on Sunday evening and make food for the whole week. So, despite my running around and blurred vision, I have still been eating well.

This salad seems like it may be boatloads of work, but you can make everything in advance and it makes several servings so you can have it for lunch or dinner throughout the week. Check out some substitutions all the way at the bottom if you want to save some time.

DSC_2202

DSC_2203

To roast the zucchini, summer squash and asparagus, I used the new baking sheet my Grandma gave me. Look how much bigger it is compared to my old ones!

Roasted Veggie Salad with Herb Quinoa Oat Bread

Roasted Veggie Salad:

  • 2 small zucchini
  • 2 small summer squash
  • 1 large bunch of asparagus (skinny stalks are the best! But that may be personal preference…)
  • 1/2 butternut squash
  • baby spinach or arugala (Whichever you prefer. I have had both and both were delicious. I tend to have baby spinach on hand more frequently though because I also use it in smoothies)
  • coconut oil
  • salt and pepper to taste (optional)
  • pepita seeds

Pre-heat the oven to 400 degrees F.

Dice your butternut squash into cubes and place on a baking sheet. Drizzle with coconut oil (I didnt measure but I would estimate 1 TBSP) and toss until well coated. Sprinkle with salt and pepper to taste if you are using.

Dice your zucchini and summer squash. Remove the tough ends from the asparagus and cut into thirds. Put the zucchini, summer squash and asparagus on a large baking sheet. Drizzle with coconut oil (again, around 1TBSP) and toss until well coated. Sprinkle with salt and pepper.

Place the butternut squash in the oven for 30 minutes. At the 15 minute mark, put the other tray of veggies in.

When the 30 minute are up, remove the veggies from the oven. Veggies can be hot or cold when served, both are delicious so it’s a matter of preference. To serve, place a slice of toasted Herb Quinoa Oat Bread down (recipe below), top with a bed of spinach or arugala, then your roasted veggies, drizzle with apple cider vinaigrette (recipe below) and sprinkle with pepita seeds. Dig in!!

Apple Cider Vinaigrette
from Food Network

3 tablespoons apple cider vinegar
1 tablespoon honey or maple syrup
1/4 teaspoon kosher salt
1/4 teaspoon freshly ground black pepper
1/3 cup extra-virgin olive oil

Put in a jar, shake it up and serve.

Herb Quinoa Oat Bread
recipe from Edible Perspective
2
-3 servings (I cut mine into 6 servings to get me through the week)

  • 1/2c GF oat flour*
  • 3/4c quinoa flour
  • 1/4c almond flour
  • 1c water
  • 1.5T ground chia seeds or ground flax seeds
  • 1.5T coconut oil
  • 1T unsweetened applesauce
  • 1/4t salt
  • 1/4t garlic powder
  • 1t parsley
  • 1t oregano
  • 1t thyme
  • 5-8 grinds of black pepper
  1. Preheat your oven to 375.

  2. Add 1/2T coconut oil to a 9” round/square pan and place in the oven.  A cast iron pan works really well.  Or line a 9” round/square pan with parchment paper.

  3. Mix all dry ingredients together in a large bowl.

  4. Pour in the water, applesauce, and 1T of melted coconut oil.

  5. Stir until just combined and let sit for 5min.  Batter should be thick, but pourable after sitting.

  6. While the batter is sitting, place the pan in the oven with 1/2T coconut oil for 5min.  Remove from the oven and spread the oil around the sides + bottom of the pan.  *If using parchment paper, skip this step.

  7. Pour the batter into the pan, spread to the edges, then shake lightly to even out.

  8. Bake for 38-42min, until the bread is cracked on top, pulled away from the sides, and edges are golden brown.  I always bake mine for 40min.

  9. Let cool to fully firm up, then remove from the pan + slice.

  10. Store in a sealed container for 3-4 days.

* notes from Wicked Vegan: Don’t be intimidated by the list of unusual flours. I currently have at least 5 different flours in my pantry, none of which are the ones listed above and I was determined not to buy another. So I made these flours with the oats, quinoa and almonds that I already had. Just put the oats, quinoa and almonds in a food processor or magic bullet, separately, and blend until they have broken down into a flour consistency.  The oat flour and quinoa flour were very easy to turn to flour. I had a bit of trouble with the almonds, which resulted in a corn-bread texture to my bread. It was still delicious, it just didn’t look like the pictures from Edible Perspective but I was ok with that.

notes from Edible Perspective: I have found coconut oil to be the best to prevent sticking.  Feel free to sub another high-heat safe oil.  This recipe would be great as a base for pizza.  Remove the bread from the pan, pile on toppings, then bake for 5-10min.  Feel free to sub buckwheat, millet, amaranth, or corn flour for the oat or quinoa flour but not the almond meal.  You can easily make these gluten free flours at home in your blender or food processor.  For GF oat flour, use rolled oats, oat groats, or steel cut oats.  Process until turned into a fine flour.  You can make almond meal by processing almonds until turned into a soft meal with no almond pieces.
DSC_2213
You can roast any veggies that you want for this salad. California Pizza Kitchen has a salad similar to this and they use eggplant. You could also throw in mushrooms, green beans, bell peppers or onions. I really think whatever you like would work in here.
DSC_2215
Store bought Naan can be subbed in for the quinoa bread. I had originally bought roasted garlic naan for this recipe but holy crap was that stuff delicious! I ended up eating the four pieces before I even began to make this recipe so I decided that maybe I didn’t need more of that deliciousness in the house! After all, oatmeal with a side of roasted garlic naan for breakfast, soup with roasted garlic naan for lunch and just warm roasted garlic naan dipped in hummus for dinner doesn’t exactly make a well rounded day of food.
Balsamic vinaigrette, bottled or homemade, can be subbed for the apple cider vinaigrette dress.
ok, I promise no more sad stuff tomorrow on WV. I’ll try and bring you some fun Friday Favorites complete with some upbeat music.

Read Full Post »

Sometimes, it’s Saturday and I’m able to take my time taking awesome pictures for the blog, complete with props and natural sunlight and cute dishes.

DSC_2131

Other times, I have been trying to make a dish for two weeks but haven’t found time;  had to toss ingredients out at least once because they went bad before I could use them; had to hussle out of the kitchen cause my roommate needed it to make dinner with his friends; had to take pictures in front of old plastic-ed windows in the early morning gray-ness because it’s snowing; and the recipe I’m photographing is really nothing but a pile of orange and  brown (albeit delicious) mush.

(Did I use those semi-colons correctly?!?! I think I followed the rules the Oatmeal gave me! oh yeah!)

Can you guess which situation this delightful shephard’s pie recipe falls under?

DSC_2124

Despite the fact that it may win the award for the most unpleasant pictures on the site, the recipe is actually really delicious, which is a lot coming from me. Shephard’s pie used to be my one freebie at dinner. You know, you had to eat what Mom makes except for your one freebie meal because she knew you genuinely hated it. Shephard’s pie was my freebie (until I went vegetarian, then I got a special meal each night. Go me!). But since this recipe has exactly none of the ingredients that my mom’s shephard’s pie had, it shouldn’t be a big surprise that I like it better.

Like my potato masher? After I made the Sweet Potato burgers for my parents and it took me a million hours to mash the potatoes with a fork, Mom bought me my very own potato masher. yeah!! lol

Like my potato masher? After I made the Sweet Potato burgers for my parents and it took me a million hours to mash the potatoes with a fork, Mom bought me my very own potato masher. yeah!! lol

This recipe takes the tradition meat, potatoes and veggies (Mom’s always had ground beef, corn, mashed potatoes and gravy) and subs in lentils, mushrooms and sweet potatoes, all things I love! Weirdly enough, when it was cooking though, it definitely smelt like I remember Mom’s did! Maybe I was just psyching myself out…

Lentil, Mushroom & Sweet Potato Shepherd’s Pie

From thekitchn.com
Makes 6 servings

6 medium sweet potatoes, scrubbed*
1 cup brown or green lentils, washed and picked over
3/4 cup dry steel cut oats
1 bay leaf
1 teaspoon salt
1 tablespoon olive oil
1 pound  mushrooms, divided ( used baby bellas, the original recipe used creminis)
1 onion, chopped
2 carrot, chopped
1 celery stalk, chopped
1 garlic clove, minced
3/4 cup low-sodium vegetable stock
1/4 cup red wine
1 tablespoon tomato paste
1 tablespoon soy sauce or tamari
2 teaspoons smoked paprika
1/4 cup chopped fresh parsley

Preheat the oven to 400°F. Prick each sweet potato several times with a fork and place on a baking sheet. Roast for 45 minutes to 1 hour, or until very soft to the touch. Set aside to cool.

In a medium pot, combine the lentils, oats, bay leaf and salt with 5 cups of water. Bring to a boil and lower heat. Simmer uncovered for 15-20 minutes or until lentils are soft but not mushy, stirring occasionally to keep the oats from sticking to the bottom of the pot. Discard bay leaf and drain mixture into a colander or sieve.

While the lentils and oats are cooking, finely chop half of the mushrooms and set aside. Cut the remaining mushrooms into quarters. Warm the olive oil in a large pot over medium-high heat. Add the quartered mushrooms and a pinch of salt and cook until browned and soft. Add the chopped mushrooms, onion, carrot, celery and garlic and cook, stirring occasionally, until onions are soft and translucent. Lower heat to medium and add the lentil and oat mixture, followed by the vegetable stock, wine, tomato paste, soy sauce, paprika, and parsley. Taste and add salt if needed. Simmer mixture for 5 minutes. Remove from heat and add a few grinds of black pepper.

Preheat oven to 350°F. Peel sweet potatoes with your hands and place in a medium bowl. Use a fork to mash them into a smooth paste and season to taste with salt and pepper.

Evenly spread the lentil mixture into a 9×13-inch baking dish. (For thicker layers, use a 9×9-inch pan.) Spoon the sweet potato mixture on top and smooth with a spatula. Bake for 30 minutes, or until the filling is bubbling at the edges.

 *Note: The original recipe called for 5 medium sweet potatoes but that didn’t even cover 3/4 of my shephard’s pie in a 9×13 pan. I would suggest buying and roasting 6. Start by mashing 5 and if you need more, mash the 6th. If you end up not using that 6th roasted sweet potato, you can always cube it and add it to a salad or have it it for lunch.
 
DSC_2130
 
Bonus points for me: Shephard’s Pie is considered an Irish cuisine on wikipedia. Which means that I am over a week early with presenting you with a St. Patty’s Day dinner idea. Just add a Guiness (Extra Stout is vegan according to Barnivore.com) and your done. More St. Patty’s day recipes to come!

Read Full Post »

I got the Taylor Swift CD last week and seriously, I can’t stop. It’s not even funny.  I’m plugged in at the grocery store, there was an embarassing moment in an aisle of Target where someone totally caught me dancing to the song “Holy Ground”, and my poor roommates probably know the songs by heart because I’ve been blasting it while cooking, which is pretty much all I do. My friend, Melinda, even tried to stage an intervention by giving me a TON of new CDs and while I’ve given them a quick listen, I make it about 30 minutes before switching back to Taylor Swift.

This is a problem. Halloween in TOMORROW. I should be listening to a halloween playlist. I even have one made up! But nooo…I keep listening to “We are never, ever, ever getting back together” ad nauseam and wondering if Taylor Swift is trying to give me relationship advice through her music.

Seriously…I need help…

BUT, even if my music life is in shambles, I am totally prepped for Halloween, food-wise. I made a huge pot of this pumpkin cranberry soup for lunch this week. Check in tomorrow, too. I may be posting a cupcake recipe that I should have given you today but totally forgot to photograph. Fail…

Pumpkin Cranberry Soup
veganized from The New England Soup Factory Cookbook by Marjorie Druker. (seriously…buy this book)
found on-line at Food.com

  • 1/2 cup fresh cranberries (or 1/2 c. cranberry sauce or 1/2 cup dried cranberries)*
  • 3 tablespoons Earth Balance or other vegan butter
  • 1/2 large Spanish onion, diced
  • 1 celery stalk, diced
  • 3 carrots, peeled and sliced
  • 1 pound of fresh, uncooked pumpkin or butternut squash, cubed (Do you even need to ask which I used?  Butternut Squash Addict!)
  • 1 (16 ounce) can pumpkin
  • 4 cups vegetable stock
  • 1.5 tablespoons dark brown sugar
  • 1/4 cup pure maple syrup
  • 1/4 teaspoon ground nutmeg
  • 1/2 cup cashew cream (or 1/2 c. silken tofu or 1/2 c. heavy vegan cream)**
  • salt and pepper, to taste
  • pepitas for toppings

* The recipe called for dried cranberries but I couldn’t find them so I used fresh. I didn’t think this gave the recipe a ton of cranberry flavor so next time I will definitely use sauce

** Cashew cream = 1/2 c. raw cashews blended with 1/2 c. water until smooth. I like this because I feel it has a more neutral taste then vegan cream and I always have cashews, as opposed to silken tofu. All these options will work though.

Directions:

  1. If you are using dried cranberries, place the cranberries in a glass or ceramic bowl and 1/2 c. water. Cover the bowl and let the cranberries soak at least 2 hours or overnight.
  2. In a stockpot, melt the butter over medium heat. Add the onion, celery and carrots and saute 5 minutes.
  3. Add the fresh pumpkin/butternut squash and saute for another 5 minutes
  4. Add the canned pumpkin, stock, brown sugar, maple syrup and nutmeg and bring to a boil.
  5. Reduce the heat to medium and simmer 30 minutes or until fresh pumpkin/butternut squash is fork tender
  6. Remove from heat, add cranberries (or cranberry sauce) and puree or blend until creamy. (I used a immersion blender)
  7. Add the cashew cream and stir until incorporated
  8. Season with salt and pepper and stir well. Top with Pepita seeds!

I know a lot of people don’t like blended soup. It sort of has the consistency of baby food so I get it. I love adding seeds and nuts on top of blended soup for some crunch, which helps with the texture thing.

This soup is so warm and comforting. I had a huge bowl of it while I was camped out during Hurricane Sandy and it was perfect. It’s thick and hearty and I love all the Fall flavors.

Also… Halloween mini-sized candies don’t count calories-wise, right? Cause I may have had about a bajillion Monday while camped out on my couch riding out the hurricane and watching Dexter season 6 and 7. Please tell me you have seen this show! I’m so obsessed right now!

Also… download this song so when you see me dancing like a weirdo in Target you can join me and we can be weird together. Awesome!

Read Full Post »

Hello everyone! Sorry there was no Weekend Things post for you yesterday. Um, it was my birthday and birthdays = no work. Also…I sorta can’t figure out how to transfer pictures from my fancy new cellphone to my computer soooo you may have a Wednesday Things…or a Thursday Things…or A Whenever-the-hell-I-can-figure-out-my-phone Things.

So until then, you are stuck with my rambling and more fall recipes. Today, I will be rambling about some of  my favorite things (be lucky you are on the other side of the computer and can’t hear me singing). 1. Halloween Sprinkles. Seriously…they make everything better! Ice cream, birthday cupcakes (coming soon), peanut butter toast, oatmeal, lattes, you name it! I’m pretty much obsessed!

2. Pumpkin Beer- I have to put the kabosh on this obsession. I’ve been having pumpkin beer every. single. day. and that’s WAY more then I usually drink. Plus, beer isn’t exactly a healthy food to be obsessed with…I mean, neither is sprinkles but at least sprinkles come in fun shapes and colors!

3. Dexter. I’ve watched the show but I decided to tackle the book for Halloween. Last year I read Salem’s Lot around this time because I love me a good vampire story. This year, I thought I’d tackle the serial killer series. So far, I have not been disappointed!

and last but not least, 4. Butternut Squash. I’ve had this at least 5 times a week and when I made up my weekly meal plan, I snuck another recipe in. I can’t help it! I keep having leftovers. This recipe was thought up because I had leftover roasted squash from my Black Bean Butternut Squash Burritos. I promise I’ll try another vegetable…maybe…

Butternut Squash Kale Rice Bowls
servings 1

olive oil

2 cloves of garlic

1 c. cubed butternut squash, roasted

1/2 cup mushrooms, thinly sliced

1 c. Kale, finely sliced ( I used frozen for this recipe)

1/2 c. brown basmati rice

1/4 c. apple cider

pepita seeds (optional)

Butternut squash: Peel your squash and slice into 1″ cubes. Put into a glass pan, lined with tin foil, drizzle with olive oil and toss until squash is coated. Season with salt and pepper to taste. Roast at 400 degrees for 30-40 minutes, or until fork tender.

While the squash is roasting away, prepare the rice. Rince 1/2 c. under water. Place in a medium size pan with 1 cup of water. Bring to a boil and then reduce to a simmer for 30 minutes.

Once your squash and rice are ready, heat some olive oil in a small skillet over medium heat. Add the garlic and saute until fragrant, or 3-4 minutes. Add the mushrooms. Saute until golden, about 10 minutes, stirring occasionally. When the mushrooms have begun to turn golden, add the squash and the kale. Mix together really well and add 1/2 c. cooked rice and apple cider. Reduce heat to medium low and let the mixture simmer together, stirring occasionally. Simmer until the apple cider has mostly evaporated.

Serve hot in a big bowl, sprinkled with pepita seeds.

I love this recipe because it’s SUPER versatile. I used everything that I already had in my house but you could add sautéed or caramelized onions, serve with quinoa instead of rice or omit the grain and have as a side. All would be delicious.

I had this for dinner almost every night last week and I’m not sick of it at all. In fact, the more butternut squash I have, the more I seem to crave it. This is a problem… especially since we don’t have sharp knives in our kitchen anymore and I risk my fingers every time I try and peel one. It’s so worth it though!

I have not tried this with halloween sprinkles but I’m pretty certain black and purple bat sprinkles would only make it more amazing. Like, 90% certain…

Read Full Post »

Older Posts »