Feeds:
Posts
Comments

Posts Tagged ‘cinnamon’

So Sunday is Mother’s Day. I’m sure you already knew that. I’m sure you already made plans with your mom and I’m sure you already bought her something nice. Because, of course, you remembered it was Mother’s Day Sunday… of course.

Unfortunately, I will be working and not celebrating with my mom, which really stinks because she’s kind of awesome- even though she refuses to admit I’m better at Singstar and Scrabble. It’s ok, though. I was an obnoxious, annoying teenager for a solid 6ish years. For instance, for my senior prom, shopping for my prom dress was so stressful that she came home after hours of shopping and finding nothing (cause I was seriously the worst person to shop with then) and made herself a large, probably very strong, margarita. It’s not my fault that all the dresses were too girly/too ugly/too frilly/too ruffly/too not black/too not-edgy-enough and I waited until the last minute to go shopping! So, letting her think she’s better at scrabble and singstar is the least I can do for her now, right?

Anyway, as Mother’s Day usually equals brunch, I’ve whipped up some pancakes to share with you. These are delicious! Unfortunately, during the process, I realized I’m almost as bad at flipping pancakes as wrapping burritos, so just pretend these are prettier, ok? Thanks.

Cinnamon Roll Pancakes
veganized from RecipeGirl.com
if you use the 1/3 cup, as suggested below, will make 4-5 pancakes

CINNAMON FILLING:
4 tablespoons (1/2 stick) Earth Balance vegan butter, just melted (not boiling)
1/4 cup + 2 tablespoons packed light brown sugar
1/2 tablespoon ground cinnamon

GLAZE:
4 tablespoons (1/2 stick) Earth Balance
2-ounces cream cheese, at room temperature (optional. I couldn’t find a vegan version of cream cheese so I omitted this and it still tasted great! Trader Joe’s is suppose to have a really tasty cream cheese, though, if you want to try and find it)
3/4 cup powdered sugar
1/2 teaspoon vanilla extract

PANCAKES:
1 cup all-purpose flour
2 teaspoons baking powder
1/2 teaspoon salt
1 cup non-dairy milk (I used unsweetened vanilla almond milk)
1 large “egg”, lightly beaten (I used 1 Ener-G “egg”)
1 tablespoon canola or vegetable oil

Directions:

Prepare the cinnamon filling: In a medium bowl, stir together the butter, brown sugar and cinnamon. Scoop the filling into a quart-sized heavy zip baggie and set it aside (see *Tips below).

Prepare the glaze: In a small pan, heat the butter over low heat until melted. Turn off the heat and whisk in the powdered sugar into the pan, stir and add in vanilla extract. Set the pan aside while you make the pancakes.

Prepare the pancake batter: In a medium bowl, whisk together the flour, baking powder and salt. Whisk in the milk, egg and oil, just until the batter is moistened (a few small lumps are fine).

Cook the pancakes: Heat a large, nonstick skillet over medium-heat. (You can spray the pan with non-stick spray if you desire but I found they made my pancakes yellow so I omitted this) Use an ice cream scoop (or 1/3 cup measuring cup) to add the batter to the pan. Use the bottom of the scoop or cup to spread the batter into a circle (about 4-inches in diameter). Reduce the heat to medium low. Snip the corner of your baggie of cinnamon filling (it should be the consistency of toothpaste) and squeeze the filling into the open corner. When your pancake begins to form bubbles, add the filling. Starting at the center of the pancake, squeeze the filling on top of the pancake batter in a swirl. Cook the pancake 2 to 3 minutes, or until the bubbles begin popping on top of the pancake and it’s golden brown on the bottom. Slide a thin, wide metal spatula underneath the pancake and gently but quickly flip it over. Cook an additional 2 to 3 minutes, until the other side is golden as well. When you flip the pancake onto a plate, you will see that the cinnamon filling has created a crater-swirl of cinnamon. Wipe out the pan with a paper towel, and repeat with the remaining pancake batter and cinnamon filling. Re-warm the glaze briefly, if needed. Serve pancakes topped with a drizzle of glaze.

Tips from Recipegirl.com:

*Quick and easy tip: Use a boxed pancake mix as the base for this recipe. (most bisquick IS vegan, last time I checked.)
*Tips for the cinnamon filling: Before swirling, open up the baggie again and give it a good stir to re-incorporate any butter that may have separated from the sugar. You want the mixture to thicken a bit- it’s best when it’s similar to the squeezing texture of a tube of toothpaste, which will happen if you leave it at room temperature for several minutes. Don’t try to use the filling for the pancake swirl unless it has thickened as it will be too runny to make a solid swirl.
*Keep the heat low or your pancakes might cook up too quickly. Don’t flip them until you see those bubbles starting to pop on top. Flip them with a wide spatula so you can grasp the whole thing without batter and filling dripping all over the place!

If you aren’t seeing your mom this weekend and are instead partying it up with your friends are Friday, I imagine these would also be excellent at soaking up all that beer in your belly the next morning!

Read Full Post »

This is my answer to the chocolate overdose I was suffering from last week. After making those cookie dough peanut butter cups (which I’m dying to make again with different flavors!) AND a vegan version of Reeses Peanut Butter eggs (which were ok,  but not great, which is why I didn’t post them here), I was so over chocolate. That’s apparently what happens when you make excuses to have peanut butter eggs for breakfast (I’ll just have a peanut butter egg instead of peanut butter on my toast. Same thing!). Infact, the thought of making something heavy for Easter dessert made me want to cry. But backing out of making a dessert wasn’t optional. If I didn’t bring anything then I wouldn’t have a vegan dessert and a holiday isn’t a holiday without a dessert…or five!

So I decided a light, fruity dessert would be perfect. It would be a nice change from heavy cakes, cheesecakes and chocolate that usually show up for our holiday parties. The one I made had a thin, chewy snickerdoodle cookie crust, a layer of creamy chocolate pudding (pudding technically isn’t a chocolate. It’s way too light for that!), and a layer of fresh fruit. Yes, please!


Snickerdoodle Cookie Crust
from Wicked Vegan

  • 1/2 cup vegan butter, at room temperature ( used Earth Balance)
  • 1 cup sugar
  • 1 Ener-G “egg”
  • 1 teaspoon vanilla extract
  • 1 3/4 cups all-purpose flour
  • 1/4 teaspoon salt
  • 1/2 teaspoon baking powder
  • 1 1/2 teaspoons cinnamon
  • 2 tablespoons milk replacer (I used unsweetened soy milk)

Preheat oven to 375.

Cream vegan butter and sugar with an electric mixer until smooth. Add “egg” and vanilla, mixing well until combine, about 2 minutes. Stir in flour, baking powder, salt, and 1 1/2 teaspoons cinnamon. Mix until dough comes together. Dough will most likely be crumbly at this point. Add in milk 1 TBS at a time until the dough comes together. Refrigerate for 30 minutes.

After 30 minutes, spread dough onto a round pizza pan. The dough will be thin. Cook between 10-15 minutes. Mine took about 12 1/2 minutes.

Let cookie cool 100%. Melt about 2 TBSP of vegan chocolate with  1/2 tsp of vegan shortening in the microwave. Spread a very thin layer of the chocolate onto the cooled cookie and let dry. This will prevent the pudding from making the cookie soggy.

Vegan Chocolate Pudding
 
from epicdialogue.com

  • 1box (1.4oz) jell-o instant chocolate pudding mix*
  • 1 package (12.3oz) silken tofu, chilled
  • 1/2-3/4cup almond milk (I used 3/4 cup)

In a food processor, puree the tofu with the almond milk until smooth. Add the pudding mix and blend to a creamy texture. Put in fridge to set for about an hour. Spread on the cookie. I had about half the mixture left over.

*jell-o instant pudding is dairy-free but it has a few chemicals and weird ingredients that I wasn’t thrilled with but I couldn’t find an organic, more healthful instant pudding. I found the cook and serve kind but not instant. I wasn’t sure how the cook and serve would work so I opted for jell-o. If anyone finds a better instant pudding product or tries the cook and serve in this recipe, let me know how it turns out!

Toppings

  • strawberries
  • kiwi
  • banana
  • blueberries
  • raspberries

Slice up your fruit and layer as desired. Really, you could use any fruit you wanted, including mandarin oranges, apples or pineapple. Or you could use shredded coconut, slivered or sliced almonds or other nuts. I haven’t tried those but I bet they’d be great!

mmm…I want some of this right now. After all, if I can justify a knock-off Reeses egg for breakfast,  I should have no problem doing that with a fruit covered cookie!

Read Full Post »

I haven’t adjusted well to the whole going back to work thing. In fact, I’m starting to think my future holds a man with lots of money and me staying home all day, cooking him a healthy vegan meals, scrapbooking and watching my stories. Except, my stories would be more like re-runs of Veronica Mars and Gilmore Girls and not traditional soap operas.

This morning, I not only managed to sleep through my alarm clock, but I somehow also managed to reset my clock forward 15 minutes. So when I woke at 7:15, aka the exact time I’m suppose to leave the house, I had a huge freak out. At some point as I flung on whatever clothes where closest to me, I was able to calm down a bit because I realized I had 15 whole minutes instead of 0. But still, I have zero recollection of resetting my clock!

A little tip: Save all your glass jars from sauces, nut butters or jams and reuse them for storage. My ground flax seed is in an old tomato sauce jar and my spices are stored in tiny mason jars! You reuse, it helps with storage situations and it keeps nasty moths and bugs out of your items. Yeah!

I also managed to 1. forget my badge for work so I had to run back and get it, 2. wait 15 minutes in my driveway as my next door neighbor’s painter moved his van, 3. get stuck behind the recycling truck, 4. get stuck behind a school bus and 5. forget my much-needed, happily-caffinated tea at home.

At least I managed to whip up a batch of these last night so that I had a yummy breakfast…

Baked Blueberry Streusal Oatmeal
adapted from Healthful Pursuit

Wet

  • 1 flax egg (1 tbsp freshly ground flax seed mixed with 2 tbsp warm water. Allow to sit for 5 minutes before use)
  • 1 cup unsweetened apple sauce
  • 1/2 banana, mashed (yield about 1/4 cup mashed)
  • 1 1/4 cup non-dairy milk – I used unsweetened, original almond milk 
  • 2 tbsp maple syrup
  • 1 tsp maple extract
  • Dry
  • 2.5 cups rolled oats
  • 2 tbsp ground flax seed
  • 2 tsp ground cinnamon
  • 1 1/2 tsp  baking powder
  • 1/4 tsp salt  
  • One small carton of blueberries (roughly a cup)

Toppings

  • 2 TBSP vegan butter (I used Earth Balance), melted
  • 1/2 cup brown sugar
  • 1/2 cup chopped pecans
  • 1 tsp cinnamon

Directions

  1. Preheat oven to 350F and line a 12 cup muffin pan with muffin liners.
  2. Place wet ingredients and mix with a mixer or beaters.
  3. Place all dry ingredients in a large bowl and combine. Pour wet into dry and mix. It will be runny, but don’t worry!
  4. Fold in blueberries.
  5. Pour mixture into muffin cups and top with desired toppings. The don’t rise so you can fill the liners almost to the top.
  6. Mix all the topping ingredients together in a bowl. Top the oatmeal cups with streusal mix (I forgot to get the pecans for this photoshoot so these are sans nuts. They work well this way too)
  7. Place in prepared oven and bake for 25-30 minutes or until toothpick inserted comes out clean. Mine were done at 26 minutes.
  8. Allow to cool in the pan for 2-3 minutes before removing onto a cooling rack.
  9. Microwave before serving for 30 to 45 seconds to get a hot oatmeal flavor. I served mine over half a carton of vegan vanilla yogurt to make it a little more heartier.

 When I made these, I was sort of expecting a cake like consistency but they really do taste like oatmeal! The applesauce and the banana make them super moist and give it that oatmeal consistency. I’m definitely a fan!

Plus, without the streusal topping, Leanne at Healthful Pursuit said these were only 102 calories! Not too shabby.

If you are looking to keep this sugar-free, some possible toppings that Leanne tried were:

  • cinnamon raisin: 1/2 tbsp raisins and sprinkle of ground cinnamon per cup
  • apple: 2 apple slices per cup
  • coconut: 1/2 tbsp unsweetened shredded coconut per cup
  • trail mix: 1/2 tbsp trail mix per cup

I haven’t tried any of those yet so I can’t vouch for their yumminess but the overall, the oatmeal cups are great so I imagine any toppings you like will be a great addition. Note: Leanne didn’t add blueberries to her oatmeal so those toppings were all added to a plain oatmeal cup.

Now, let’s see if I can actually eat my breakfast without dropping it on my lap or down the front of my shirt. I don’t have high hopes but I’m keeping my fingers crossed.

Read Full Post »

Guys…this post is a hot mess of bad pictures and awesome recipes. So lets just get this thing over with, shall we?

Tuesday was Mardi Gras. Hellz to the yeah!

If I was a better blogger, I would have posted this recipes on Monday … and I would never use the phrase ‘Hellz yeah’ again…but I’m not, so you are going to get this Mardi Gras recipes 3 days late. It is SO good I couldn’t resist sharing.

Melinda cooking up the jambalaya. Kinda one of my favorite pictures of her…

My super delicious jambalaya recipe. Bonnie and I just about ate this entire pot between us. I’ll post this recipe next week. It so yummy I’m planning on making it again!

Andrew and my roommate, Daniel, working oh-so-hard in the kitchen while the girls slaved away. Thanks for the help guys! (Daniel later cleaned the kitchen so all was forgiven!)

KING’S CAKE!! Definitely in the top 5 of best desserts I’ve made. Melinda said it was second only to the almond joy truffles, Dan said it was second to none. Yeah…It was that good. (Recipe Below) The icing was suppose to be yellow, green and purple but I had some issues with my all natural food dye…especially the yellow, as you can see…

Jester Bonnie! The point of the King’s Cake is a small toy baby or uncooked bean is placed in the cake before it cooks and whoever finds the bean/baby gets the crown and to host the party next year. Bonnie won this year!! (I put a dried chickpea because a plastic baby in a 350 degree oven is weird.)

Vegan King’s Cake
from DairyfreeCooking
makes one cake, 10 to 12 servings (HA! in our case it had maybe 6. We couldn’t stop eating it!)

For the Cake:

  • 1 package dry active yeast
  • ¼ cup warm water
  • 1 T. maple syrup
  • 2 ½ cups all-purpose flour, plus more if needed
  • 1 t. salt
  • ¼ t. nutmeg
  • 3 T. sugar
  • 6 T. soy margarine, cut into pieces
  • 3 T. Egg Replacer Powder mixed with ¼ T. hot water
  • ¼ cup coconut milk (not “lite” variety), plus more for brushing (I used the thick coconut milk from a can)

For the Filling:

  • ¾ cup dark brown sugar
  • ¼ cup dairy-free soy margarine, softened
  • ½ cup finely chopped pecans  (I used a mix of pecans and walnuts because I ran out of pecans. It was good though!)
  • ½ t. cinnamon

For the Icing:

  • Confectionary sugar
  • coconut milk from above
  • food coloring (preferrably all natural)

1. In a medium-sized mixing bowl, combine the yeast, warm water and maple syrup, mixing gently until the yeast dissolves and bubbles begin to appear on the surface. Set aside until frothy, about 5 minutes.

2. Meanwhile, the bowl of a food processor, combine the flour, salt, nutmeg and sugar. Add the soy margarine and process until the mixture resembles fine crumbs. Add this mixture to the yeast, along with the Egg Replacer mixture and coconut milk. Knead, adding flour as necessary, until a soft dough forms. Place in an oiled bowl, covered, for 1 hour, or until the dough is doubled in bulk.

3. Meanwhile, make the filling. In a small mixing bowl, combine the brown sugar, soy margarine, chopped pecans/walnuts and cinnamon until combined.

4. Roll out the dough on a lightly floured surface to a large rectangle about 1/8” thick. Using a floured bench scraper or sharp knife, cut the dough in half lengthwise. Cut each of the strips into triangles, each about 3 inches at their base. (Think of a zipper or zigzag pattern when you cut, alternating the tops of triangles with the bases.) With the tips of the triangles pointed inward, place the triangles in a circle (or oval in my case) on the prepared sheet, overlapping one over the other and pressing the edges to seal. Place an even amount of the filling on the centers of the triangles, and place the baby or dried bean somewhere on the filling. Fold the outsides of the triangles over the filling, so that the reach just over the filling. Fold the tips over, pressing slightly to adhere the tips to the outside of the ring. Cover the ring lightly with a paper towel or clean dish towel, and let rise for 20 minutes more.

5. Bake in the preheated oven for 25-30 minutes, or until golden brown. Allow cake to cool completely on a wire cooling rack, and then transfer the cake to a serving platter large enough to catch excess icing.

(Or, just leave it on the hot pan and put the icing on it while it still hot so that it gets all melty and messy because your too inpatient to wait. That’s what I did… though letting it cool works too…)

6. While the cake is cooling, mix together the icing. It should be noted, I NEVER measure out this icing because it’s so insanely easy. Place 3 or 4 spoonfuls of confectionary sugar in a bowl (more if you are going to want a thicker icing to spread). Add coconut milk to the confectionary sugar one spoonful at a time, stirring after each addition, until the desired consistency. I knew I wanted mine a little more liquidy because 1. Melinda likes coconut flavors so I wanted more coconut milk in my icing and 2. I knew I was drizzling it on the cake because I was inpatient so the icing needed to be runnier. I would say I added about 4 or 5 spoonfuls of coconut milk. If you want is spreadable so you have it thicker, you would want to add less coconut milk, obviously. That’s why you want to add the coconut milk slowly. Once you have the icing to the consistency you want, divide it into three and add the food coloring. I used India Tree, which is made from fruit and veggy extract, but only comes in yellow, blue and red. The yellow is STRONG! Go easy with it. Apply icing to cake.

7. Shovel  unceremoniously into your mouth and try not to eat the whole cake!

I know this is traditionally a Mardi Gras thing but it can serve as a delicious dessert or even a morning pastry if you leave out the dried bean/baby and cool it with the mardi gras colors. So definitely don’t wait 362 days to make this!! It really was insanely delicious. If I make it again, I will add the better pictures, I promise.

Read Full Post »

Dear Mr. Claus,

I don’t have a ton of things to request from you this year. I gave my parents an 8 page amazon wish list that just about covered everything so I’m all set in that department. What I could use from you is a little Christmas magic! A local radio station, WFNX, is giving away tickets to The Black Keys in Nashville for February and I would really like to win them. Really, Really like to win them.

See, I was planning a vaca for February, anyways, and Nashville is on my places to see list. Might as well kill two birds with one stone, right?

Also, I would really like a nail polish that I can apply myself and will last a week without chipping. Preferably in black. I’ll take dark red though if you feel black isn’t in the holiday spirit.

Oh yeah, and world peace.

Kthanks!

Xoxo,

Erin

PS. I made you these chewy ginger cookies. They are vegan but insanely delicious. I think they are easily one of my top 5 favorite cookies. I know they seem pretty simple but my guess is that you are going to be bombarded with fancy-schmancy cookies, covered in sprinkles and frosting and weird things like bacon. These shine in their simplicity and I thought you might like a bit of a change during your big night. Hit me up with those tickets and I’ll  make a big batch for you and the Mrs.  I’ll even throw in some treats for the deer. ;)What? I’m not bribing you!

Holiday Ginger Cookies
adapted from Land O Lakes
makes approximately 2 dozen (I actually halved the recipe since I just needed a vegan cookie fix)

1 1/4 cups sugar
1 cup Earth Balance Butter (2 sticks)
1 Ener-G egg replacer “egg”
3 tablespoons molasses
1 teaspoon vanilla
3 cups all-purpose flour
2 teaspoons ground cinnamon
1 teaspoon ground ginger
1/2 teaspoon baking soda
1/4 teaspoon salt

Combine sugar, butter, “egg”, molasses and vanilla in large bowl. Beat at medium speed, scraping bowl often, until creamy. Reduce speed to low; add all remaining cookie ingredients. Beat until well mixed. Divide dough in half; wrap in plastic food wrap. Refrigerate until firm (1 to 2 hours).

Heat oven to 375°F. Roll out cookies into balls. Place cookies, 1 inch apart, onto ungreased cookie sheets. Bake for 6 to 9 minutes or until set. Let stand 1 minute on cookie sheets; remove to wire cooling rack. Cool completely.

O, what’s that? I should have been taking pictures and not eating my 800th cookie? Yeah, I know. But at least now you know why the only pictures I have for this post are two that are almost exactly the same and a third of a half eaten cookie. Sorry about that!

Read Full Post »

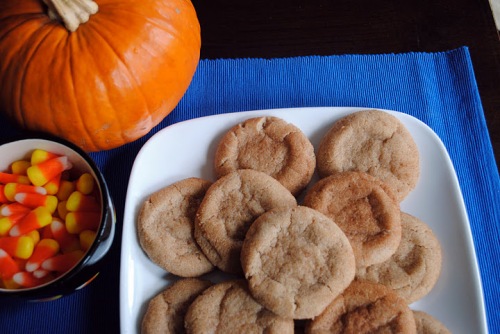
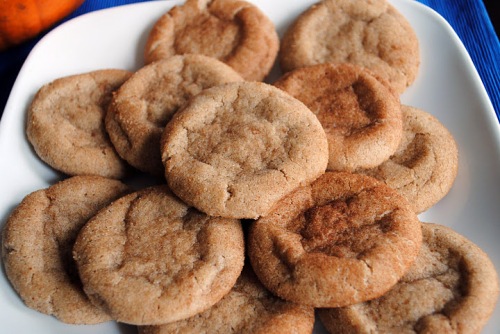
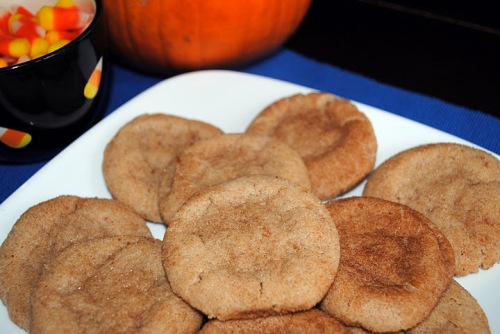
Snickerdoodle Cookies

Lets be honest with one another here- sugar cookies are hands down the most boring cookie ever. Yeah, ok…they get trooped out a few times a year when we need to decorate cookies but no one really loves sugar cookies. I don’t know anyone whose ever like, man…I could use a good sugar cookie right now. Because they are boring. They have no pizzazz!

Since cookies were homemade when I was growing up, more often than not, they were chocolate chip or oatmeal raisins (I’d pick the raisins out, obviously). During the holidays, the really good ones came out- mint chocolate chip, chocolate rolos, white chocolate dream cookies,  cookies with Andes mints in the middle, etc. So, why would we ever make sugar cookies when we had these amazing cookies to choose from?!?

The fact is, we didn’t. I called my mom for a sugar cookie recipe last year and she didn’t even have one! When I tried a few online, I felt like Goldilocks with porridge- these are too crunch, these are too cakelike- and I could never find the right one.  I quickly got bored and gave up. Sugar cookies are so not worth the effort.

So it goes without saying that I never made a snickerdoodle cookie. They’re just sugar cookies with cinnamon sugar, right? Well, having exhausted my apple and pumpkin taste buds over the last few weeks (and mildly concerned one of my my co-worker would kill me if I brought one more pumpkin thing into work), I was desperate for a different fall flavor for my Monday treats for work. Since I’ve been shoving my face with this cinnamon honey bread like my life depended on it, obviously my first thought was cinnamon. Hence, me turning to the snickerdoodle cookie. And I must admit, these cookies may be worthy enough to go toe-to-toe with our mint chocolate chip cookies…well, maybe…

Snickerdoodles

veganized version from How Sweet Eats

makes 16-20 cookies

1/2 cup vegan butter, at room temperature ( used Earth Balance)

1 cup sugar

1 Ener-G “egg”

1 teaspoon vanilla extract

1 3/4 cups all-purpose flour

1/4 teaspoon salt

1/2 teaspoon baking powder

1 1/2 teaspoons cinnamon

2 tablespoons milk replacer (I used unsweetened soy milk)

1/4 cup sugar + 1 tablespoon cinnamon for dipping

Preheat oven to 375.

Cream vegan butter and sugar with an electric mixer until smooth. Add “egg” and vanilla, mixing well until combine, about 2 minutes. Stir in flour, baking powder, salt, and 1 1/2 teaspoons cinnamon. Mix until dough comes together. Dough will most likely be crumbly at this point. Add in milk 1 TBS at a time until the dough comes together. Refrigerate for 30 minutes.

In a bowl combine remaining sugar and cinnamon. Remove dough from fridge and roll into big 1 1/2 inch balls. Dip in cinnamon sugar mixture and place on baking sheet. Lightly press down on dough to flatten it. Bake at 375 for 10-12 minutes.

These cookies were the perfect texture. A little crunchy around the edges, soft and chewy in the middle. I’m sort of in love with them. And, I may have just had one for breakfast…

Side note: I know I’ve been giving you guys a lot of How Sweet Eats recipes lately. This week I’m going to be getting seriously vegan on your butts though and trying out some recipes from Alicia Silverstone’s Kind Diet, as well as my second favorite blog Healthfulpursuit.com. Stay tuned!

Read Full Post »

I had a little break down in the bread aisle last week. Don’t feel bad for me-It was due to Karma. About 2 years ago, my roommate and really good friend Melinda, told me about a breakdown she had in the bread aisle because she could not find a decent bread without high fructose corn syrup. I laughed at her and rolled my eyes.

I was not laughing last week.

Here’s the scoop: I’ve had it in my head since the beginning of October that I wanted to make apple butter (coming soon!). My thought was, ‘how delicious would apple butter be smothered on toast for breakfast? OH! On cinnamon toast for breakfast.’ After that I couldn’t get the thought out of my head. I simply had to have cinnamon bread with apple butter. So I began my search for cinnamon bread.

Not a simple feat. By the third store and after looking at more bread than I could count, I sort of felt like the teacher from Daria who sort of freaked out and got the one ginormous eye. Yeah…I felt like that. All the bread I was finding either  had A. high fructose corn syrup or other chemicals and/or B. raisins. I wanted my bread to be simple with ingredients that are not overly processed. I didn’t want to start my day by shoveling chemicals down my throat! And HFCS is a chemical. I don’t care that once upon a time it was corn. Its made in a frickin’ lab for Pete’s sake!

'WHY can't I get BREAD without frickin' CHEMICALS or RAISINS' yeah...that was me...

And don’t even get me started on raisins. I HATE them. Know the book Green Eggs and Ham? It’s basically 20 pages of this little kid talking about all the places he hates Green Eggs and Ham. That could be me…but with raisins (“I do not like them here or there, I do not like them anywhere, I do not like any raisins, I do not like them, Sam-I-Am”). I know the book ends with him liking Green Eggs and Ham but that’s not the point…My point is, Raisins suck and finding a cinnamon bread without raisins AND high fructose corn syrup/other chemicals is damn near impossible.

Hence the break down. Melinda, feel free to laugh at me and roll your eyes. I deserve it.

So I decided to just make it. This is an attitude I (and my mom and her friend, Lu) often take with crafts and I take all the time with baked goods, like cakes and cookies, but bread? Bread is a whole nother ball field. I had never made bread before and prior to the beer pretzels I’ve never had much luck with yeast. My frustration overrode practicality, though. Bring on the bread making!!

I was so excited to make my first loaf of bread I literally took a picture at every step...I'll only subject you to a few

Thankfully, I just happen to have a bread machine lying around courtesy of my roommate, Bonnie’s, Grammie. Bread is surprisingly easy when you just dump it in a pan and let the bread maker do the work!

Raisin-less Cinnamon Honey Bread

adapted from Sunbeam’s Bread Recipes

1 1/4 c. water

2 TBS of Earth Balance vegan butter

3 1/4 c. bread flour

1/4 c. honey*

1 1/2 tsp salt

1 tsp cinnamon (I was a bit generous with my cinnamon. It may have been closer to 1 1/2 tsp)

1 packet of yeast

Place the ingredients in the bread boxes in the order they are given (except the yeast). Put all the liquid ingredients in and then all the dry ingredients. Make a well in the flour and place the yeast in the well. The yeast should NOT touch wet ingredients. (the directions told me this at least three times so yeah… don’t let your yeast touch the liquid layer). Snap the bucket in your bread maker. Set your machine for sweet dough and the desired color of your crust.

Voila!

This bread was Ah-Ma-Zing. It was super moist and springy and it tasted delicious as toast with almond butter and apple butter. AND it didn’t have raisins OR funky chemicals. Take that super market bread!

This is totally doable without a bread maker, especially if you have a kitchen aid stand mixer. I have a feeling, based on the research I did for this recipe, that you would follow the exact some procedure, except you would layer all the ingredients in the bowl of your mixer and then start it on low. When the dough is formed, you would let it rise for about an hour, punch it down, dump it out of the bowl, shape it on a greased pan, let rise for another hour or so and then bake it. I’ll try it next time this way and let you know how it works out.

OR! if you try it without a bread maker, let me know how it goes in the comments section!

*I know a lot of vegans do not consider honey to be a vegan product due to the fact that it is technically an animal product. I disagree. I’ll be updating the ‘Life’ page soon with my thoughts on Honey. For now, you can just sub in 1/4 cup of sugar, which is what the original recipe called for. I just didn’t want sugar in my bread. I felt honey was a bit more natural and a lot less processed.

Read Full Post »

These muffins are waaaay over due. Remember last week when I was all “I bring in baked good every monday for my co-workers”? Well, I technically didn’t lie about that. But this week was a holiday on Monday, so I was going to bring them Tues. Then I played hookey from all my responsibilities on Monday and went frolicking in an apple orchard all day, shoved my face with cider donuts, then went to my friends and shoved more yummy baked apple things in my face.

Clearly, I was ditching my responsibilities for important stuff. Clearly…

yum! Streusal topping!

I was undaunted though when on Tuesday night I faced the challenge of making 3 dozen cinnamon muffins after working all day and going to a dance class. Who cares if it’s already 9 o’clock? I thrive in these situation. Procrastination is a very dear friend of mine. Think I’m kidding?

  • In 5th grade, in what could be my first encounter with procrastination, I was forced to write a Dare essay for class. I waited until the last night and I can remember sitting at our kitchen table in NC with a very annoyed Mother near by. That paper won as the best in my class. I got a nice little award and got to read it in front of the school.
  • In 10th grade, I was assigned to write a journal about a Civil War soldier. A journal? pssh, I’m going to make a whole frickin’ scrapbook complete with tea stained, hand written journal entries and mounted pictures from various sources…the night before. Oh yeah, got an A+ AND won the history award that year (Hermione and I could have been besties that year…I was a little bit of a kiss-ass…Hey, Ms. Donnelly!)
  • In my junior year of college, I decided that working on research papers over an extended time was overrated. So for all my essay finals, I worked on them from about 8pm – 8am straight the night before they were due. I pretty much had instant french vanilla cappuccino running through my veins. Passed them all with flying colors!

Point being-  3 dozen muffins should be childs play for me. Except, I sort of didn’t take into account that this is a new recipe…and I wouldn’t know what to expect. Whoops! Cue the biggest baking disaster I’ve had in a very long time.

looked at that squished, mauled bottom. So sad...

Cinnamon Streusal Muffins

adapted from King Arthur Flour

Topping
1/3 cup brown sugar, packed
1/4 cup diced pecans (optional. I did not include since I know so many people who don’t like nuts)
1/4 cup rolled oats
1/2 cup King Arthur Unbleached All-Purpose Flour
3 tablespoons Earth Balance vegan butter

Filling
3 TBS of Earth Balance vegan butter

1/2 cup of brown sugar

1 1/2 TBS ground cinnamon

3 to 4 tablespoons water

Batter
1/2 cup Earth Balance vegan butter, melted
3/4 cup unsweetened non-dairy milk (I used soy milk)
2 Ener-G “eggs” (Ener-G is an egg replacer you can get at Whole food. 1 egg = 1 1/2 tsp dry Egg Replacer plus 2 tbsp water)
1 3/4 cups King Arthur Unbleached All-Purpose Flour
1/2 cup rolled oats
2 tablespoons cornstarch
3/4 cup granulated sugar
1 tablespoon baking powder
1/2 teaspoon salt
1/4 teaspoon ground nutmeg
1/2 cup cinnamon chips or butterscotch chips (I omitted the cinnamon chips because I just couldn’t find them anywhere. I’m not even sure if they are vegan. I think they would have added a lot to this recipe though)

Glaze:

4 TBS Confectioners Sugar

1-3 tsp of water

Splash of vanilla

Preheat your oven to 400°F. Line a 12-cup muffin pan with cupcake papers, or grease it lightly.

Prepare the topping by mixing the ingredients together until crumbly. Set aside.

Prepare the filling by mixing the Baker’s Cinnamon Filling with enough water to make filling with a soft, pudding-like consistency. Set it aside.

To make the batter: In a large bowl, whisk together the melted butter, milk, and eggs. In a separate bowl, whisk together the dry ingredients, including the chips. Add the dry mixture to the liquid, stirring just until combined.

Divide half the batter evenly among the muffin cups. Dollop 2 teaspoons cinnamon filling onto each muffin, then top with the remaining batter. Sprinkle with topping, pressing it in lightly. (NOTE: Do NOT over fill these. You want to be very careful with these. If the cinnamon sugar mixture overflows or seeps down outside the liner, it will form a lovely, sticky, hot glue that will prevent your muffins from coming out of the pan. )

Bake the muffins for 20 to 25 minutes, or until they’re golden brown. Remove them from the oven, and wait 5 minutes before transferring them from the pan to a rack to cool.

Mix Confectioners sugar,  water and vanilla together until its the consistency of glaze. Drizzle onto muffins with a spoon. Yield: 12 muffins.

The battlefield. See those streaks of brown? That would be the cinnamon sugar glue

Yes, so these were kind of messy but that was entirely my fault. As I noted above, be very careful when spooning the cinnamon mix into the cupcake liners. You don’t want it to drip anywhere else or it will form a lovely adhesive. Also, don’t over fill them. This is common sense for someone who works with cupcakes. With cupcakes though, they will cool and you can still pop them out of the pan without much problem. These have that sticky cinnamon which crystallizes to the pan and involves lots and lots of scraping…and cursing…to get the muffins out. And when you do, they are all ugly and deformed. So, yeah…don’t over fill them!

Don’t let the squished bottoms fool you though, they are still pretty tasty

Read Full Post »

Twofer Monday

So you should probably know something about me before I launch into this first post and that is

I Love Fall!

It’s hands down my favorite season. I love apple picking, pumpkin carving, boots, my birthday * cought Oct 8 cough*, hoodies, halloween, colorful leaves, etc etc. I love it all!

Especially being able to bake again! My lovely apartment in  Boston lacks some of the more cushy things in life, an AC being one of them. So in the summer baking is 100% off limits. Actually, short of lying in front of a fan and breathing, pretty much everything is off limits.

So last year, I was so excited when the weather cooled and I was allowed to bake again that I went a little overboard. Cue the weekly baked goods for my work. I get to over due it with the baking AND not have to eat it. I was pretty excited. I’m doing that again this year so expect Monday blogs to be chuck full of delicious baked goods.

This week is donuts! And not just one kind. Oh no, we have two- pumpkin spice and apple cider. Why you ask? Well, I was going to do just pumpkin spice, which I had tried once already and loved, but when I shared the super exciting news that this is what I decided on for my first blog post and fall baked good, one of my friends I work with immediately replied, “oh… I don’t like pumpkin”.

whomp, whomp.

So, at the last minute, feeling really bad that he wouldn’t be able to try the first weekly bake good, I also decided to make apple cider donuts as well. Because I’m just awesome like that!

Mini Cinnamon Sugar Pumpkin Spiced Doughnuts

from Oh She Glows

Pumpkin Doughnuts:

  • 1/2 tsp apple cider vinegar
  • 6 Tbsp non-dairy milk ( I used unsweetened)
  • 1/2 cup canned pureed pumpkin
  • 1/4 cup organic cane sugar
  • 3 Tbsp unsweetened applesauce
  • 2 Tbsp lightly packed brown sugar
  • 2 Tbsp Earth Balance (or other non-dairy butter substitute), melted
  • 2 tsp baking powder
  • 1/4 tsp of baking soda
    1 tsp cinnamon+ 1/2 tsp ginger + 1/4 tsp nutmeg (or 1.75 tsp pumpkin pie spice)
    1/2 tsp kosher salt
  • 1 cup all purpose flour
  • 1/2 cup of whole wheat pasty flour
Cinnamon sugar:
  • 1/4 cup Earth balance (or other non-dairy butter substitute), melted
  • 1/2 cup sugar
  • 1/2 tsp  cinnamon

1. Preheat oven to 350F. Grease two mini doughnut pans or two regular sized doughnut pans with Earth Balance (or other butter substitute).

2. In a large bowl, whisk together the vinegar, milk, pumpkin, sugar, applesauce, brown sugar (sift if clumpy), and melted Earth Balance (or other butter sub).

3. Add in the dry ingredients (baking powder, baking soda, spices, salt, and flours). Mix until just combined.

4. Using a ‘zip-lock’ baggie or pastry bag, spoon the batter into the bag and then secure it with the zip lock or rubber band. Twist the bag slightly and then cut off a hole at the corner to ‘pipe’ out the batter. Pipe the dough around the circle and gently flatten down with slightly wet fingers to smooth. Repeat.

5. Bake  for 10-12 minutes at 350F or until they gently spring back when touched. Cool in the pan for 10 minutes before carefully using a butter knife to remove. Place on cooling rack for another 10-15 minutes.

6. Cinnamon Sugar: Melt Earth Balance in a small bowl and dip the cooled doughnuts into butter one at a time. Transfer the dipped doughnut into a bag with the cinnamon sugar and shake until coated thoroughly. Doughnuts keep for 2-3 days. (I used both a plastic bag and a brown paper and I found the brown paper helped absorb some of that extra butter…or it could just be wishful thinking)

I absolutely LOVED this recipe and there wouldn’t be anything that I would tweak about it. I made the first batch without pastry flour and it came out great. The second patch was with pastry flour and it was much more fluffly. Both were delicious so don’t worry if you don’t have pastry flour.

Mini Apple Cider Doughnuts

from Peas and Thank you

  • 1 1/2 cup whole wheat pastry flour
  • 1/2 cup unbleached all purpose flour
  • 1 Tbsp baking powder
  • 1/2 tsp nutmeg
  • 1/2 tsp cinnamon
  • 1/4 tsp salt
  • 3/4 cup apple cider
  • 1/4 cup organic sugar
  • 1/4 cup brown sugar
  • 2 Tbsp molasses
  • 2 Tbsp unsweetened applesauce
  • 2Tbsp vegan margarine (ie Earth Balance)
  • 1/2 tsp of vanilla extract
  • cinnamon and sugar for dusting (I used the exact same method as I used for the pumpkin doughnuts)

Instructions

  1. Preheat oven to 350 degrees.
  2. In a large bowl, combine flours, baking powder, nutmeg, cinnamon and salt.
  3. In a measuring cup or smaller bowl, mix together apple cider, sugars, molasses, applesauce, melted margarine or coconut oil and vanilla extract.
  4. Add cider mixture to flour mixture and stir until just combined.
  5. Spoon batter into a greased donut pan (or muffin tin).
  6. Bake for 11-13 minutes, until donuts are slightly browned and firm. (the mini doughnuts, like the pumpkin doughnuts, only took 10 minutes because they were mini)
  7. Dust with cinnamon and sugar while still warm, if desired (who doesn’t desire more cinnamon and sugar! I definitely shook these babies in cinnamon and sugar, just like above)
This recipe isn’t too bad. I like it but I don’t love it. The molasses is very strong and I think I would have omitted a TBSP. Unfortunately, as I mentioned, this was a last minuted addition so I didn’t have time for a trial run. My roommates swear that these are great so it is possible I’m suffering from doughnut overload!

Happy fall everyone and enjoy your doughnuts!!

PS. Clearly, with all the doughnuts being dunked in butter around here this isn’t a ‘health’ blog. I will hopefully have a good balance of healthy and comfort food. So don’t be scared of all the cinnamon and butter!! (As for the picture- though I love them, this isn’t a product placement for Flour bakery. I mooched extra brown bags off them for this recipe. This is just to show you the nice butter absorption. yum!)

Read Full Post »