Feeds:
Posts
Comments

Archive for the ‘Recipes’ Category

St. Patrick’s Day is next week. Look at me being all on top of this holiday thing!

I’m not sure how St. Patty’s Day will be without Boston’s… charm. Toowoomba is just a tad bit smaller. Just a little bit. And the number of Irish people is just a wee bit smaller.  I suspect I will have a much quieter St. Patrick’s Day than I have the past few years.

Either way, here are a few recipes from the past 2 years that I’ve had success with. Some are traditional and some are just green. With it being hotter here, I don’t think I will be breaking out the stew. Those Guinness-glazed potatoes are definitely a possibility, though!

I can’t believe I don’t have any desserts!!! I’ll definitely have to work on that this week.

cornbeef

Breakfast:

Thin Mint Donuts

Green Chocolate Mint Smoothie

Green Monstah Smoothie

Meal and sides:

Vegan Corned Beef

Vegan Guinness Stew

Vegan Irish Stew

Guiness Glazed Potatoes and Roasted Carrots and Brussel Sprouts

Beer Fries

Guiness Beer Bread

Vegan Irish Cream


irishcream1

Read Full Post »

Vanilla Cupcakes

DSC_0927

I’m so predictable. It’s Friday and I’m giving you a dessert recipe. I think its because I secretly hope that you will make these on Friday and eat the entire thing over the weekend so I will feel better about having nothing but these for lunch two days in a row.

I actually made these for the 5-year-old that I nanny for. When I asked her what she wanted to bring to school for her birthday, the conversation went like this:

Her: VANILLA CUPCAKES!!

Me: Vanilla cupcakes? Are you sure?

Her: Yes!!

Me: Well…do you want me to throw strawberries in? I can make pink strawberry cupcakes!

Her: No. I want vanilla.

Me: Do you want me to add some sprinkles?

Her: No! Just vanilla

Me: Pink Vanilla?

Her: JUST VANILLA!!

Me: fine…

DSC_0905

I was so underwhelmed. Vanilla cupcakes are never my go to recipe. Ever. I think because all the really bad store-bought cakes and cupcakes that are always brought to parties and events are plain, ol’ stale vanilla. I’ve been scarred.

So I grudgingly made these with some serious trepidation. When they came out amazing, I was really, really surprised. Of course, I flat out ignored her request for all vanilla and paired them with the strawberry frosting from this recipe, which is hands down my favorite. She loved them.

DSC_0910

Vegan Vanilla Cupcakes
from Food.com
makes 12

  • 1 cup non-dairy milk (I used unsweetened almond milk)
  • 1 teaspoon apple cider vinegar
  • 1 1/4 cups flour
  • 2 tablespoons cornstarch
  • 3/4 teaspoon baking powder
  • 1/2 teaspoon baking soda
  • 1/2 teaspoon salt
  • 1/3 cup canola oil
  • 3/4 cup sugar
  • 2 1/4 teaspoons vanilla

Pre-heat oven to 350 F and line a muffin tin with liners.

Stir the non-dairy milk and the apple cider vinegar together and set aside for a few minutes to curdle.

In a medium bowl, combine the flour, cornstarch, baking powder, baking soda and salt. Set aside.

In a large bowl, beat the milk/apple cider mixture, oil, sugar and vanilla together. Add the flour mixture and beat until no large lumps remain. (if you taste the batter after it’s all combined, it tastes just like a box cupcake mix!)

Fill the cupcake liners 2/3 full and bake for 20 to 22 minutes until done.

I had to make 3 dozens of these puppies. Of course, after I made the first batch of vegan ones, I remembered that one of the 5 year-olds classmates is allergic to nuts, which means no almond milk. I had to scrub everything really well and make 3 new batches with regular milk. Thankfully, I only made 1 dozen of the vegan version before I remembered this.

DSC_0910

The cupcakes pictured are frosted with this Coconut Frosting, which I had left over, and some chocolate frosting from a left over cake that was made. All the strawberry frosting went onto the non-vegan cupcakes so I decided to use what I had instead of making a whole new batch. The vanilla cupcakes went beautifully with all of them but my favorite was definitely the strawberry.

DSC_0921

Now, go make these and report back with how many you ate so I can feel better about how many I had. Kthanks

Read Full Post »

Strawberry Chia Jam

DSC_0941

This is sort of one of those recipes that I want to post because I love it but it’s so simple that I’m not even sure it can be classified as recipe. Because really? This is pretty much the lazy persons recipe for homemade jam.

DSC_0945

I have been pairing this with my homemade sourdough bread!!! mmhmm. you read that correctly. I made my own sourdough bread. With my own homemade starter! I’m insanely proud of that. Granted, the reason you are getting a recipe for the jam and not the bread is because I haven’t perfected the actual cooking time yet but that’s beside the point! The starter was awesome. My dough rose beautifully. The bread was edible. And this jam complimented is perfectly. I’m practically Martha Stewart, guys!

DSC_0947

Strawberry Chia Jam
from Cookie and Kate
makes about 1 cup

  • 1 bag (12 ounces) frozen organic strawberries or other berries.*
  • 1 to 3 tablespoons of liquid sweetener, to taste (honey, maple syrup, agave necter, etc.) I used 1.5 TBSP of maple syrup
  • 1 tablespoon chia seeds

In a medium sauce pan over medium heat, add your strawberries and sweetener. Bring to a simmer, stirring frequently.

Once the strawberries are heated thoroughly and have become saucy (approximately 5 minutes), mash with a potato masher or fork.

Reduce heat to medium low. Stir in the chia seeds. Cook for about 15-20 minutes, stirring frequently, until the strawberry and chia seed mixture has reduced to your desired consistency.

Serve on toast, oatmeal, crackers, etc! I won’t judge if you eat it right out of the jar.

*it is not recommended that you use fresh berries here as they don’t break down in the same way that frozen berries do. If you do use fresh, you may need to add a bit of water. Also, you really want to try and get frozen berries with nothing else added- no sugar, no dyes, no preservatives. Just. Berries.

DSC_0965

This stuff is gooood. Like, real good. I wasn’t sure if I would like it because sometimes the chia seed consistency can be a bit odd. I’ve made chia seed breakfast pudding three days in a row and I still don’t know if I like it. This jam, though…this jam works! And it’s so easy. That’s the best part. You have that great homemade taste in no time. I love it!

Fun Aussie tip: What the US calls “jelly”, the Aussie’s call “jam”. What the Aussie’s call “jelly”, is what the US calls “jello”. I got some weird looks when I offered to make the kids peanut butter and jelly. They definitely thought I was offering to make them peanut butter and jello sandwich. Yum!

Read Full Post »

DSC_0904

Happy Friday, everyone! I’m made you something with fun sprinkles to help you celebrate the end of your week. I hope you have some awesome plans for this weekend. I think I have not 1, but 2 fun things in the works that I am looking forward to sharing with you on my next Travel Tuesday-Staycation post.

Ok, now let’s get down to business. The family I nanny for often has chocolate chip cookies in the house. They are good. Real good. Like, I’m pretty sure in one day, the Dad and I can make a fairly large dent before the kids even know I restocked. They aren’t vegan and they aren’t healthy. Thus, they are my worst enemy. They whisper to be from the very top of the cabinet saying “psst, Erin. You worked out this morning. You can totally have 1. Or 3. I’m yummy and chock full of chocolate chips…”

DSC_0883

It’s the worst.

peanut butter + maple syrup

peanut butter + maple syrup

So I’ve been trying to make some cleaner, healthier-sorta-kinda, desserts that I can keep around the house that I don’t have to worry about sharing. This way, when I’m being taunted by store bought chocolate chip cookies, I have a better option.

peanut butter/maple syrup + coconut flour

peanut butter/maple syrup + coconut flour

Healthy-ish Peanut Butter Balls
from Oh She Glows
serving 20-25

Ingredients:

  • 1 cup 100% natural peanut butter (smooth or crunchy, I used Teddy’s. You want it to be the all natural kind that is kind of drippy.)
  • 3.5-4 tablespoons pure maple syrup, to taste (I only tried maple syrup so I can’t vouch for other liquid sweeteners like honey and Agave Nectar)
  • 2-3 tablespoons coconut flour (I used 2.5)
  • fine grain sea salt, to taste (I used 1/8 teaspoon because by PB was already salted)
  • 6 tablespoons rice crisp cereal
  • 3/4 cup dark chocolate chips
  • 1/2 tablespoon coconut oil

Instructions:

  1. Combine natural peanut butter and the maple syrup in a medium bowl and stir vigorously for about a minute until the mixture has thickened.
  2. Add the coconut and stir until well combined. The amount of the coconut flour will depend on the consistency of your peanut butter. Start with 2 TBSP, combine and let sit for a minute or two. The coconut flour will continue to absorbed the moisture in the mixture and will continue to thicken. Add a bit more if the peanut butter remains sticky. You want to be able to roll the peanut butter into a ball without it sticking to your hands (add more flour if this is the case) and without cracking or crumbling (add more maple syrup). See my picture below for a reference on what your dough should look like.
  3. Add salt and combine.
  4. Add cereal and gently combine.
  5. Shape into balls and place on a baking sheet lined with parchment paper (I was able to make 20 but I would suggest going smaller for a better Peanut butter/ chocolate ratio). Place in freezer while you prepare the chocolate.
  6. On medium heat,melt the chocolate and coconut oil in a double boiler. Once the chocolate had begun to melt, stir the chocolate around until it becomes smooth then remove from heat.
  7. Remove the peanut butter balls from the freezer. One at a time, drop them into the melted chocolate, roll around until it is covered, then roll it gently up the side to help remove excess chocolate.
  8. Place in the fridge or freezer for another 10 minutes or so for the chocolate to harden. Keep chilled.

DSC_0880

I had been eyeing this recipe since I received two large jars of Teddy’s peanut butter from home for Christmas. I sort of forgot about it with the craziness of the holidays but the other day, I realized I was down to my last 1/2 of a jar and knew I had to make this before it was too late.

DSC_0888

The filling is straight up peanut butter goodness! The rice cereal adds a nice texture but the best part is, because it’s so peanut buttery, I’m good with one. It’s the perfect little afternoon snack!

DSC_0906

AND peanut butter is a very American thing and most of the family doesn’t particularly like them so they are all for me! Yesssss!

PS. did you notice in the first picture the condensation on the Peanut Butter Balls because it was SO hot here when I was photographing them? It reminded me of this skit. LOL! Happy Friday.

Read Full Post »

DSC_0882

Remember when I said I was in a food rut? Apparently that is still in place. I just checked my back posts and realized I haven’t posted a recipe for a real meal since Dec. 2. It’s been desserts, snacks and breakfast foods ever since then.

I mean, if I’m being honest with you, those are the only meals that I really care about but I try to at least pretend to be a responsible adult.

To make matters worse, this wasn’t even really my idea! As I’ve mentioned in past posts, I love wraps but can’t successfully wrap a wrap to save my life. I almost always put too much or too little in, never heat them correctly and somehow rip them. It’s a serious problem people! And that’s with normal, run of the mill flour tortillas. The one time I tried rice paper wraps was disastrous!

Instead, this recipe is due 100% to the fact that when I asked the 13 year old what he wanted for lunch one day, he said “summer rolls with noodles”. I laughed at him, told him we didn’t have the ingredients, he found them, proceeded to laugh at me and then I had a mini panic attack because  I can’t handle rice paper wraps!

Fun twist, I can, in fact, handle rice paper wraps. So much so that I’ve made them about a million times for lunch since that fateful day AND made them one time to feed the family while the Dad was away. I got all the ingredients ready, laid them out and the kids made their own. It was a hit! Here’s my favorite variation:

DSC_0879

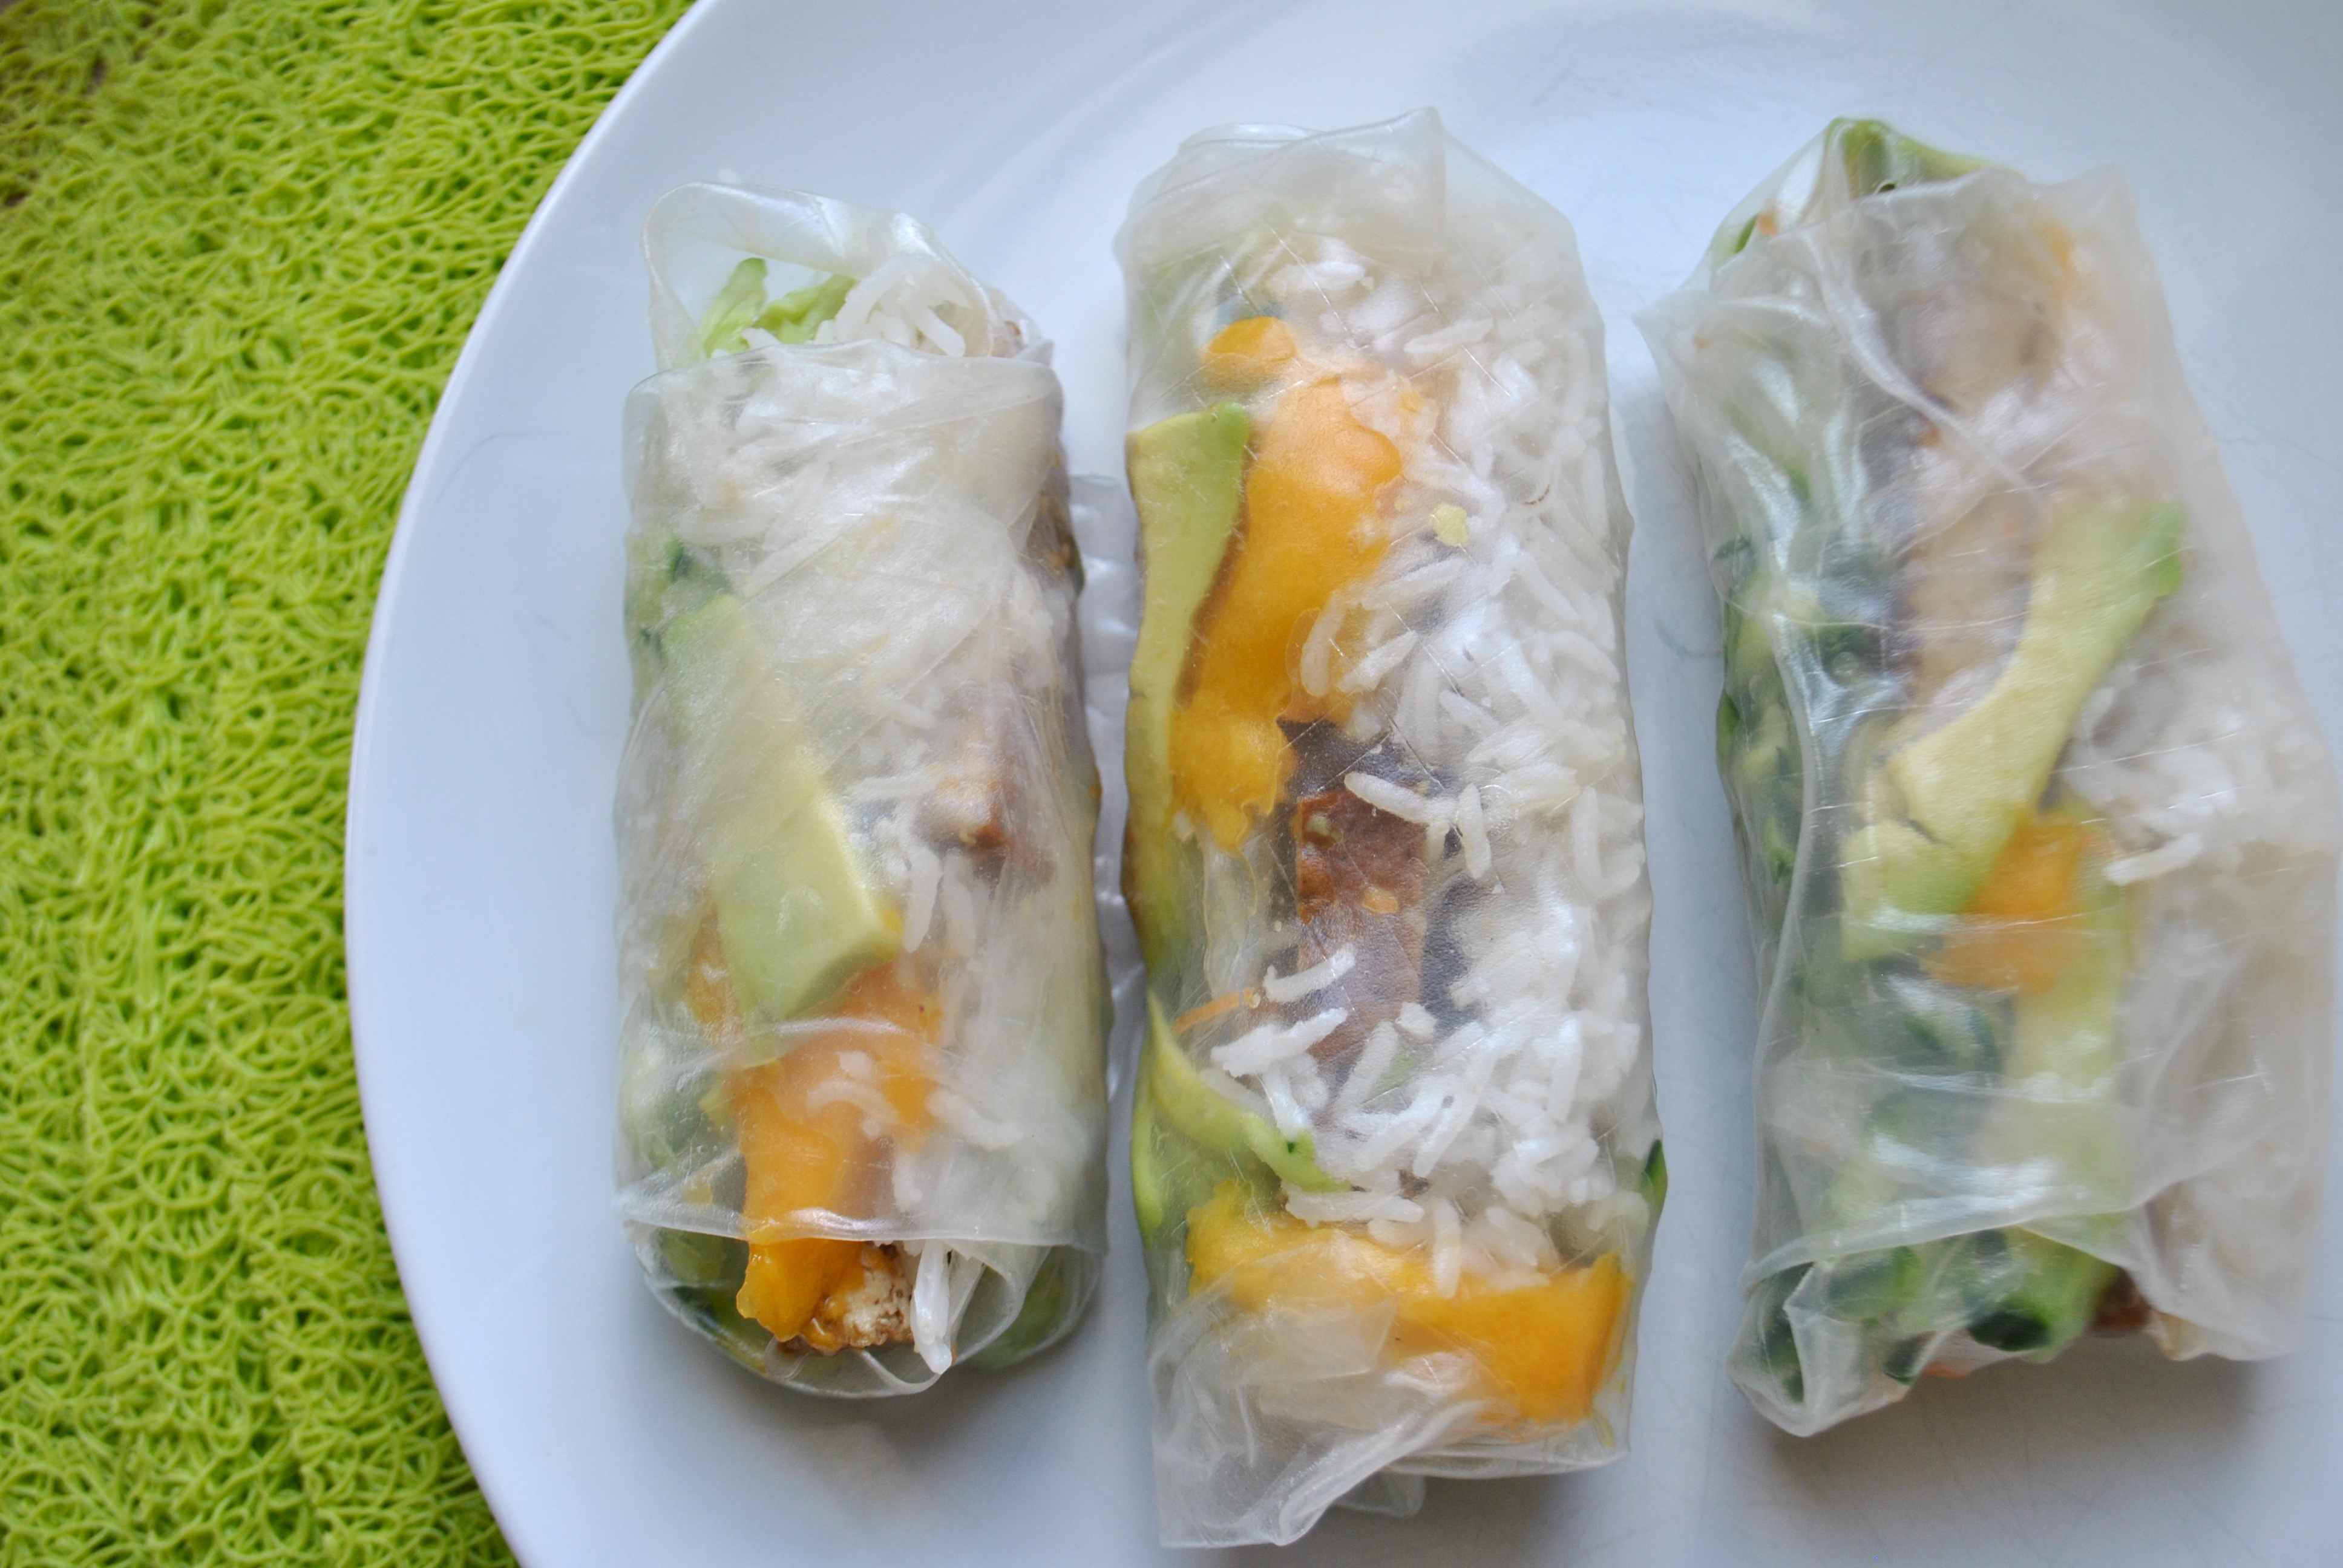
Tofu Mango Summer Rolls
makes 3 wraps= 1 serving

  • 25g of asian marinated tofu*
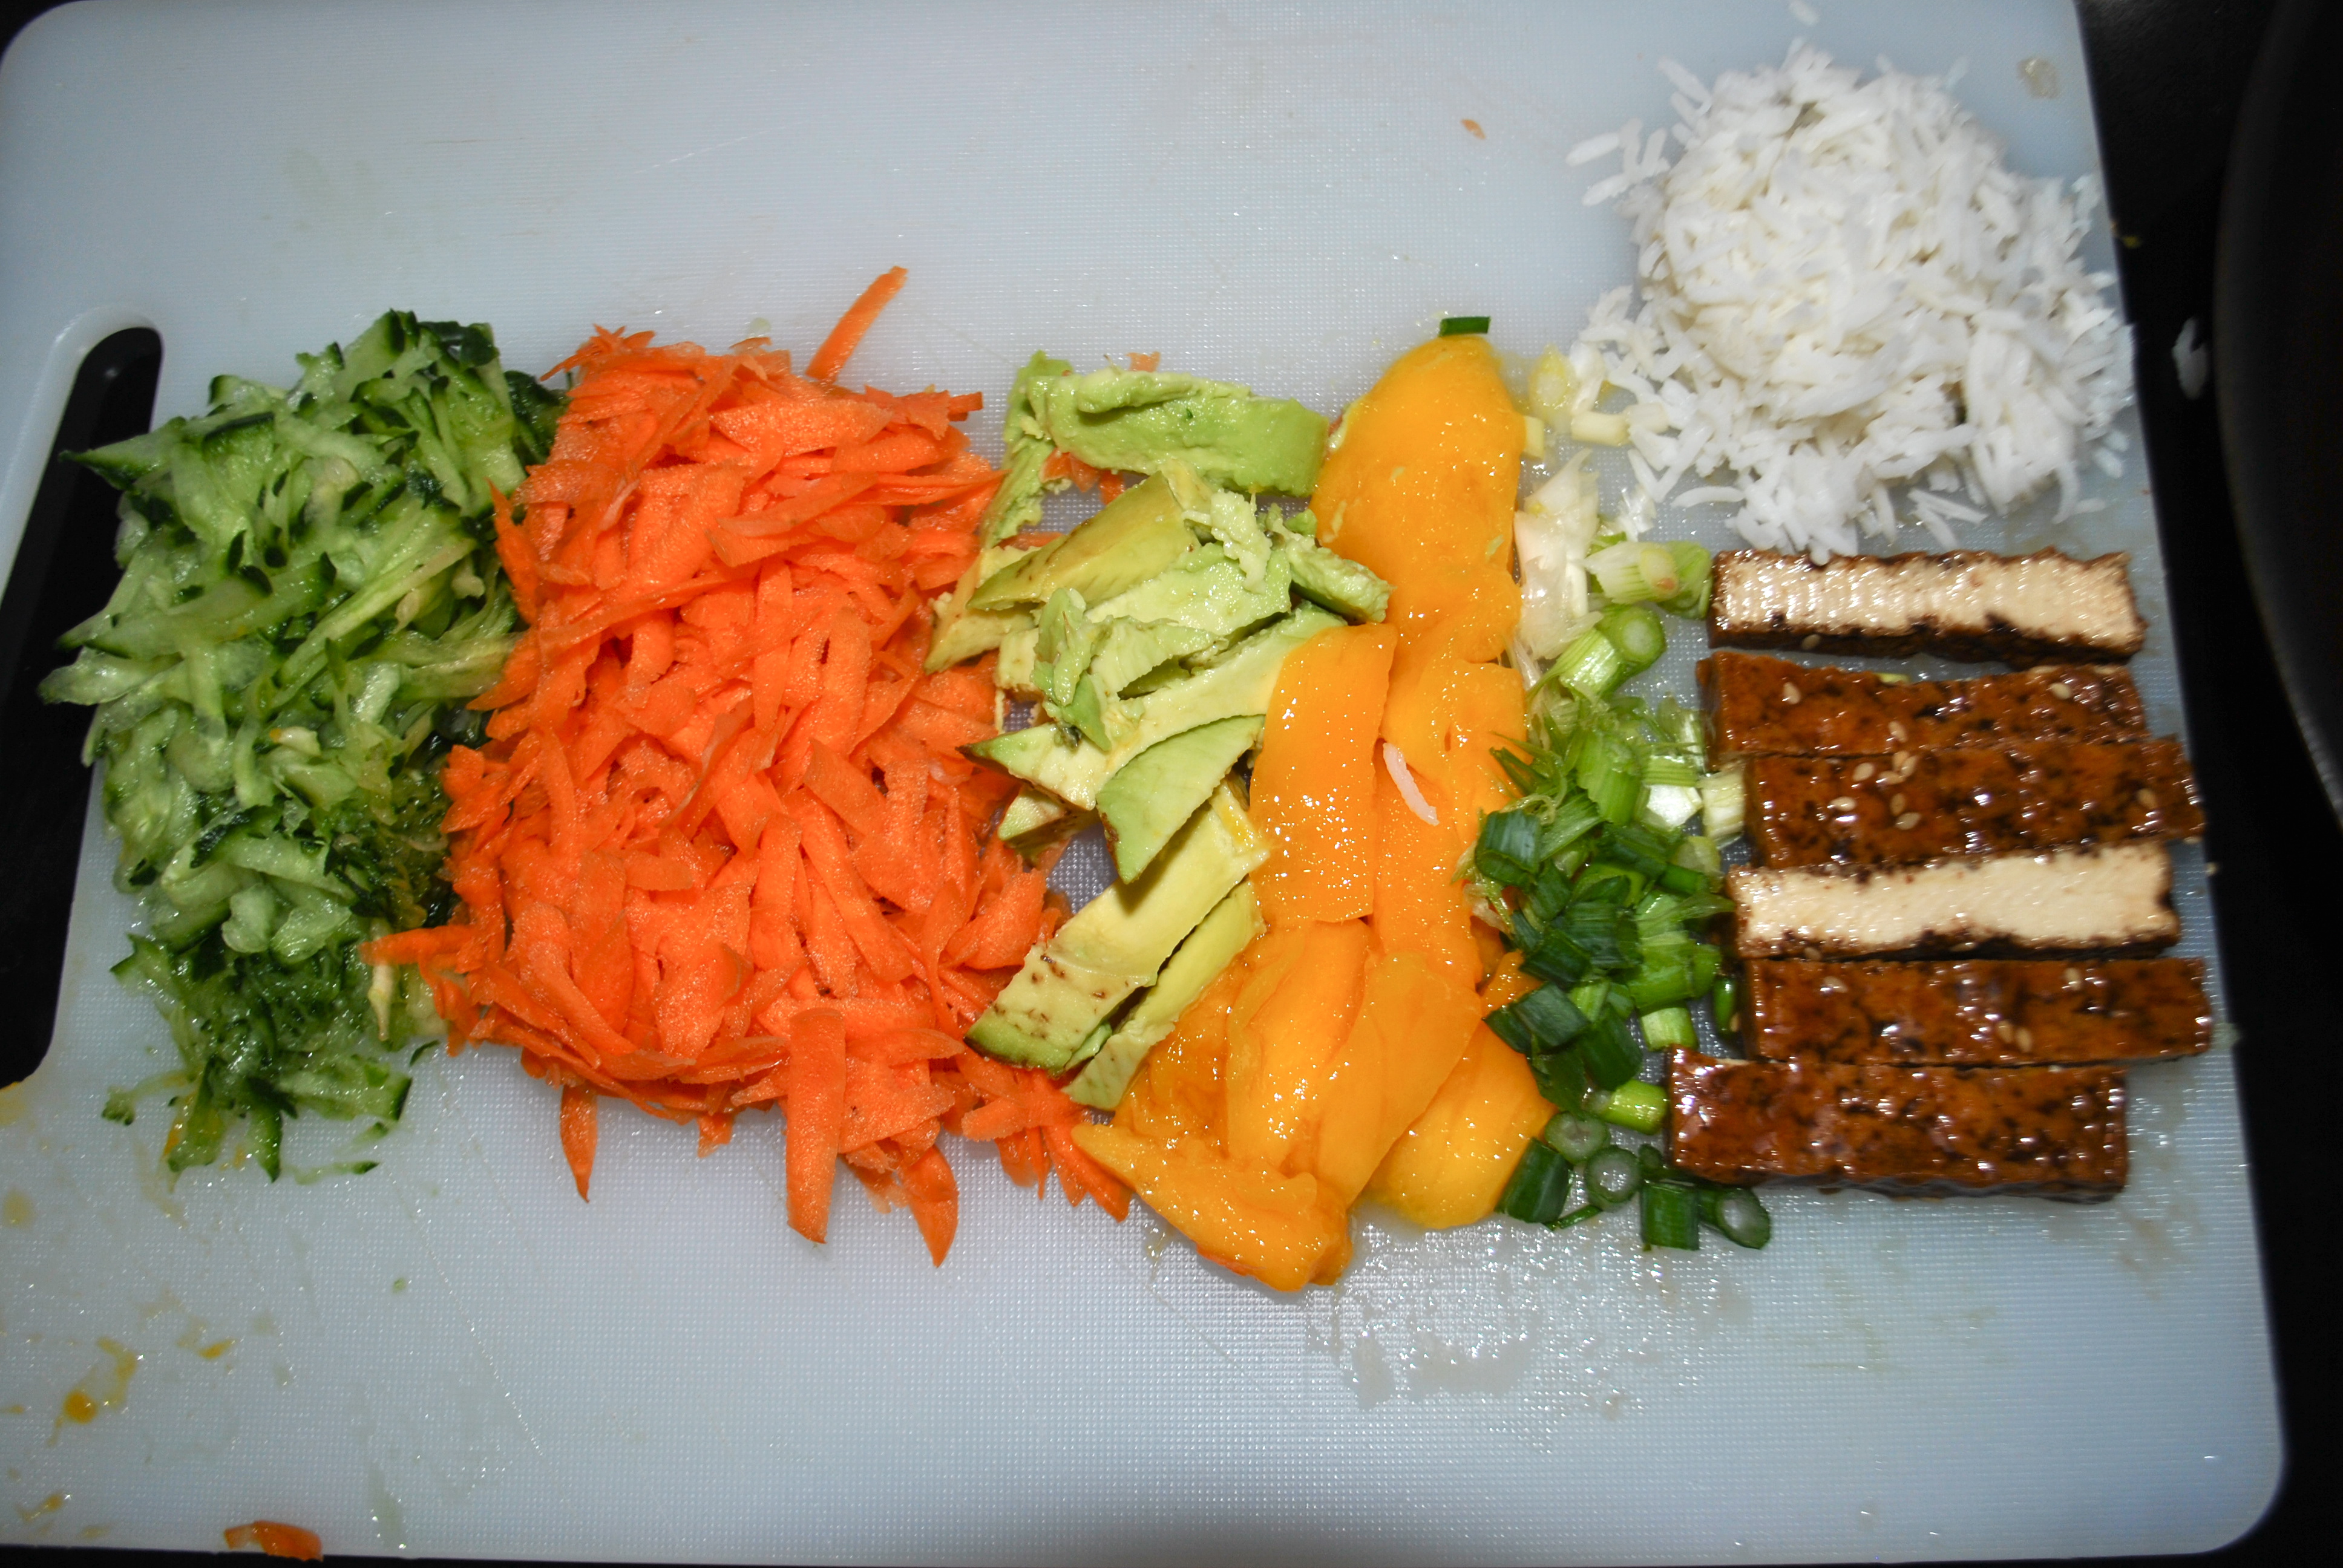
  • 1/5  an english cucumber, grated
  • 1/2 a large carrot, grated
  • 1/2 an avocado, cut into strips
  • 1/3 a mango, cut into strips
  • 1 green onion, green and white parts, sliced
  • 1/4 cup basmati rice, cooked (angel hair pasta also tastes really good and is what I used with the kids)

For dipping sauce:

  • 1 TBSP Sweet Chili Sauce
  • 1/2 TBSP Low Sodium Soy Sauce (or more to taste)
  • splash of toasted sesame seed oil (optional)

*weird measurement, yes. But I’ve been using  this tofu, which is pre-marinated and comes in four pre-cut servings. I know, it’s lazy but at least it’s not more dessert!

Instructions (I’m including step-by-step pictures, which I normally hate but sort of felt necessary):

1. Get all your ingredients set up on your chopping board. You have to work quickly when you are making these.

DSC_0885

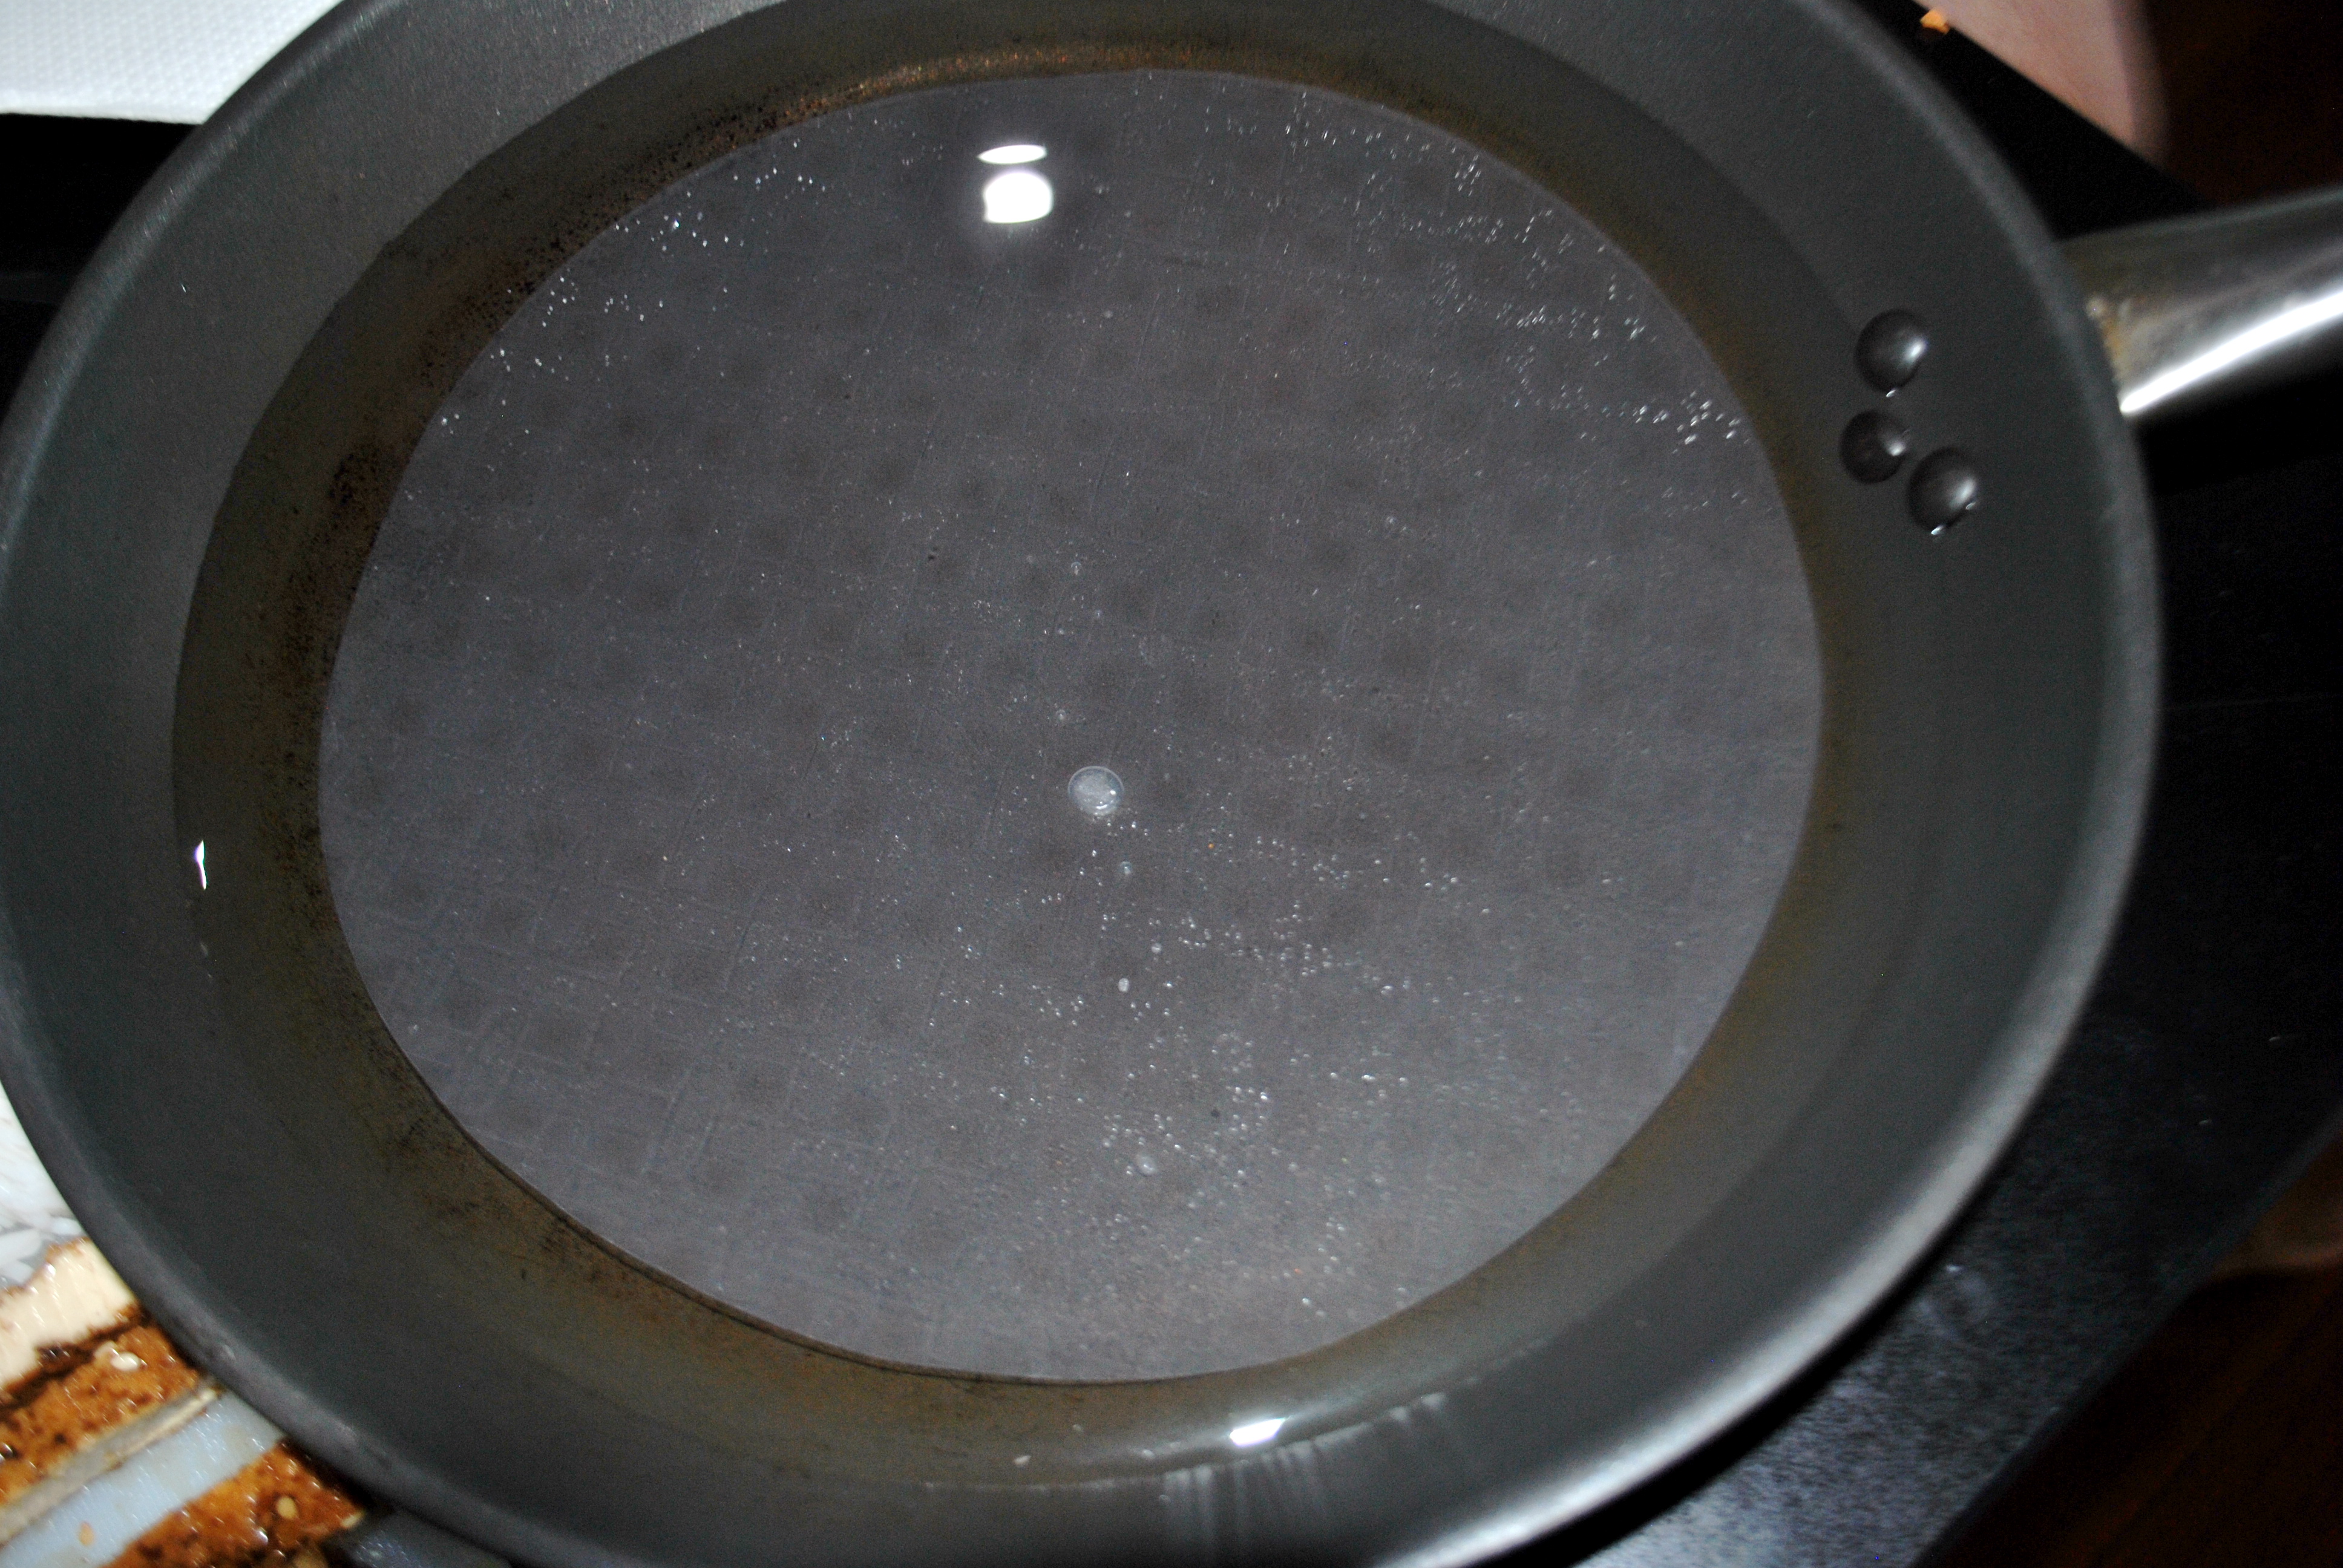
2. Grab a pot or pan that is large enough to lay your wrapper in without bending it. Fill it  with warm water (I like a frying pan best). Line a plate with a clean, dry towel.

3. Submerge your wrapper in the warm water for approximately 30 seconds until it is soft and pliable.

DSC_0889

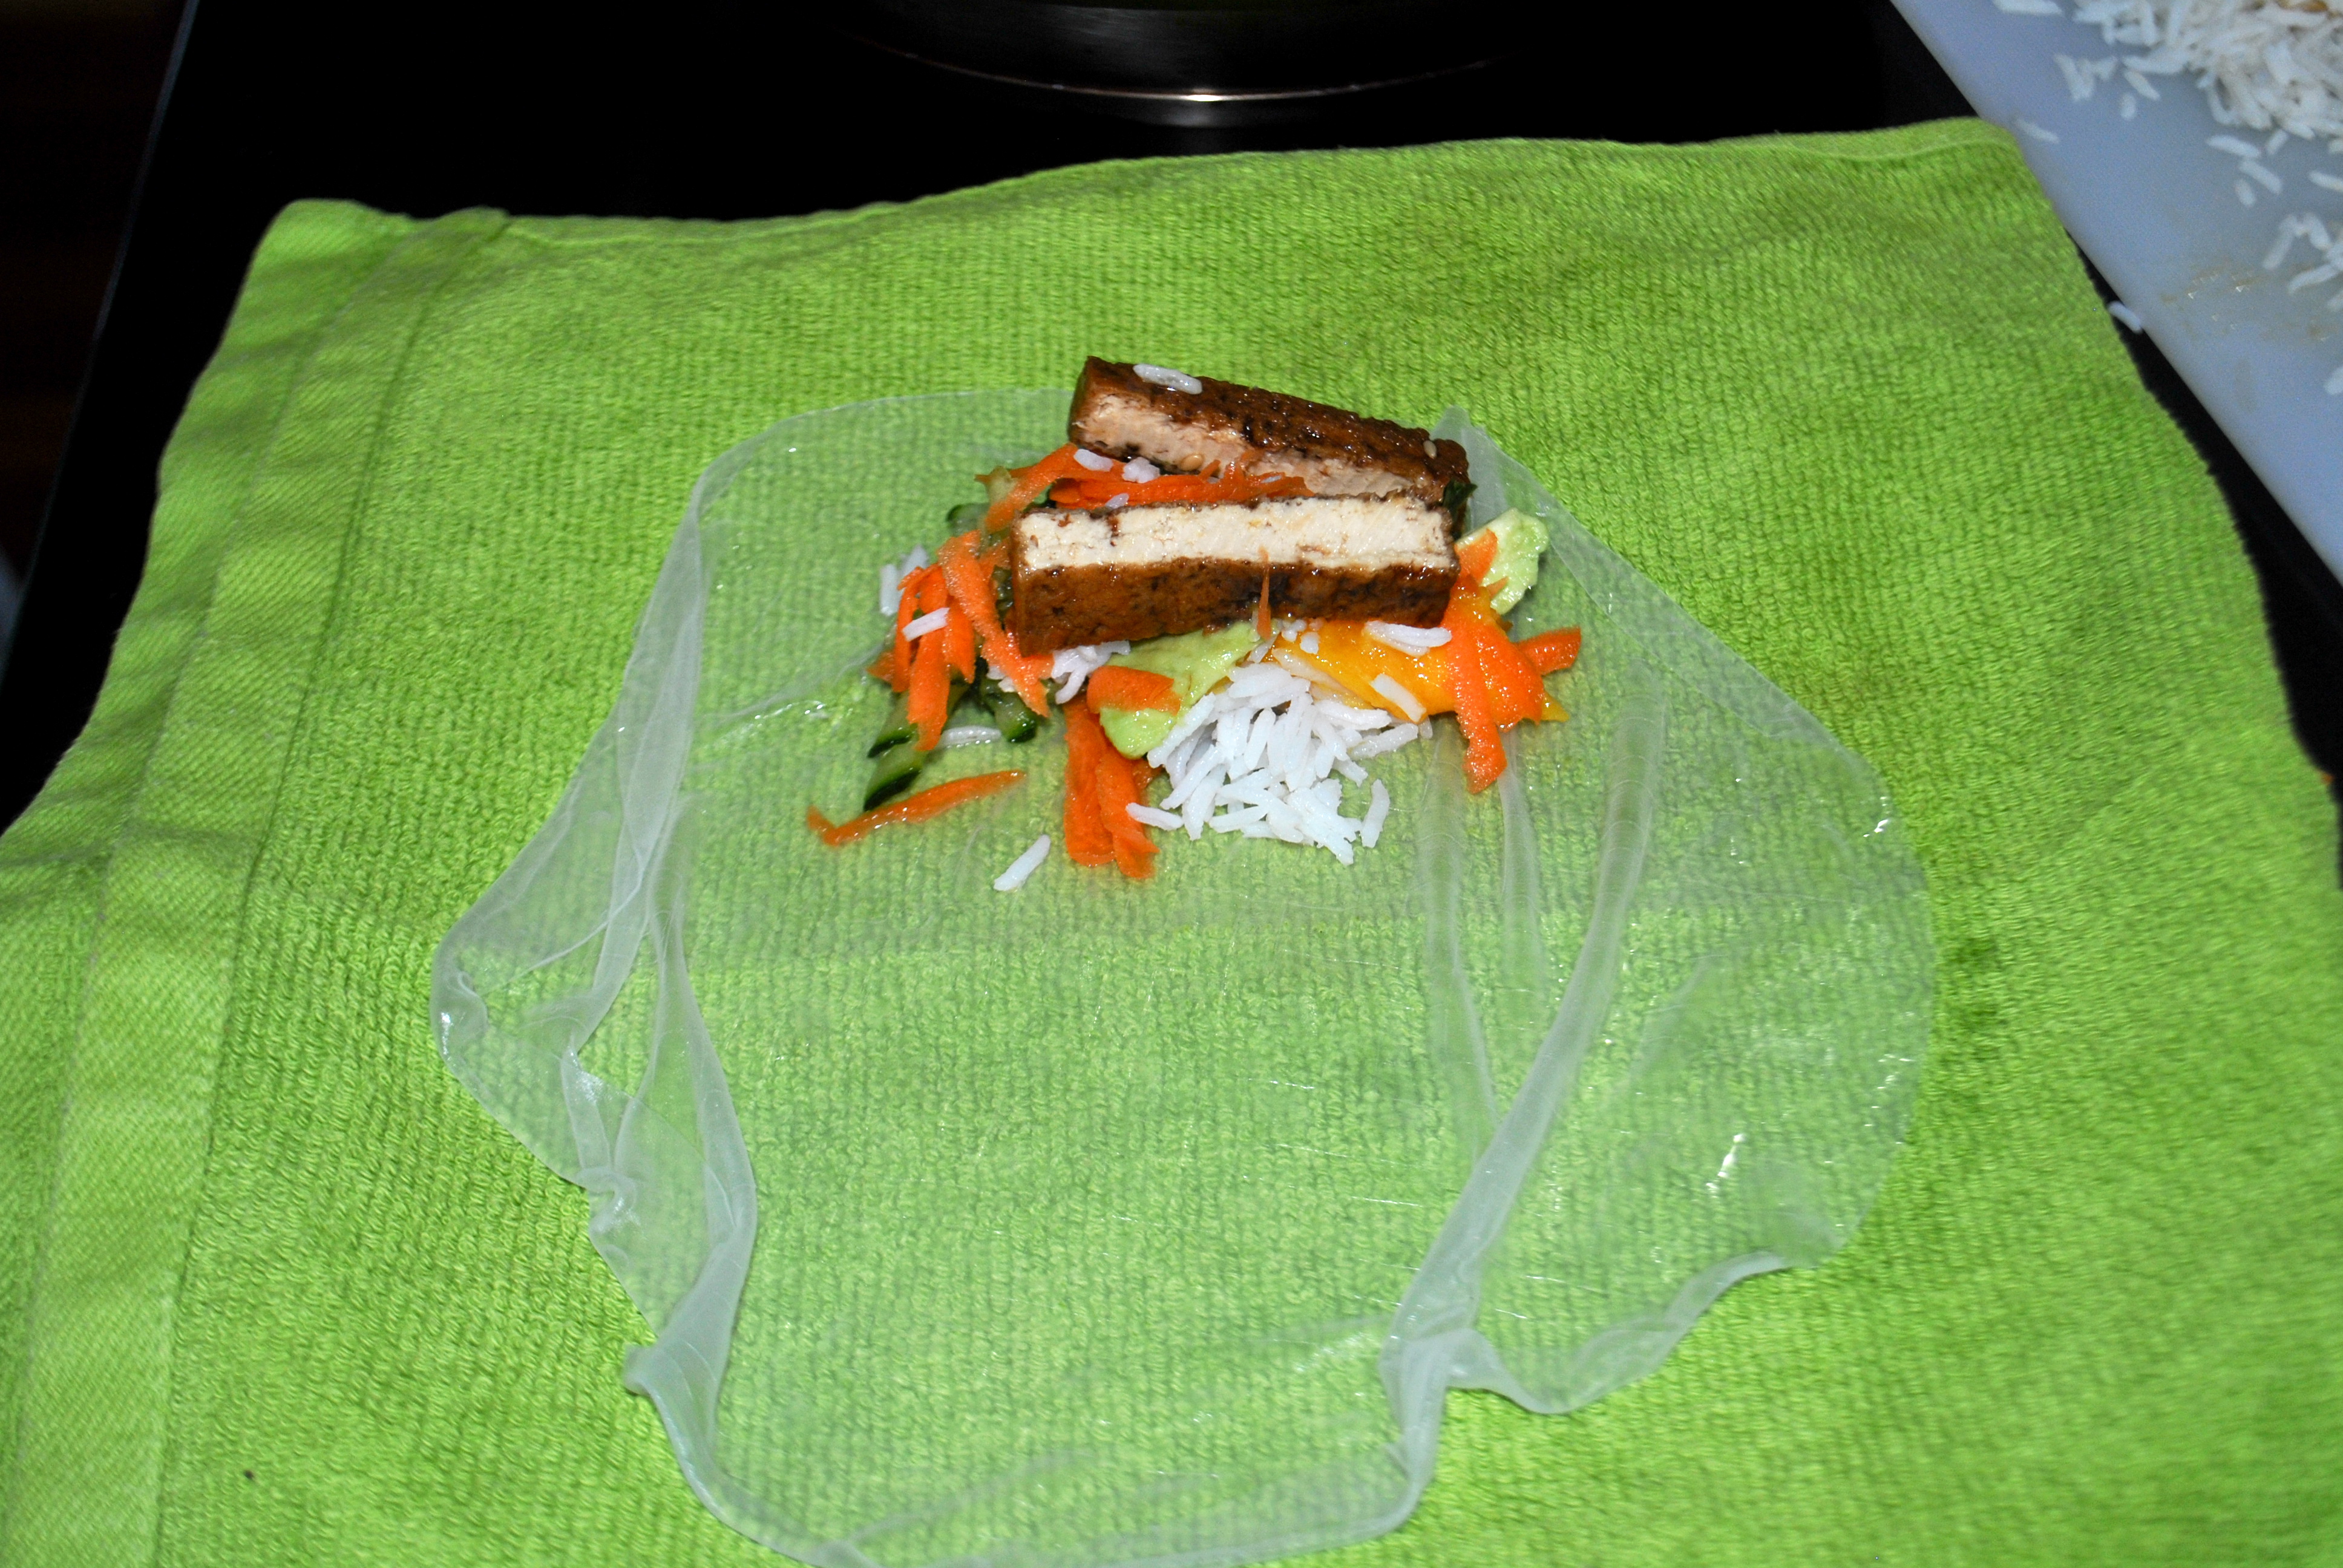
4. Lay out the wrapper on the clean towel (this towel is clean, I swear!).

DSC_0903

5. Pile the ingredients on one end leaving room to fold the end over the ingredients, like a burrito.

DSC_0895

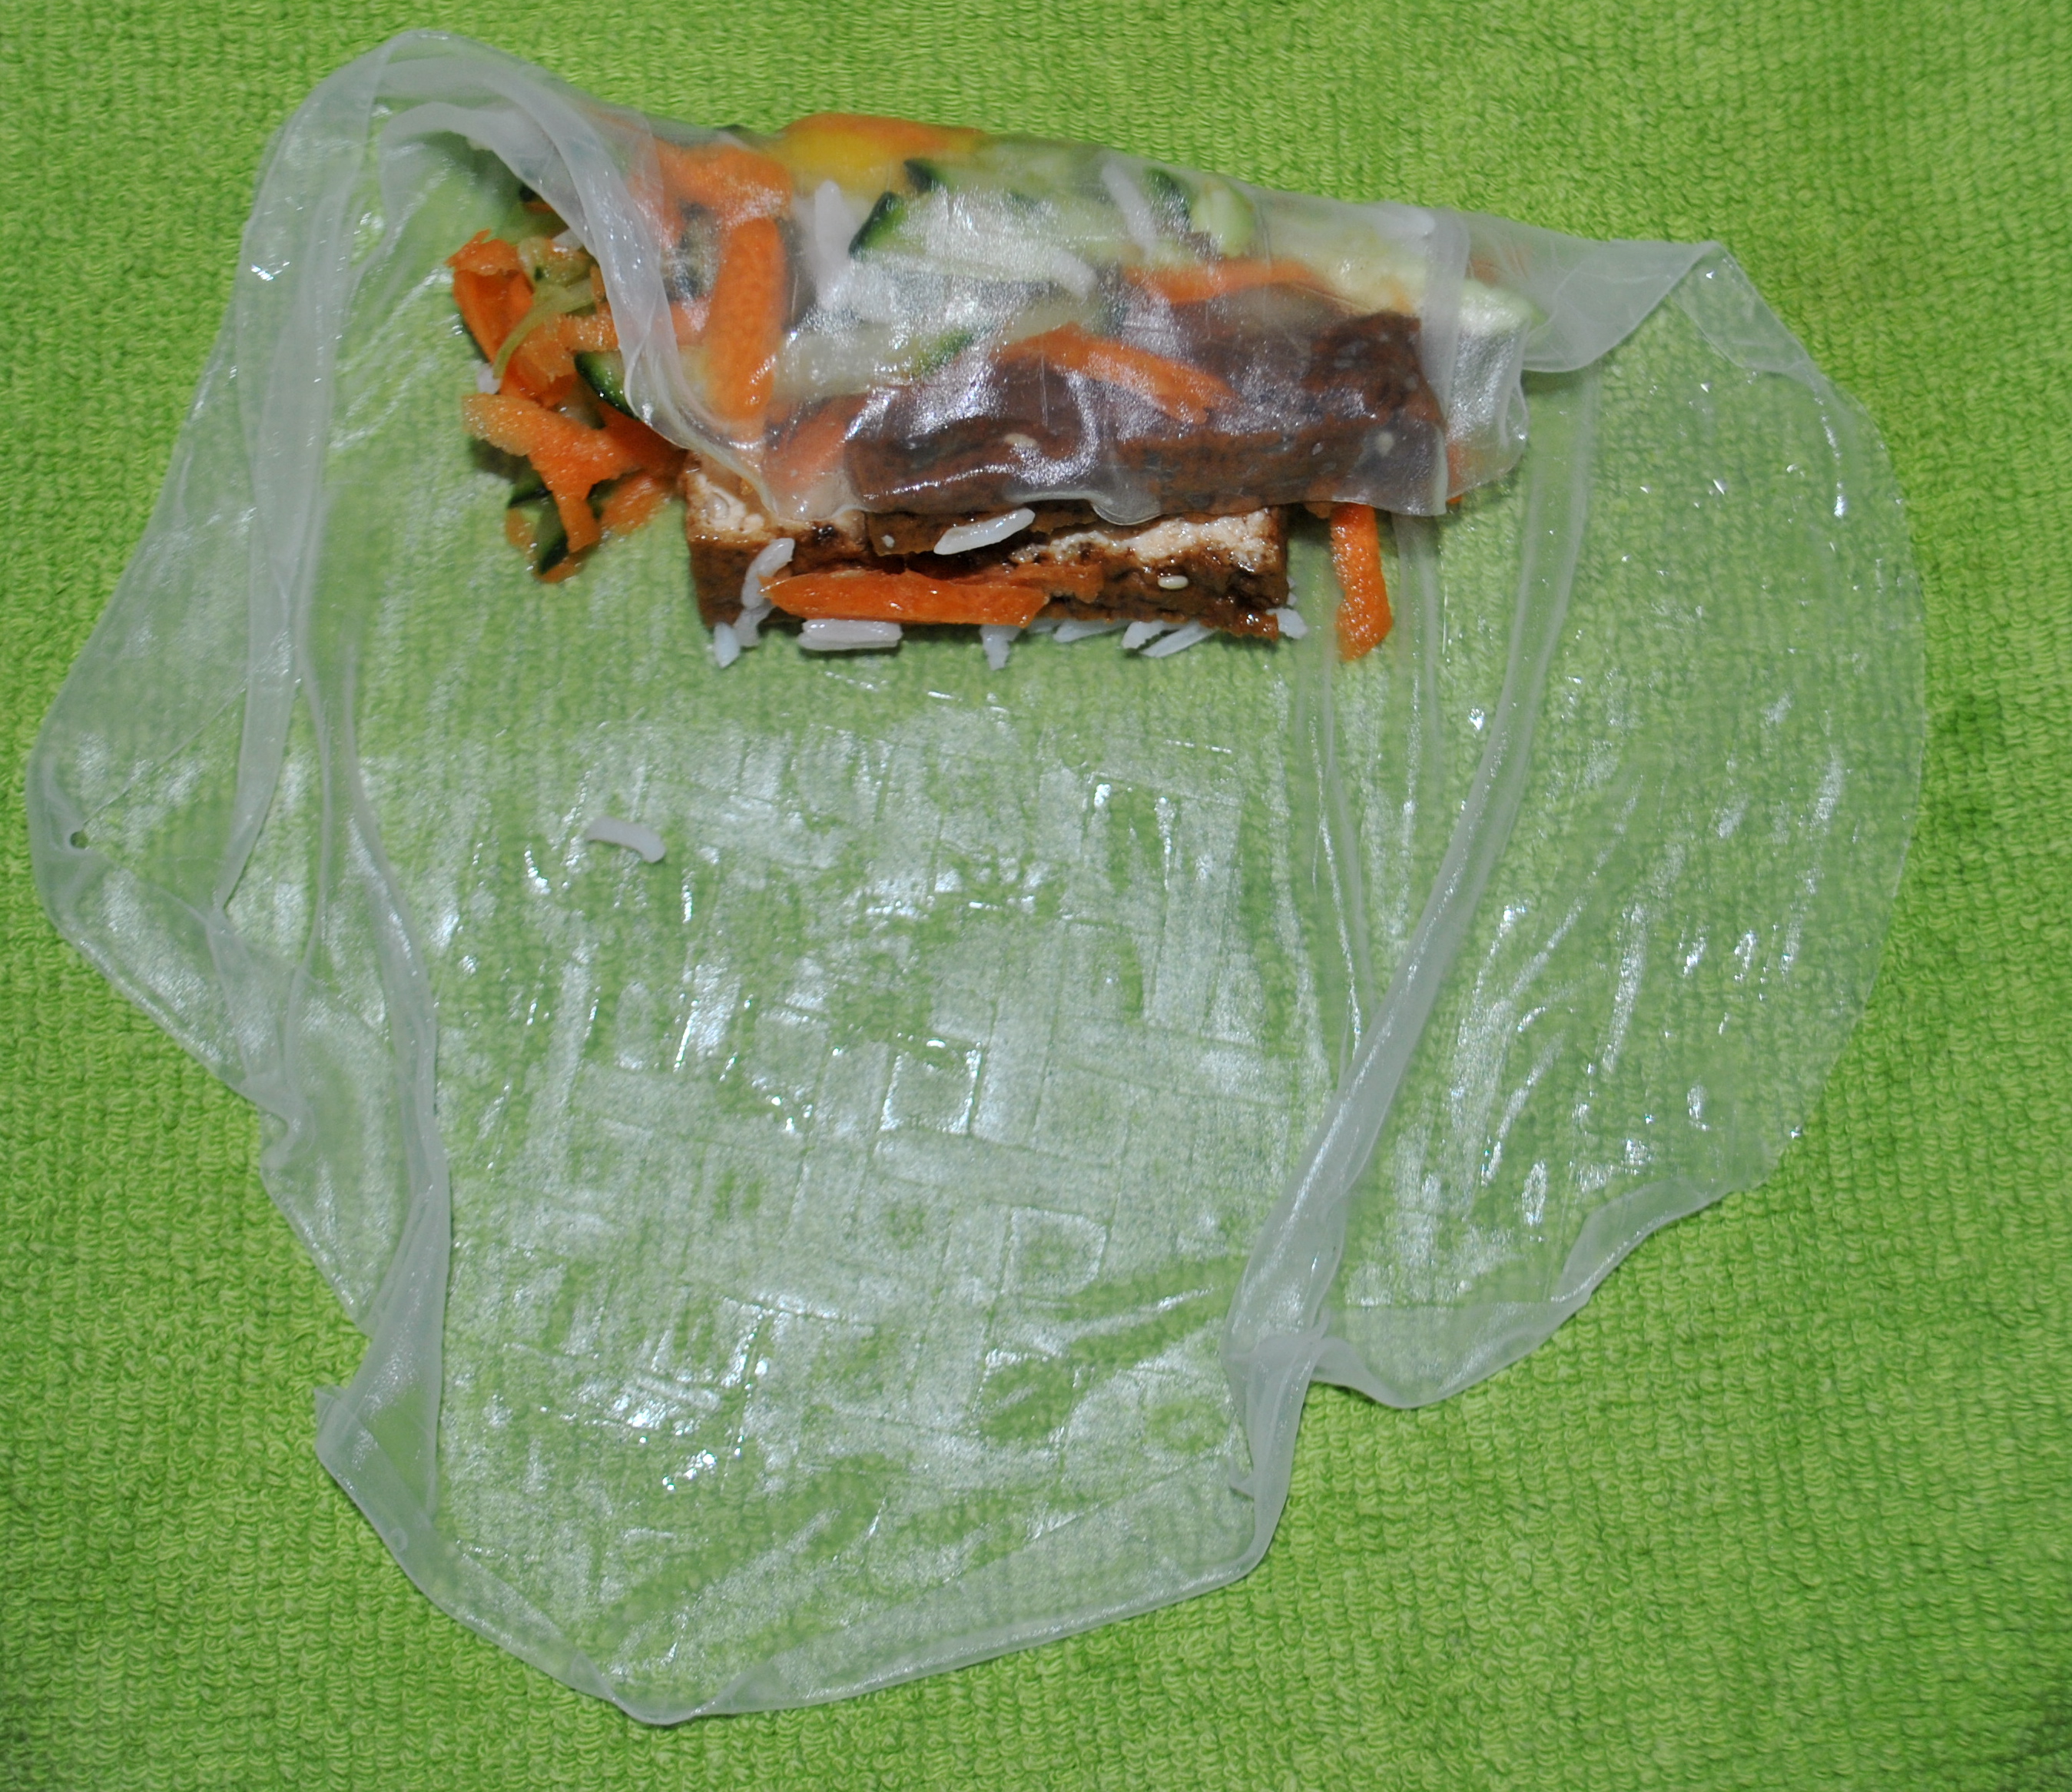
6. Fold the end with your filling over the filling.

DSC_0896

7. Fold in the sides.

DSC_0906

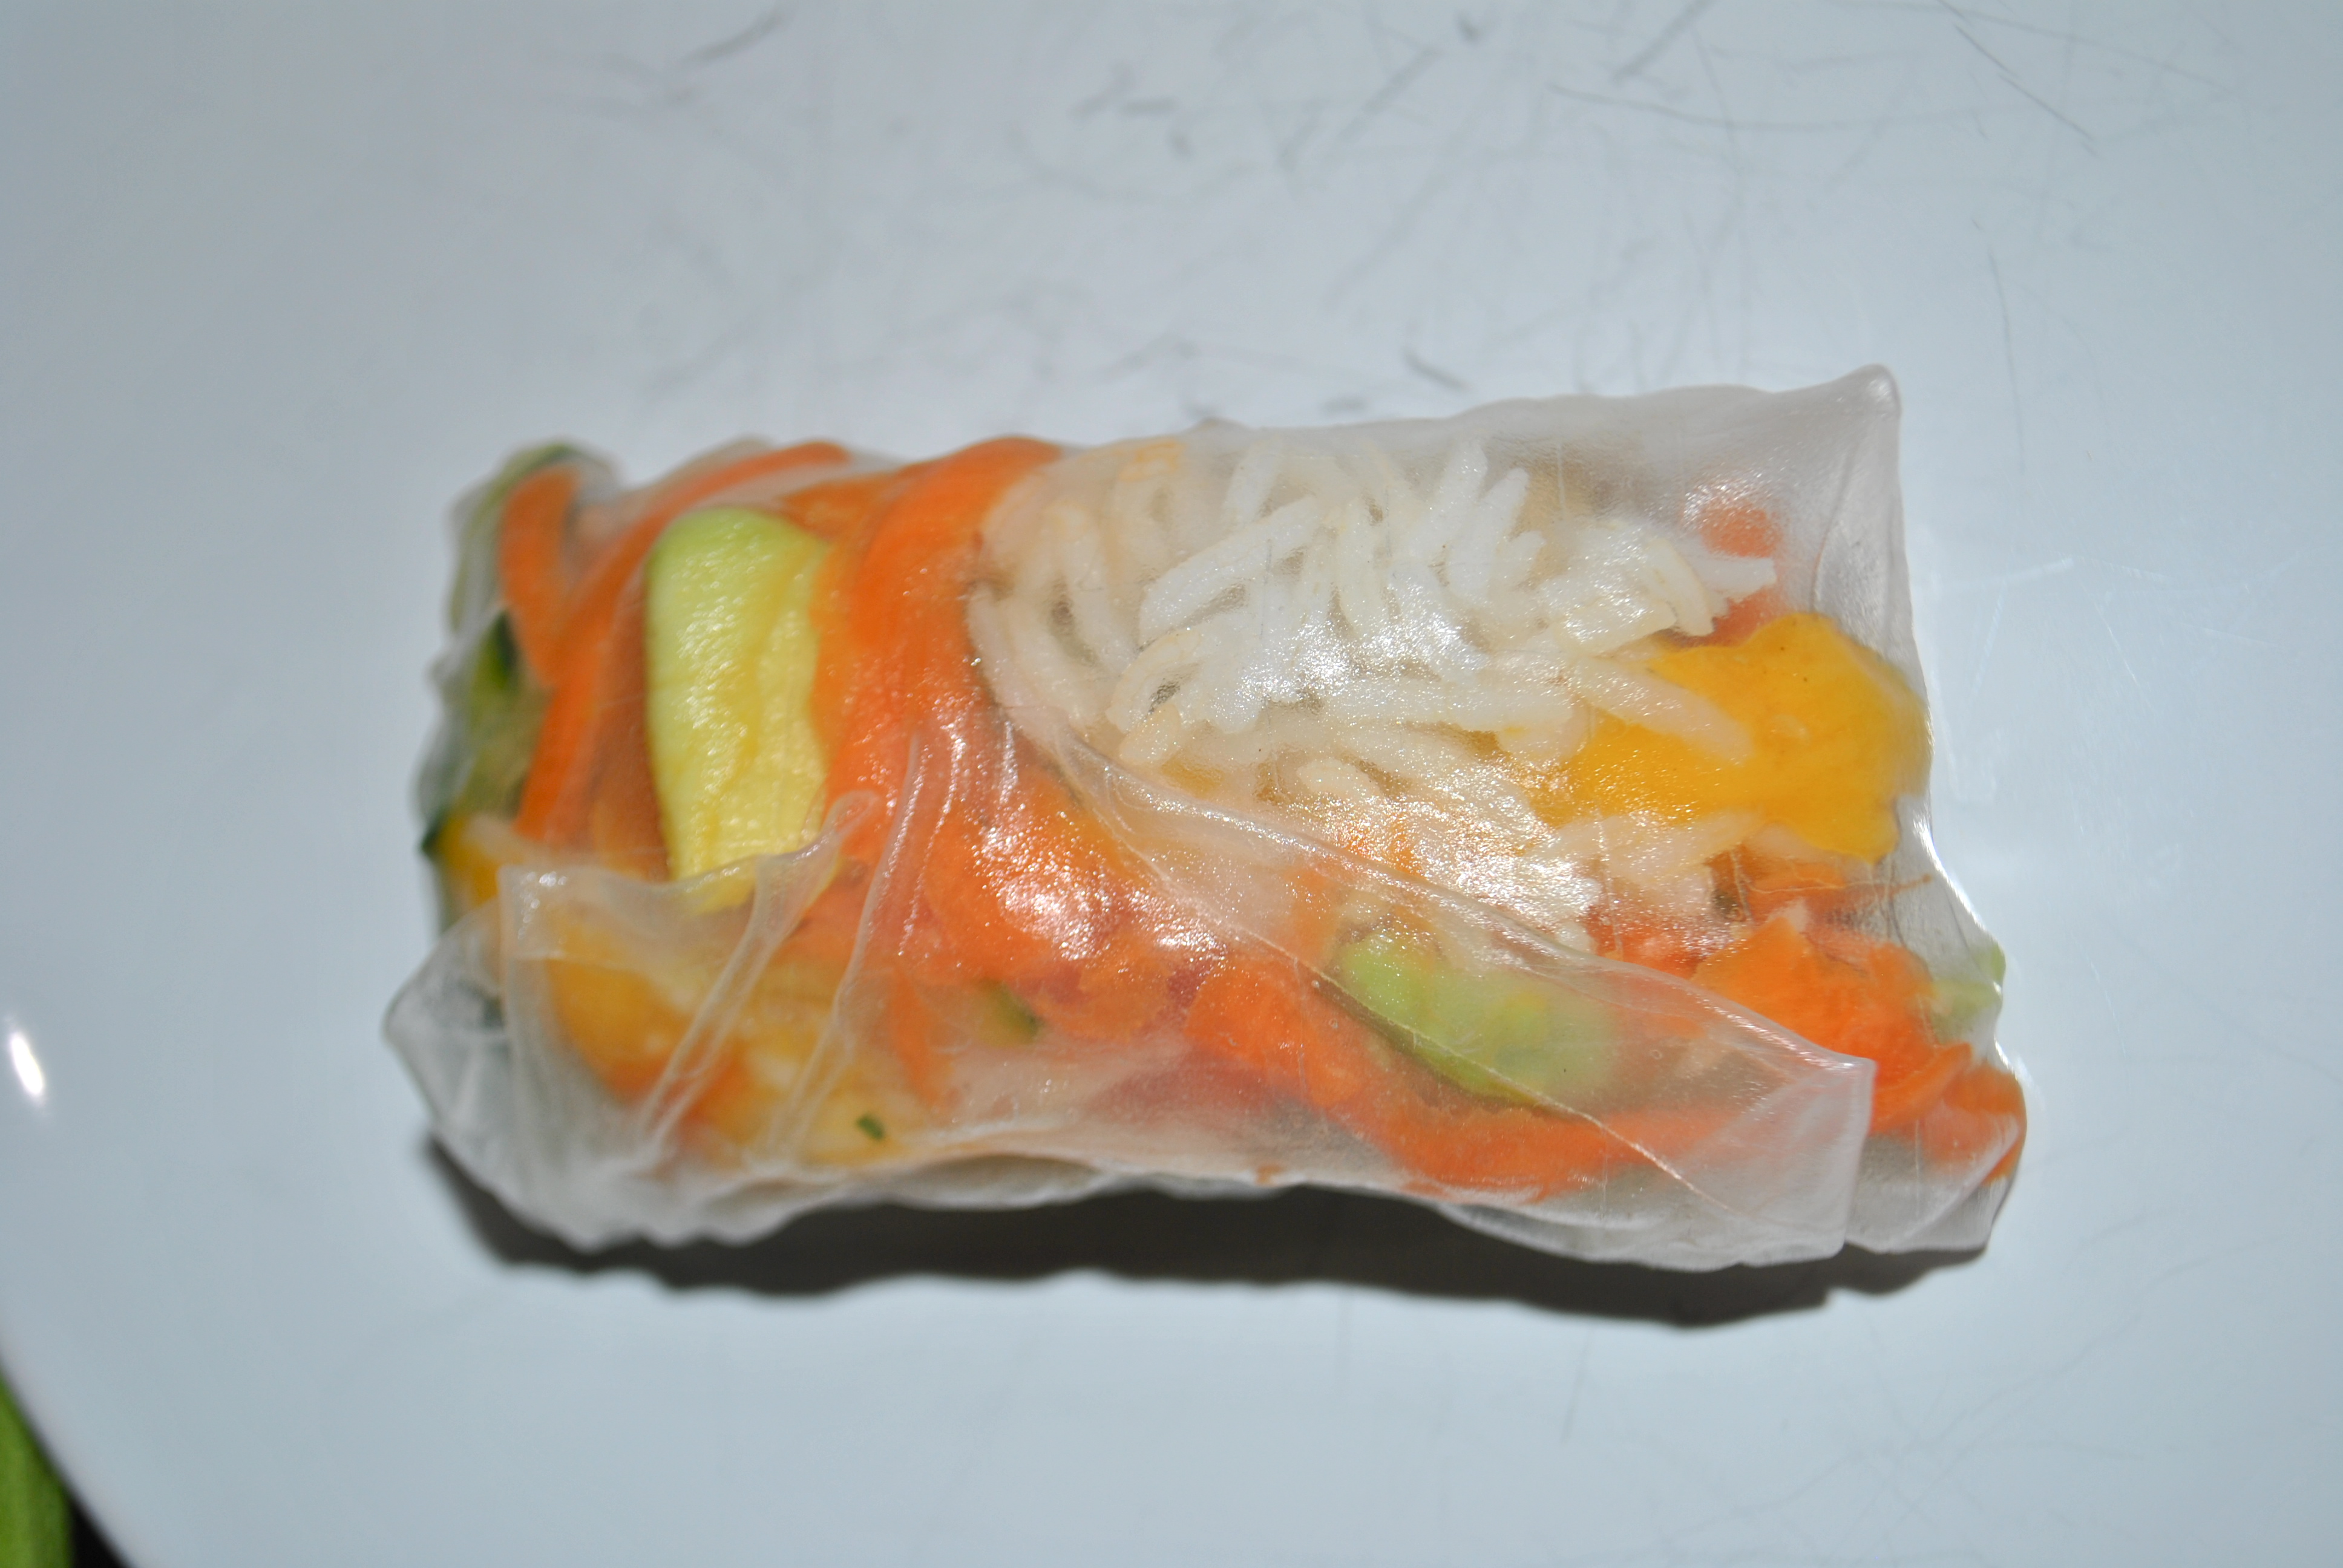
8. Slowly roll up the filling in the rice paper.

DSC_0897

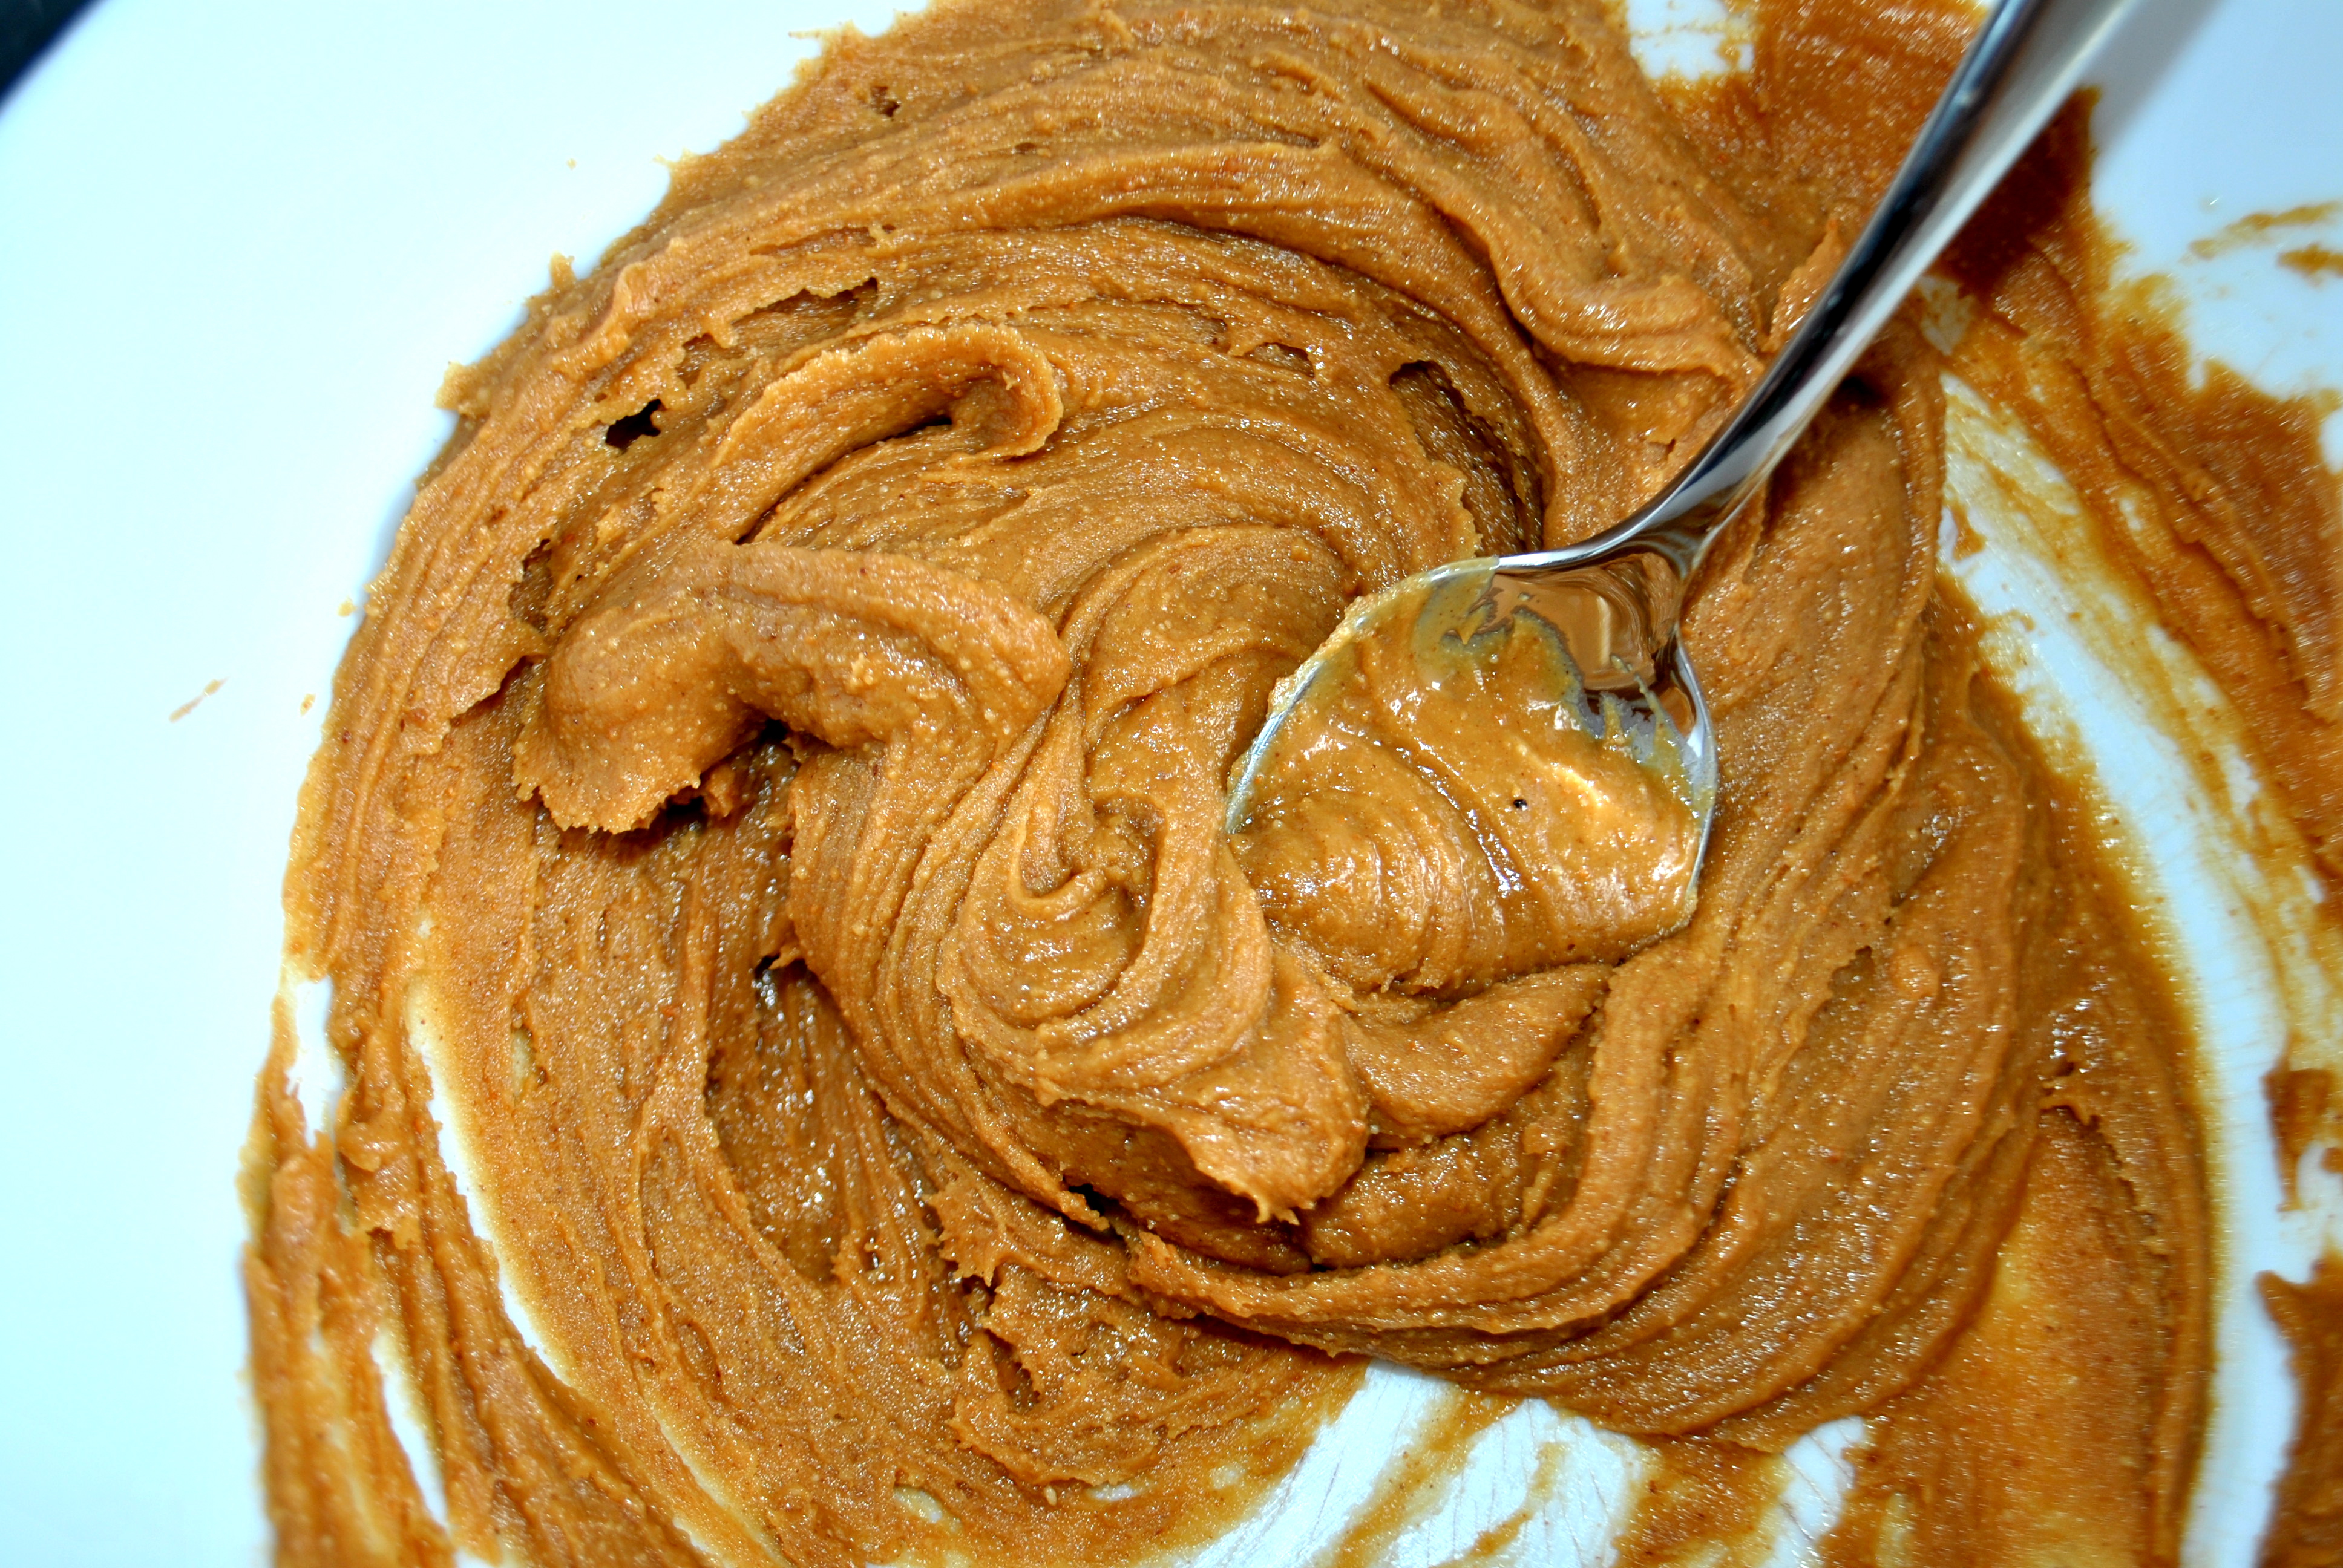
9. Mix the Low Sodium Soy Sauce and the Sweet Chili paste together. If you like toasted sesame seed oil, a splash of that adds some great flavor but it isn’t necessary.

10. Dip in your Summer Rolls and chow down!

DSC_0882

I know the dipping sauce is pretty simple and not that innovative. I tried a bunch of different variations and concoctions- garlic, soy sauce, ginger, sweet chili sauce, sesame oil, hoisin sauce, rice vinegar, etc- but honestly, my favorite was just the simple sweet chili sauce and soy sauce combo. It was easy, came together fast and the simplicity matched the rolls. I like these rolls because they are fast and light which is what I’m looking for in this heat. I didn’t want to complicate the meal with a fancy sauce. Feel free to experiment though!

When I made these for the family, I paired them with these green beans and the meal was a huge success!

Ok, tomorrow, we are back to dessert. And if the past few months are any indication, that will be the norm for the next two months. YEAH!

Read Full Post »

DSC_0864

Sometimes, I’m certain that my body is boycotting the fact that I removed it from New England. According to all of my friends’ facebook statuses, it’s been snowing in Massachusetts since I left in October. Practically non-stop. In fact, by some weird coincidence, every time it snows in Mass, the temperature spikes here in Toowoomba.

Despite this, I occasionally forget I am not in a cold climate. Last week when I purchased quinoa and vegetable soup from the health store? Yeah, it’s been in the 90s and it’s still sitting in my fridge. The other morning when I rolled out of bed and put on my comfy yoga pants, tshirt and hoody and went in the kitchen and made this apple Quinoa Flake Bake? Yeah, I ate half because it was too heavy and then changed into shorts and a tanktop. I don’t know what I was thinking.

It does benefit those stuck in cold climates, though! This is a fast, single-serving, hearty stick-to-your-ribs breakfast that is perfect for a snow day.

DSC_0860

Apple Quinoa Flake Bake
from Healthful Pursuit

  • 1/2 cup apple sauce
  • 1/2 cup quinoa flakes
  • 1 tbsp sugar (I used coconut sugar but regular white sugar will work fine)
  • 1 tbsp of chia seeds
  • 1 tsp ground cinnamon
  • handful of chopped walnuts
  • handful of coconut

optional toppings: natural peanut butter (I used Teddy’s), maple syrup, raisins, apple, etc.

Directions

Prepare a 16oz. microwave/oven safe dish by oiling with a dab of coconut oil. Set aside. Drop all ingredients in a small bowl and mix until fully incorporated. Press mixture into prepare dish and even out with fork.

Microwave option: Place in the microwave and cook for 3 1/2 minutes. You’ll know when it’s done when it rises slightly, is harder to the touch, and pulls away from the sides of the dish. Don’t bake it too long, or you’ll have a chocolate Frisbee!

Oven option (WV note: I have not tried this in the oven): Place in a preheated oven at 350F and bake for 25-30 minutes, or until toothpick inserted comes out clean.

Allow to rest for 1 minute before tipping over onto a plate and smothering with your favorite toppings.

Though tasty and filling, this has the texture of baked oatmeal when it is complete, which is a little dry for me. I would suggest topping with peanut butter (or other nut/seed butter of your choice) and/or maple syrup. That’s a personal preference, though. Taste it first and see what you think.

DSC_0866

This also pairs well with a hot beverage, sweats, warm slippers and lots of blankets.

Read Full Post »

DSC_0874

I know it’s 7:30pm in the States and the day after Valentine’s Day in Australia but I am physically incapably of letting a holiday pass without making a corresponding dessert. I think it may be a problem. Chronic Seasonalbakingaholic? Sure, that sounds about right.

For this Valentine’s Day, I wanted to make something a little different. EVERYONE makes red velvet something or other. I’m totally guilty of that as last year I made Red Velvet Nutella Breakfast Rolls in the shape of hearts. (side note: the Aussies say “Love heart” when describing the traditional Valentines Day heart…weirdos). They were to die for. I think I had a dreams about those breakfast rolls for days after. BUT, they were kind of cliche.

DSC_0866

So this year, I decided to branch out a little and leave the red velvet for others (my pancakes were technically not red velvet since they don’t have food dye…even though you could easily add it). I decided to go for passionfruit since you want passion for Valentine’s Day? Get it? Get it? Cool. And thanks to this handy cook book I got for Christmas (thanks Matt!), I know that passionfruit and coconut pair well together. Thus, the Coconut Passionfruit Cupcake with Coconut Milk Buttercream was born.

DSC_0876

Coconut Passionfruit Cupcake with Coconut Milk Buttercream Frosting
veganized from SBS.com.au
makes approximately 15

cake ingredients:

  • 1½ cups self-raising flour
  • ½ cup shredded coconut, sweetened or unsweetened, whichever you prefer.
  • ¾ cup coconut milk
  • ¼ cup passionfruit pulp (approximately 3–4 large passionfruit)
  • ¾ cup vegan butter, room temperature
  • ¾ cup sugar
  • 2 Ener-G eggs

Preheat the oven to 180°C (350°F). Whisk together the flour and coconut in bowl, set aside. Combine the coconut milk and passionfruit pulp in a small jug and set aside. Whisk together the vegan eggs and set aside.

Cream butter for 1–2 minutes until light and fluffy. Add the caster sugar a third at a time and beat for 1–2 minutes after each addition.

Add 1/2 the egg mixture and beat for 1 minute. Add the rest and beat for 1 minute.

Add ⅓ of the flour and coconut and beat on low until just combined. Add half of the coconut milk and passionfruit mixture and beat until combined. Repeat this again and then finish with the final third of the flour and coconut. Do not over beat the mixture or it will become tough.

Line cupcake pans with papers and fill liners 3/4 full. Bake for 15–20 minutes or until skewer comes out clean when tested. Allow cool on a cake cooler.

 Coconut Milk Buttercream Frosting*:
adapted from Dairyfreecooking.about.com
  • 1/2 cup dairy-free soy margarine, room temperature
  • 4 c. powdered sugar
  • 1/2 can coconut milk
  • 1/2 t. vanilla extract
  • food coloring (optional)
Beat the butter until fluffy, about 1 minute. Add half of the powdered sugar and beat for another 1-2 minutes until well mixed. Add the coconut milk and vanilla extract. Beat for another 1-2 minutes. Add the remaining powdered sugar and beat for 1 minute or until well mixed and fluffy. Add food coloring if you wish.
*One of the batches of cupcakes I made come out super fluffy and moist. It was almost the texture of pound cake and suspect I over mixed something. If that happens with yours, I would recommend saving the buttercream for another recipe and going the coconut whipped cream route. I haven’t been able to find an Aussie brand of coconut milk that will separate which is why I opted for buttercream but most in the US do separate.
To make the chocolate hearts:
vegan chocolate, preferably melting chocolates
Line a cookie sheet with wax paper or parchment paper and set aside. Place some vegan chocolate in a plastic baggy and stick it in the microwave. Heat for 15 seconds. Pull it out and mush the chocolate around. Repeat this process until the chocolate is fully melted. Snip the corner of baggy. Pipe hearts onto your prepared cookie sheet. Put it in the fridge to solidify. Once hard, decorate your cupcakes!
DSC_0878
Hope everyone has a great Valentine’s with their special someone or with friends! I’ll tell you how I spent my Valentine’s Day next week. It was kind of hilarious.

Read Full Post »

DSC_0858

Oh Valentine’s Day. You are here again. For all those couples out there, you put pressure on them to buy awesome things. For all those single people, you just make them feel like crap for being single! It’s a lose, lose situation.

DSC_0856

Fortunately, these pancakes are here for you. If you are looking to gain a few extra points with your significant other, you can double this recipe and serve breakfast in bed. If you are single, then these are perfect to whip up quickly and then eat while snuggled in bed with your favorite book/movie and their leading man. Mr. Darcy? Edward? Noah Calhoun? Aint nothing wrong with that!

DSC_0860

Chocolate Pancakes for One
slightly modified from Chocolate Covered Katie
m
akes 3 largish pancakes

  • 4T all purpose flour
  • 1/2 tsp plus 1/8 tsp baking powder
  • scant 1/8 tsp salt
  • 2T cocoa powder
  • 1/2 tsp vanilla extract
  • 1/3 cup plus 1T nondairy milk
  • 1 tablespoon oil
  • 1-2 T sugar
  • Optional- Red food coloring or beet juice for a red velvet pancake

* I also made this with whole wheat flour and Stevia for a healthier option and though it was edible, I would recommend the above version instead. The whole wheat/stevia version came out kind of rubbery.

Mix dry ingredients. Add wet and mix. Then make your pancakes!

DSC_0864

Speaking of Noah Calhoun, I accidentally discovered that the local cinema near here is playing the Notebook on Valentine’s Night. I quickly recruited a friend and bought those tickets ASAP! So, I’m a mere few hours away from seeing Mr. Ryan Gosling on the large screen. Happy Valentine’s Day to me!!


Read Full Post »

Another year, Another Valentine’s Day. This year, it would be really, really great if Ed Sheeran could swing on over to Australia and be my date. I can make dinner and we can rewatch Game of Thrones in preparation for the upcoming season. Or, you know, I’m open to suggestions.

While I wait for my phone to ring, here’s a recipe round up for Valentine’s Day. It’s just a few recipes I thought would work well for that evening. There will be two new recipes coming Thursday and Friday as well. I just want to rephotograph one but I’ve been feeling icky the past few days.  Don’t worry, Ed. I’ll be perfectly fine by Friday.

Breakfast:

DSC_2109

Red Velvet Nutella Breakfast Rolls

Strawberry Glazed Donuts

“Be Mine” Fruit Smoothie

Dinner:

DSC_2257

Peanutty Noodles

Pumpkin Burgers with a side of Beer Fries

Spicy Black Bean and Quinoa Soup, for those facing more snow this week

Pomegranate Margaritas

Dessert:

DSC_2107

Peanut Butter Chocolate Crispy Treats

Dark Chocolate Truffles

The Perfect Chocolate Cupcakes

Strawberry Macaroons

Red Velvet Beet Cupcakes

Dessert for One: For those staying in and flying solo, these pair great with wine, popcorn and a chick flick

cccd1

Cookie Dough Truffles

single serving funfetti cupcake

Read Full Post »

DSC_0468

I am SO happy it is Friday! It’s week two of the new school year and waking up early again is hitting me hard. I’ve been in grumpy zombie mode all week. I’ve wanted nothing but a serious nap. I went to bed one night at 9:30 and I still can’t shake it! This weekend I will be lounging in bed late every morning and soaking up the laziness! I think I may also work on some Valentine’s Recipes and check out Wolf of Wall Street. Has anyone seen it? Thoughts?

ok, Friday Favorites:

New Music: New Taking Back Sunday (duh!):

Favorite new exfoliant: Lush‘s Let the Good Times Roll. This was one of my Sydney Lush purchases and I can’t get enough of it. It smells amazing, like caramel popcorn, and leaves my skin so soft. The lady at Lush told me to use it every other day or every three days. It nearly kills me not to use it every night. Ob-sessed!  I think it’s seasonal, though :/

Picture from Lush.com

Picture from Lush.com

Favorite New Make-up: Garnier’s BB cream. I’m not going to get into a big make-up rant because I sound like a commercial. I will say getting up early, working with kids and living in a sunny, hot climate has resulted in me almost never wearing makeup during the day. When I do, I wanted something much lighter and gentler on my skin. This meets all those requirements. Plus, my skin actually looks better after I wear it. True story. Downside- it’s not all natural. Leave a comment below if you have a good all natural foundation you use.

DSC_0851

Favorite Beverage: Boost’s King William Smoothy. It’s just cold, liquid chocolate. Perfect thing to kick my chocolate cravings. To make vegan, I switched the milk for soy milk and the yogurt for sorbet. In this case, I’m pretending all chocolate is vegan. I’m the worst vegan ever.

DSC_0851

Favorite Treat: Popsicles. When I can’t afford the above smoothie, I reach for these. It’s been hot here and I’ve been on a cold treat kick. I made these fudgesicles a few weeks ago and had to force myself to keep them to a snack. A hot meal for lunch and dinner? Nah, bring on the frozen chocolate!

DSC_0475

Mocha Fudgesicles
slightly altered from Take A Mega Bite

Ingredients:

  • 1 (14 oz) can full fat coconut milk
  • 3/4 cup vegan chocolate chips or vegan chocolate
  • 1 T instant espresso or 2 T instant coffee
  • pinch salt
  • 1/2 t vanilla
  • 1/2 T- 1 T sugar, depending on the chocolate used (my chocolate chips were sweet enough so I used 1/2T)

Place the coconut milk, chocolate, and espresso in a saucepan and heat until chocolate is mostly melted. Set aside for 5 minutes for the coffee to steep. Stir in salt, vanilla, and sugar. Taste and add more sugar to taste. Pour into popsicle mold and freeze for a few hours or over night.

If you do not have popsicle molds (like myself), pour into small paper or plastic cups, cover with tin foil and poke your popsicle stick through the tin foil. Freeze for a few hours or over night.

When ready to eat, run the mold under warm water. If you pull a stick out sans pop just run it under water and place back in the popsicle to freeze.

DSC_0478

These were so creamy and delicious. I definitely hoarded them from the children because I didn’t want to share. I mean… because they don’t need the caffeine. yeah…we’ll go with that.

Now, what are your weekend plans?

Read Full Post »

« Newer Posts - Older Posts »